How to make 360-degree videos with the GoPro Fusion
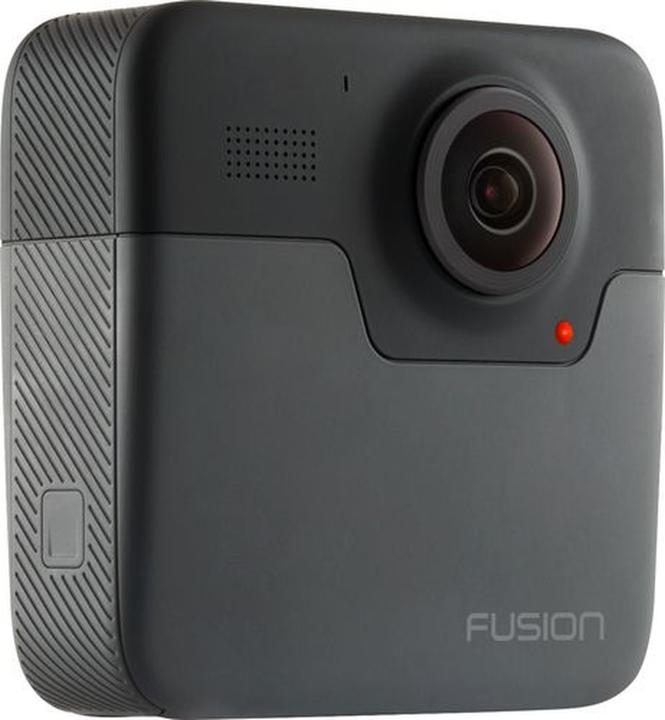
The GoPro Fusion can record 360-degree videos. I have tried it out and share my experiences with you for your own VR videos. Plus a few tips and tricks.
With a 360-degree camera, you always have everything in your field of vision. If you go paragliding and have the camera attached to your helmet and in front of your face, your face is recorded in the same way as your paraglider or your view of the world in miniature format. If you film your dog doing one of his hard-learned tricks, you and all the other people around you are also in the picture. You can play with this and tell stories in a completely new way. And depending on your approach in post-production, you can also use just a section of the 360-degree image. You don't even show your audience what's around it.
The above basically applies to all 360-degree cameras. I will now show the procedure using the GoPro Fusion as an example.
What you need to know before you start
Anyone who has ever held a GoPro in their hands will quickly find their way around the Fusion. What is unusual, however, is that the camera is equipped with two memory card slots. Each slot is assigned to a lens. This means that in addition to the GoPro, another 50 to 100 francs are required for fast memory cards.
The possibilities - 360-degree & overcapture
The GoPro can record 5.2K videos (4992x2496 pixels). Some VR cameras are capable of 5.7K, while most are at least capable of 4K resolution. A high resolution is a great advantage, especially for 360-degree videos. This is because more is recorded than you see in the section. If you upload the video to YouTube or Vimeo later, you can use your mouse or finger to look in all directions in the video. Or you can buy VR glasses for your smartphone and move your head in the appropriate direction.
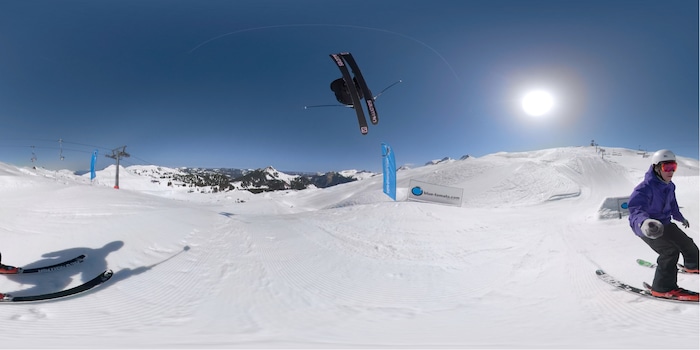
On one of the last ski days of the season, I take the camera up to the piste and into the snow park. There I meet the super talented Michi Nützel, who is only 19 years old, and ask if he would like to show some of his tricks on camera.
With the so-called overcapture feature of GoPro (and actually any other 360-degree camera), you can also produce classic recordings in 16:9 format from the 360-degree recordings. Afterwards, you decide on a section of your all-round image. You will never miss the action again, as it is recorded all round and you decide later what should be shown effectively. The fact that it was originally a 360-degree video is then no longer visible.
So you don't get sick straight away
Your senses are put under a lot of strain with 360-degree videos. During my tests, it went like this: create a video, upload it to YouTube, put your smartphone in Google Cardboard (a cheap pair of cardboard VR glasses for smartphones) and off you go. After one minute of video, I and other testers have had enough. There are a few things you should keep in mind so that you don't get sick straight away.
The stabilisation of the Fusion - thanks to sensors, the GoPro can stabilise the image afterwards via software and thus create gimbal-like recordings - works very well. Nevertheless, it is important that you make smooth, even movements. Of course, as in the case of the freeskier, this doesn't always work, but try to pay attention to it. In addition to stable shots, it is important to work with long takes for a 360-degree shoot. A sequence can therefore be left for 10 to 20 seconds or even longer. This allows the viewer to find their way around and have time to look around.
So that the stick is not in the picture
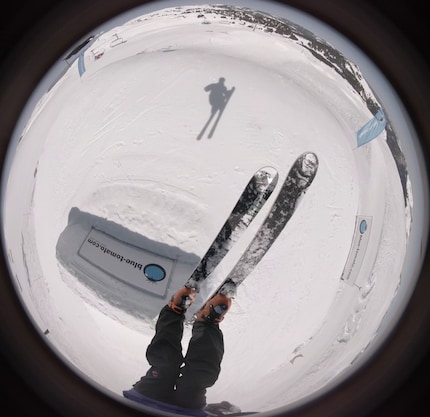
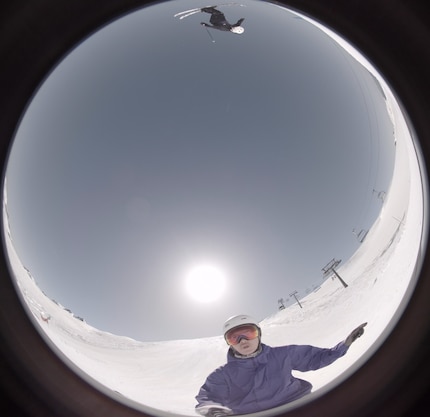
Stitching - i.e. combining the two videos from the lenses so that no lines from the cameras are visible - is done automatically by the app or the GoPro software on the PC. This works relatively well. And if you mount the camera vertically on the stick supplied, this is automatically cancelled out. It seems as if the camera is floating. If you mount the GoPro at a 90-degree angle, you have the stick in the picture. Unattractive.
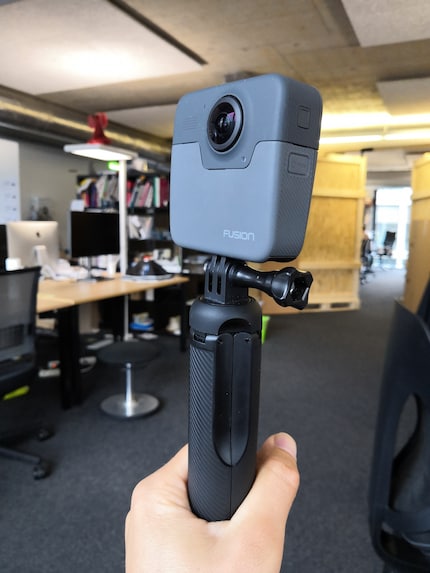
With a smartphone and the corresponding app, it is usually possible to see what is being filmed or to view shots after filming for checking purposes. Sharing in the relevant networks also works, of course. Unfortunately, only a few smartphones are supported. It's best to find out in advance here whether yours is one of them
.
How to get your clips online
There are various ways to process and publish your recordings. The easy way with fewer options is to work directly with the smartphone app. The more complex way is via PC, GoPro Studio app and Premiere or After Effects. This allows you to correct colours, add music and merge shots in the desired order. I'll show you both ways.
The easy way via the GoPro app
The Fusion footage can be viewed on your smartphone and shared accordingly. One cool feature is the app's recording mode. There you can select a clip and set a corresponding angle directly while the clip is playing. Digital Marketing Manager Sandro Hostettler has tried this out. He explains it here and also shows how you can publish the clips directly on Instagram, for example:
The professional way via the computer
First import both SD cards - front and back - onto your computer and make sure to transfer all the files on the SD card. Also adhere to the following folder structure so that GoPro Fusion Studio can find its way around in the next step:
MyVideos
   ├── Back
   └── Front
GoPro Fusion Studio is the software provided by GoPro to export simple unedited clips for YouTube, Facebook and all other popular video portals or to prepare the clips for Premiere or After Effects.
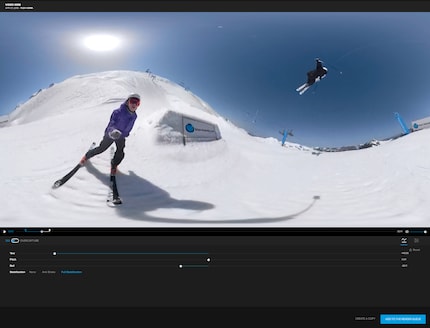
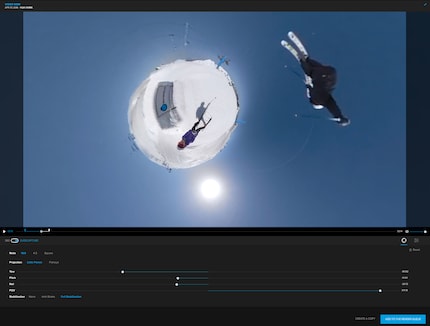
Once you have decided on a Vimeo, Facebook or YouTube clip, the editing is now complete and you can upload your videos to the platform. However, if you want more than just a single clip without cuts, you will need to continue with Premiere Pro or After Effects.
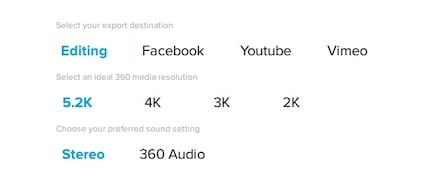
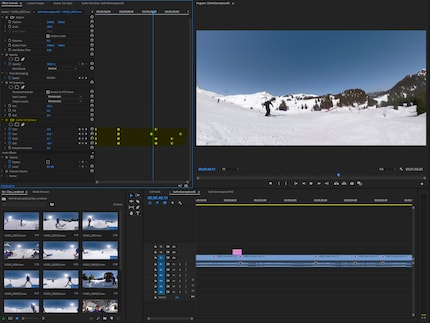
With Premiere Pro or After Effects and the "Editing" render selection in GoPro Studio, you can now customise the video exactly to your needs - add music, create cuts and decide whether it should be a 360-degree video or whether you prefer an overcapture video. The following plugins provided by GoPro are required for this.
- With GoPro VR Horizon, you can adjust angled horizons or determine what the viewer wants to see when looking straight ahead. Useful if you don't want the viewer to get confused and want the skier to continue the action in the same place after a cut. In my first attempts of the ski clip, the viewer guidance and experience was still rather weak.
- With GoPro VR Layers, you can insert a text layer or images that are positioned in space. Useful if you want to show a logo at the end of the video, for example.
- With GoPro VR Reframe, you have the option of creating a clip in 16:9 format from a 360-degree video (overcapture) without the viewer having to interact. The image is zoomed and you decide which section should be shown. This requires working with so-called keyframes. This allows the image to be moved from one section to another over a period of time. For this plugin to work, you must make the following changes to your settings:
Under File/Project Setting/General:
Mercury Playback Engine GPU Acceleration(CUDA) must be activated
I lost a lot of time getting the plugin to work until I found out that CUDA must be enabled.
Once you are satisfied with your video, it should of course be exported for further distribution. There are also points to note here. Export the clip in the highest possible resolution.
By default, most people use the h.264 codec (a type of video compression). h.264 can only handle 4k files at most. Since we work with 5.2k material, the new and more efficient h.265 codec comes into play. h.265 is the successor and is many times smaller while maintaining the same quality. This will become increasingly important in the future, especially for online streaming. The codec can also handle very high-resolution files up to 8k. In the case of a 360-degree video, we therefore select the h.265 codec with the same resolution (4992 x 2496 pixels) as the source file. If we are exporting an overcapture file, I recommend exporting a FullHD file.
And don't forget to tick the "Video is VR" box for 360-degree videos. If this is set, YouTube automatically recognises the video as a VR video. If it is overcapture footage, leave it unchecked.

Distribution
Once the video has been exported, it is uploaded. All major platforms (Facebook, Vimeo & YouTube) support 360-degree videos. VR content cannot (yet) be uploaded to Instagram. So you have to limit yourself to the overcapture feature.
Best practice examples
In addition to images and music, an additional layer is often added to the video to make it easier for the user to find their way around. With the help of a voice from the background, the viewer can be guided so that they do not miss important things in the 360-degree room. This was used, for example, in this film about the new Boeing 777 from Swiss or a report from the New York Times.
This film about the Boeing 777 won two Dolphins in Cannes: one silver in the "Corporate Online Media" category and a coveted black Dolphin in the "Production Arts & Crafts - Best Use of 360-Degree" category.
In this war reportage, the New York Times shows how 360-degree content can be used.
And now you
The possibilities of 360-degree videos and fusion are huge. Overall, the camera makes a great impression. The very well-functioning stabilisation and the overcapture feature convinced me. I hope I've been able to help you with this guide and I'm looking forward to seeing your shots. I look forward to links to your videos in the comments.
As a Multimedia Producer, preparing multimedia content and knowing about cutting-edge technology is my business. My main focus at digitec is producing videos. I can’t wait to try out new products such as cameras, drones or smartphones as soon as they’re launched. This is where being at the source comes in rather handy. When I’m not working, I’m probably skiing, biking or hiking – the mountains are my place to be.
Practical solutions for everyday problems with technology, household hacks and much more.
Show all