
Photo tip: If the back and front are not right, try focus stacking
With focus stacking, you combine several shots with different focal points to create a consistently sharp image. My motto: try it out and be amazed at how it goes wrong. Sometimes it even works.
You don't always get everything in the picture sharp that should be sharp. This is a particular problem with macros. The depth of field can be so shallow that you often barely recognise anything in the picture.
There is a simple way to achieve a greater depth of field: close the aperture. For example, if I take a picture with aperture 22 instead of 8, a larger distance range will be in focus. However, this is often not enough.

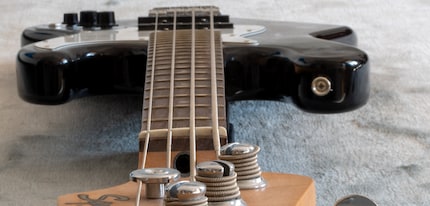
The enlargement also reveals another problem that occurs when the aperture is closed: the sharpness decreases. The effect is called diffraction blur.
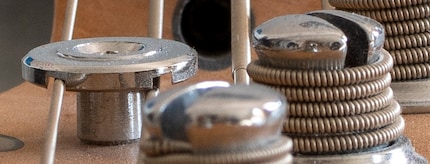
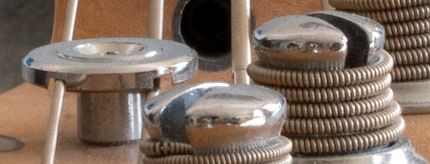
Where closing the aperture is not enough, focus stacking is used. This is much more time-consuming, but more effective. You take several photos that differ only in their focus. Each shot is in focus at a different point. The photos are then combined in such a way that the sharpest parts of the image can be seen everywhere. The result is a consistently sharp photo.
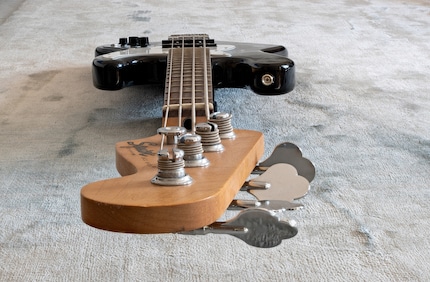
The ever-increasing resolutions of today's cameras mean that even the smallest blurs are visible. Of course, you can shrug your shoulders and take comfort in the fact that you wouldn't have noticed it on an old camera. But if we already have these high resolutions, we also want to utilise them. Focus stacking can therefore also be useful for landscape shots - in other words, for subjects that are not close up.
Automate shots if possible
Theoretically, you can create a focus bracket by simply turning the focus ring a little after each shot until you have covered the entire area of the subject. In practice, however, this is tedious. With many lenses, the ring cannot be adjusted very finely. If your steps between shots are too large, you will not cover all the desired parts of the image with a one hundred per cent sharp shot. There is also a high risk that you will move the tripod if you turn the lens between shots and push the camera around to check.
If possible, you should record the focus bracket with the help of control software. Some cameras already have such an aid built in. It changes the focus a little with each shot in precise, predefined steps.
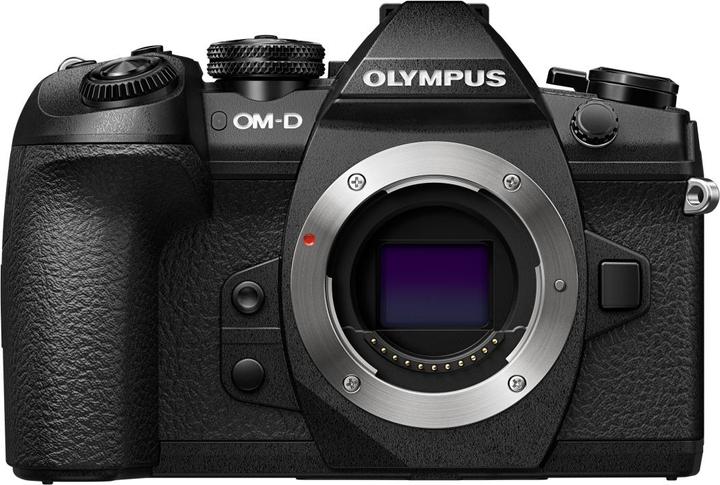
My camera cannot take a focus bracket on its own. But there is a free tool for Windows that can: digiCamControl. The camera is connected to the PC via USB cable or Wi-Fi, whereupon it can be controlled remotely. The software works with most cameras from Canon, Nikon and Sony, as a look at the list of compatible devices shows. With Fujifilm, Olympus and Panasonic, a focus bracketing function is often already built in. The Olympus camera with the unpronounceable name shown below can create a ready-to-use image on request.

If you still have to take the photos by hand, be sure to use a remote shutter release or at least the self-timer to avoid camera shake. With an SLR camera, also activate the mirror lock-up function to prevent the mirror impact from causing blurring.
Shooting sequence
To ensure that nothing changes during the shoot except the focus, you will of course need a tripod or an absolutely stable base. The subject must also not move a millimetre. Set the aperture, shutter speed and ISO manually. And if you are shooting in JPEG, also set the white balance.
The recommended aperture value is usually something in the middle range, typically f/8. With a fully open aperture, the lens is not as sharp as it is with a closed aperture, and you will also have to take an extremely large number of photos.
If you are using control software such as digiCamControl, autofocus must be activated. This is the only way the software can control the focus remotely.
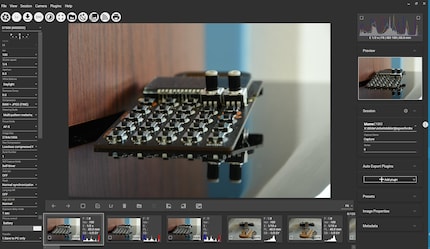
First, you should specify the storage location for the images. To do this, select "Add new session" or "Edit current session" from the "Session" menu. The interface can also be switched to German under "File" > "Settings" > "General".
If the camera is connected to the PC, the round "Lv" button in the main window lights up in white. Click on it to open the preview window. Here you can make the usual camera settings such as aperture, shutter speed, ISO etc.
You define the closest and furthest focus point for a focus bracket. You can determine the closest point using autofocus. If the focussing works, you know straight away that you are not too close. In the macro range, it is easy to be closer than the lens can focus at all. You can set the far point by gradually adjusting the focus using the image preview.
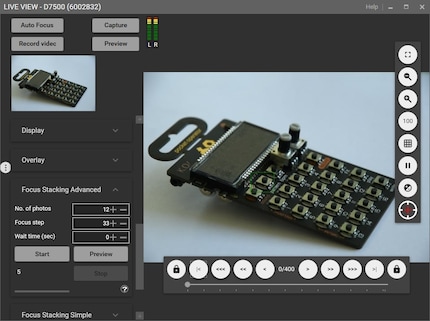
The two points are locked by the buttons with the lock. Then set the number of images under "Focus Stacking Advanced". The software suggests a very high number, I only took about 20 shots each time. The focus step is automatically calculated from the number of shots. You also start the shots under "Focus Stacking Advanced".
With Live View switched on all the time and lots of shots, the camera battery runs out pretty quickly. Always start the session with a full battery or, if possible, connect the camera to the mains.
Composing the individual photos
From the free CombineZP to the professional Helicon Focus for 200 dollars, there are various applications for combining individual photos. It doesn't have to be specialised software. Photoshop or Affinity Photo are also capable of focus stacking.
Photoshop has two advantages for me. Firstly, I already have the software on my computer. Secondly, I can work with RAW very easily. In Lightroom, I make corrections such as cropping the image or adjusting the brightness on just one photo and apply the changes to the whole series. Then I select all the images and then from the "Photo" menu or by right-clicking "Edit in" > "Open as layers in Photoshop".
Now Photoshop opens and the images end up as layers in a single file. All layers must be selected, followed by the menu commands "Edit" > "Automatically align layers" and "Edit" > "Automatically blend layers". Here you must use the "Stack images" option.
I have also already installed Affinity Photo. It can open RAW files, but the settings made in Lightroom are not applied. I therefore export everything as JPEG first. This makes it much quicker to combine the images - not just in Affinity Photo, but in every application.
The process is extremely simple in Affinity Photo: "File" > "New focus combination", select files, press OK. And that's it.
Helicon Focus can be tested free of charge for 30 days. As it is considered the best software for focus stacking, I also install it. And also Helicon Remote, a remote control software for focus stacking. It works in a similar way to digiCamControl and supports Canon and Nikon cameras. I think Helicon Remote is even better and, above all, more reliable than digiCamControl.
In Helicon Focus, you can select different rendering methods and set parameters such as smoothing or radius. The software comes with a very good help page, so I will refrain from further explanations at this point.
How to get the best results
I have definitely noticed differences between the applications. Helicon generally delivers the best results. In my experience, difficult cases usually come out best with method C. But that brings me to the crucial point: it depends more on the image than the application whether a usable result is achieved.
This raises the question of what a "difficult case" is. And how I have to record something in order to obtain an error-free result.
Problems mainly occur at the transitions between the subject and the background. The errors that occur are somewhat reminiscent of what the artificial bokeh effect produces on smartphones.
Choose a background that differs from the subject in terms of colour and brightness. However, it is much more important that the background has as few structures as possible. Not so easy: even white paper has a structure that becomes visible in a close-up. Completely smooth surfaces reflect, which is also bad. It is safest if the background is so far away from the subject that it will never be in focus despite focus stacking. For example, a macro in front of a wall three metres away. But of course this doesn't always work.
Here it works because the microphone can be placed anywhere in the room. I stacked it with two different lighting situations and then put the two photos together again.



It is an advantage if the photographed object has simple outlines. Not only does the software make fewer errors at the edges, the object is also much easier to crop.

Conclusion: A lot of patience required despite automation
Focus stacking takes time and patience. This is despite the fact that you can automate both the series of shots and the stitching process. The result is not always useful, even if the procedure was correct. For objects with clear outlines against a distant background, your chances of getting a great shot are good. In all other cases: try your luck, but expect frustration.
My interest in IT and writing landed me in tech journalism early on (2000). I want to know how we can use technology without being used. Outside of the office, I’m a keen musician who makes up for lacking talent with excessive enthusiasm.
Practical solutions for everyday problems with technology, household hacks and much more.
Show all
