

Testing Clementoni's Robomaker: a jack of all trades?
Clementoni wants to unite robotics and programming. Their Robomaker seeks to introduce these hobbies in a playful yet instructive manner. Will this combo succeed in making the robot a praise-worthy gadget?
The Robomaker is designed to teach young people programming while simultaneously introducing them to robotics and electrical engineering. In the most amusing way possible, of course. Clementoni wants to appeal to beginners and proficient programmers alike. Both the building instructions and the programming lessons start from a basic level. Robotics and coding experts may jump directly onto the largest of the five robots and write more complex programs. At all levels, users get to know code blocks, receive background information on farad, ohm or germanium and assemble a functioning robot from LEGO-like parts. Sounds like the perfect all-in-one gadget. Time to test what Clementoni's Robomaker is really capable of.

The unboxing: a big box with lots to play with
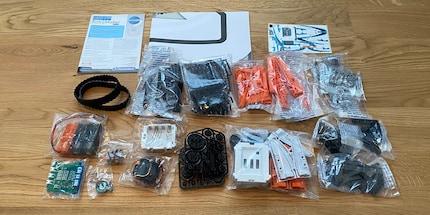
The packaging is large and heavy. Once I unwrap it, I see why. It contains a dozen small plastic bags with components that remind me a lot of LEGO Technics. They're not officially compatible, but I tried anyway and found that the bricks fit each other snugly. I also found many electrical parts: two fast and one slow motor, two infrared sensors, a touch sensor, a speaker, the mainboard and a battery compartment. Batteries? Yes, as the Robomaker unfortunately doesn't have a rechargeable battery. Some components later become obstacles and cargo for the robot. Which is why there are some patterns stamped inside the box. Finally, there's an adhesive sheet, an almost 50-page manual and a paper card.
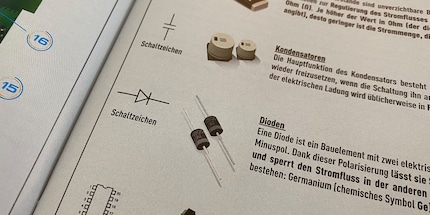
Like most beginners, I decided to begin with the instructions. It's divided into three sections: theory, product information and tasks. The first pages give you an insight into robotics, further details about robots, electrical elements, the coding and how everything is connected. The whole thing is surprisingly entertaining and interestingly written. This is followed by a second block with information about the product, the individual components and the block programming, which is strongly based on the «Scratch» programming language. The last few pages contain five robot models with their functions and ten matching tasks that must be simulated, programmed and checked after assembly.
Construction: time to glue, plug and wire
Before building the robot, you'll have to glue together some larger parts with adhesives found on the enclosed sheet. It's no big deal, but it's still annoying. Why not print out the parts right away? I also don't really enjoy fiddling with tiny parts, trying to remove them from the plastic sheet. Although fewer building blocks are lost, the waste is all the greater. Moreover, ugly plastic bits remain. Finally I can open the app, select the first robot, the «X1: Explorer», and wait until the manual has loaded. This does take a while. In retrospect, I think I know why: each component is rendered in 3D, can be enlarged and digitally inserted where it belongs via a short animated sequence. While this is helpful and a cool feature, it does increase loading times.
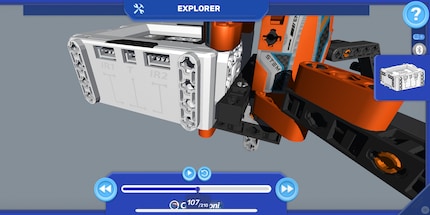
If I have to attach four equal parts one after the other, these four steps will be displayed in the correct sequence. It'd be useful if there was a corresponding component number indicating how often you have to use this element. That's how LEGO does it. This way I remove one part and put down the sheet. Only to pick it up again, remove an identical part and put it down again. When closing the app to take a photo, I sometimes get kicked out of the app. Then I have to reload the instructions and jump back to the step where I stopped. And depending on the robot model, there are no hints to whether I should insert the batteries into the main module right at the start. Any time after that, the module isn't accessible anymore without partially disassembling the robot. But that's already all the complaints I have. I made rapid progress, always placing everything in the right place without mixing up parts. The digital instructions are ecological, elaborately made and extremely practical.
Learning mode: extremely detailed and instructive
After a little over two hours, the first robot was done. The largest one took me almost three and a half hours. By the way: after I built the first robot, I had to take it apart completely to build the «X5: Droid». However, it was relatively easy as the components can be removed with little effort. Aside from build mode, which is used for assembly, the app offers three more modes: learning mode, creative mode and control mode. I switched from building to learning mode to find out about the simplest model and to introduce myself to Scratch. All blocks I needed for the first robot are explained in detail. The instructions list what they do, how they can be combined and expanded. On my path to the most sophisticated model, I worked with numerous blocks and different functions which are constantly being expanded. From movement in all directions, playing sounds, recognising obstacles and pincer movements to picking up and unloading goods – anything the robot can do is included.
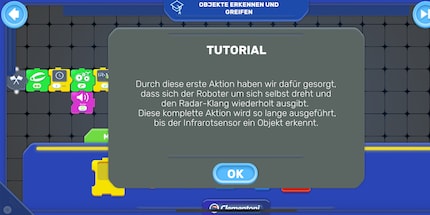
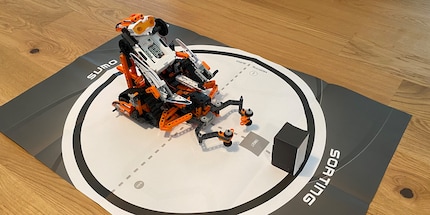
I followed the instructions and created the line of code I needed for the first task. As soon as I saw a symbol or code block I didn't quite understand, an info box popped up and told me what I was dealing with. The app almost automatically anticipates that you might need some help – kinda eerie. Even in coding mode, you can zoom out to see the entire code or enhance to check out the details of a particular block. The app also runs smoothly and without crashes in this mode. After having coded my first line, I was told to switch on the robot. I pressed the power button. The robot beeped and seconds later the Bluetooth indicator in the app lit up green. That was quick and easy. I pressed the play button. The robot moved and the app visually highlighted the block that the Robomaker was currently unwinding. For more advanced tasks, there are cardboard boxes and a paper card that must be placed on the floor. Then the robot is placed on it to interact with it.
Creative mode: unlimited possibilities
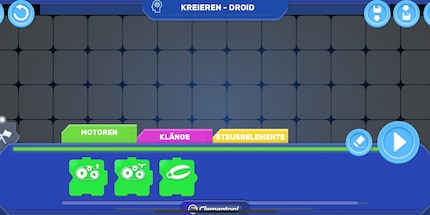
In creative mode you can apply all you've learned and create your own programmed sequences. Right from the start, all possible code blocks are at your disposal. However, you should still first solve the tasks set by Clementoni in order to familiarise yourself with the blocks and their functions before you start working on them yourself. It's fun to string the blocks together and see if the robot does what you told it to do. If you tried something but made mistakes while coding, the Robomaker serves you an answer on a silver platter. The two quick motors ensure that the robot's treads move. The slower motor is responsible for the gripper. The infrared sensors detect lines on the floor or obstacles in front of the Robomaker. Finally, the touch sensor registers contact – such as when I programmed the robot with a little too much creativity and forward movement. This led it directly into a wall. Knowing which part triggers what is helpful when building your own robot and programming in creative mode.
Control mode: Robomaker can also double as an RC car
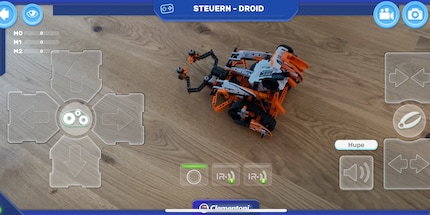
In this mode, you take control of your robot without having to write any programs first. You can even activate the camera on your smartphone or tablet and watch the robot through the app while controlling it. Photo and video recordings are also possible. A useful feature: you don't have to leave the app to take a picture of Robomaker in action. In control mode, you move the robot in all directions, see when which motors and sensors are active, play sounds via the integrated speaker or open and close the gripper arm. This mode also works flawlessly. I never lost the connection to Robomaker and it always did exactly what I told it to do. I've rarely seen such a flawless app in combination with an uninterrupted connection to the robot.
Conclusion: wholesome fun for little money
Clementoni's Robomaker leaves nothing to be desired. No matter whether you're a novice programmer or a coding expert: I never got bored with this robot. The fun started with the assembly, where I could choose between five models – depending on how many parts and sensors I wanted to install and how much I was willing to code. The animated and extremely detailed digital building instructions make mistakes impossible. The material looks expensive, doesn't fall apart even with intensive use and can be easily dismantled again. Everything is included – instructions, motors, sensors, cardboard elements and game materials. Its only flaws are the missing battery, the glue and the plastic waste. To cut a long story short: you get an incredible amount of robots, coding and fun for an amazingly cheap price. I can wholeheartedly recommend the Robomaker. Its my favourite item in our robotics range.
I don't know which robot I'm gonna do next. Do you know a worthy opponent to the Robomaker? If you have a hunch, write it down for me in the comments. If you want to be up-to-date and never miss any robotics or gadget highlights, click on the «Follow» button next to my author profile.
When I'm not stuffing my face with sweets, you'll catch me running around in the gym hall. I’m a passionate floorball player and coach. On rainy days, I tinker with my homebuilt PCs, robots or other gadgets. Music is always my trusted companion. I also enjoy tackling hilly terrain on my road bike and criss-crossing the country on my cross-country skis.


