
Background information
Why I spent 800 francs on a keyboard – and would do it again
by Kevin Hofer

If you want a truly unique keyboard, build it yourself. It's simpler than it sounds, but there are also a few pitfalls, as my experience shows.
I admit that I got annoyed more than once during assembly and final fitting. But now that I have my finished keyboard under my fingers, all is forgiven and forgotten.
Last time I showed you everything you needed to make your own keyboard. I've sourced all the parts and the assembly can begin.
You may have already guessed it: the photos I used in the last article show my own components. I decided on an aluminium case. I like the feel of a heavy keyboard that doesn't slip, and aluminium is very pleasant to the touch. To match the look, I opted for a top plate made of the same material. Both are silver because I'm sick of black keyboards.
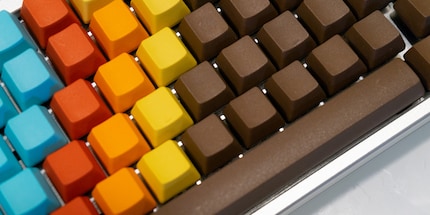
You can choose your keyboard size relatively freely. I chose a 75%, i.e. a keyboard 25% smaller than the usual format with a numeric keypad. I'm not giving up on the numeric keypad, which will simply be integrated into the 75%. I like the numeric keypad and I use spreadsheets a lot. So that's an important point for me. So I have a keyboard that's even smaller than a TKL but still equipped with a numeric keypad. Its smaller size means I have to do without the umlaut keys. That doesn't matter, though. For word processing, I work mainly in Google Docs. All I have to do is set up the automatic transformation of ae, oe and ue into ä, ö and ü.
For switches, I'm banking on a tried and tested brand and use Cherry MX Blue. I like click switches. For the keycaps, I'm experimenting with printing them myself in wood filament. We'll see if it works.
Everything is ready: PCB, switches, case, top plate, keycaps and soldering iron. I start straight away by assembling the stabilisers.
If you proceed carefully, following the correct order of assembly, and buy good quality components, assembly is very straightforward. Soldering shouldn't scare you either. My technique isn't great, but it worked without a hitch. Unfortunately, the keycaps I made were not a success. I'm still having a bit of trouble accepting that, but I'm liking the ones I've bought more and more. Regarding the cap on the Maj key that didn't fit, I contacted the manufacturer directly and asked if they could make me a custom one, which they did.
After soldering and screwing everything together, I still need to flash the firmware. This will allow me to customise my keyboard even further. True, the keyboard works as it is, but only with the standard Swiss configuration. In other words, it's unusable because I'm missing some of the keys that are missing on the full-size keyboard. I start by transposing my configuration into Keyboard Layout Editor. In the layout editor, I can determine the size and position of the keys. This is important because the next step is to create the firmware that I will transfer to the keyboard controller.
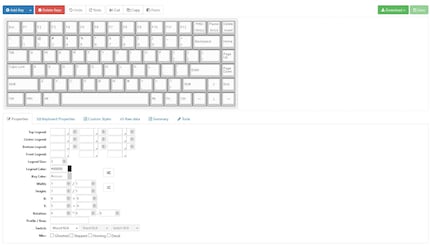
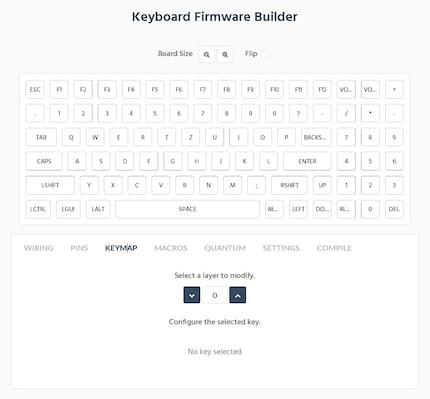
Once the configuration is complete, I import it into Keyboard Firmware Builder.. Using the configuration editor, the Builder knows exactly how my keyboard is laid out and I can assign functions to the keys. Before proceeding with this step, I still need to check the wiring and assign the pins.
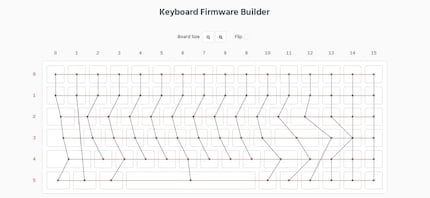
When it comes to the wiring, it's worth making sure that the electrical circuit is correctly in place. It is certainly made by Firmware Builder, but in my case not everything was entirely right. To be able to enter the wiring correctly in the firmware, I use the model of my PCB and make the necessary adaptations. When I first tried to create a working firmware, I did the wiring incorrectly and some keys didn't work. So you have to be careful. The ideal is to be guided by the models you'll find on kbfirmware or qmkeyboard.
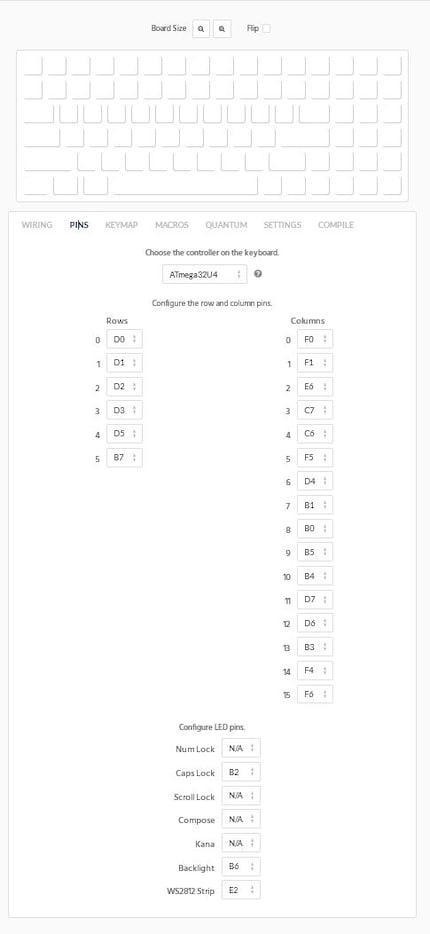
After wiring, the pins still need to be correctly allocated. The rows and columns are linked to the PCB controller. If the allocation is incorrect, some keys, rows or columns may not function correctly. Here again, it is advisable to follow the models. Despite my best efforts, I haven't managed to find another way of obtaining these indications. Even though my configuration is a little different, the procedure worked perfectly.
Now that the PCB is correctly wired and the pins allocated, I can finally customise my keyboard. I can configure up to 16 layers with my PCB. This means that each key can have up to 16 functions. I don't need that many, that's for sure. First of all, I start by configuring Layer 0, which doesn't require any key combinations, and Layer 1. Thanks to the layers, I can configure special characters and missing symbols for which there is no room because of the size of my keyboard. I also create a few macros. It's really fun to programme your own keyboard. I save my settings so I can change them quickly if I need to and I create a .hex file that I can flash on the keyboard.
Before I can do this, I still need to install the latest driver for my keyboard. I do this with the Zadig version 2.4 software. That way, my computer recognises my keyboard correctly and I can get on with flashing.
To do this, I use the QMK Toolbox software. If I may offer a bit of advice before I start: don't do as I did and don't mount your PCB in the case yet. To flash the firmware, you first need to reset your keyboard. As I didn't receive a manual with my PCB, I didn't know what key combination to use. Fortunately, there's a reset button on the underside of my PCB. But this is only accessible if it hasn't been fitted yet. So I had to dismantle the keyboard to flash it. After that, everything worked perfectly. I installed the QMK Toolbox program, opened my .hex file, connected the keyboard and pressed the reset button. You have to press the button first for the software to recognise the keyboard. Then all I have to do is press "Flash" and in a few seconds my keyboard, or rather the controller, is flashed with the new information.
Finally, I still need to select English (US) as the input language. This is essential so that I can use my keyboard with the settings flashed just now. The Swiss configuration doesn't allow it.
I'm sure this project won't be the last of its kind. One day I want to create my own PCB to enjoy an even more personalised typing experience. For now, I'm looking forward to making full use of my first self-built keyboard.
One last thing: our Category Management has heard your requests in response to my last article and has pledged that we will soon be able to offer you keyboard components in the online shop.
From big data to big brother, Cyborgs to Sci-Fi. All aspects of technology and society fascinate me.
Interesting facts about products, behind-the-scenes looks at manufacturers and deep-dives on interesting people.
Show all