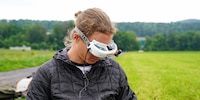

I'm learning to fly - with the DJI Mavic Air 2
I confess: I can't fly drones. Although I do write articles about drones. I am now changing this untenable situation. My first experience is with the DJI Mavic Air 2.
As a photo editor, I'm also responsible for drones. Logically, they are part of the photo and video equipment section in our shop. Unfortunately, I have hardly any practical experience with them. Years ago, I briefly tried out the Parrot AR.Drone 2.0 - that was it. Up to now, I've cheated my way through by leaving the testing to others. Now I finally want to try it myself.
I'm trying out the new DJI Mavic Air 2. I can't provide a test from the perspective of an experienced pilot - but I can give you an experience report on how suitable the drone is for beginners.

Unpacking and preparing
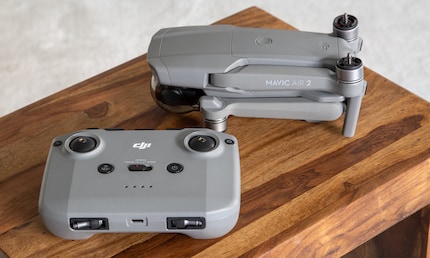
The drone is surprisingly small, the remote control surprisingly large. Almost as big as the drone when folded. The remote control is used together with the smartphone. Connection cables for micro USB, USB-C and Apple Lightning are included in the package.
I download the "DJI Fly" app, accept the unspeakably long terms of use and privacy policy (unread, of course) and register with my email, as otherwise the flight altitude and distance would be limited. This is followed by three short introductory videos in which the instructions have to be read. It all happens very quickly and the videos cannot be interrupted.
The remote control and the drone battery can be charged at the same time using the charger. This is quite quick, I estimate a maximum of two hours. The smartphone should also be charged before take-off.
To get the drone ready to fly, all I have to do is unfold the four arms and mount the propellers. This is done with a simple twist-and-snap mechanism. There are two propeller types, because two propellers rotate clockwise and two anti-clockwise. A spare propeller of each type is included in the scope of delivery.
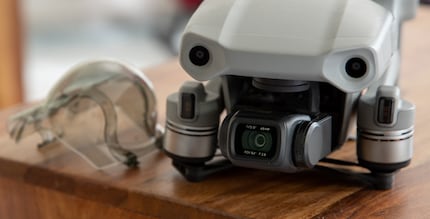
The camera and gimbal are protected by a plastic cover, which is removed during operation and replaced for transport.
Normally, I familiarise myself with new devices by trying them out. Here, however, I want to know as much as possible in advance. Firstly, so that I don't immediately turn the drone into scrap metal and secondly, because I live in a no-fly zone. This means that I have to drive several kilometres before I can launch the thing.
I switch on the drone at home. I unscrew the propellers again as a precaution - I have no idea what will happen and don't want to leave the drone flying around the living room.
The app immediately downloads a firmware update and installs it on the drone. It's all wireless, but it takes time. In the meantime, the drone trumpets and the remote control beeps.
So now, finally. At least I can try out some of the controls at home without starting the drone. One button switches between photo and video mode, another takes a picture and a dial swivels the camera up or down. I'm surprised I can't turn it to the left and right.
My first time
The next day, I want to try out the drone, but the weather isn't right. You shouldn't fly in the rain. The drone is not waterproof, would spray itself through the propellers and would probably crash.
One day later, the sun is shining. I cycle along a dirt track near the Greifensee lake. The smartphone only recognises the remote control when I restart it. From then on, it always works straight away.
To start the drone, I press start and then press the start symbol again until a circle has closed. If I let go too early, the drone won't take off. This is a safety mechanism to prevent the drone from taking off accidentally. So my fears about flying around the living room were completely unfounded.
The drone climbs to a height of 1.20 metres and hovers there until I fly it somewhere else. It's very easy to fly because the drone stays in place if you don't do anything.
So close to your nose, the buzzing of the drone is quite loud. However, it quickly becomes quieter as the distance increases and is no longer audible after a short time.
I can see practically nothing on the smartphone screen despite maximum brightness. That's very tedious. I can't see what I'm recording and I can't read any warnings from the system either. The weather is fine, but the sky is not completely clear, but slightly milky. It may be due to these conditions.
Speaking of recording: I don't have a microSD card in the drone yet. However, it has an internal memory of 8 GB. As I can't see anything on the screen, I'm constantly recording as a precaution - it could be that the camera is capturing a breathtaking view. With 4K, the memory is full faster than the battery is empty.
The videos are definitely worth watching, as I realise at home. However, I notice that I have to turn much more slowly when rotating around my own axis. Otherwise there are jerks and it looks hectic.
The videos are also saved on the mobile, as they are streamed there anyway. However, only in Full HD and not in 4K. I find that very practical. Unfortunately, this doesn't apply to photos. And: after a while, the videos are deleted, which I only notice when I want to play one. These streamed videos are therefore no good as an automatic backup.
Sight on screen better, on drone worse
On my second attempt, I accidentally fly too short a distance and am still in the no-fly zone. But the app immediately alerts me to this mistake. I find a suitable and legal spot an estimated two kilometres further on.
Now I can see more on the screen than the first time. This causes me to look at my mobile more often, which means I lose sight of the drone. This happens faster than I thought. However, I use the return flight button to bring the drone directly back into my field of vision. The return flight can be cancelled if I just need to re-establish visual contact with the drone.
In the warning zone where I am, I am not allowed to fly higher than 150 metres. With the new regulation from 2021, hobby drones will generally only be allowed to fly at 120 metres. That's quite enough for me. I never fly above 100 metres, and even then it becomes difficult to maintain visual contact. The drone is just a tiny dot in the sky.
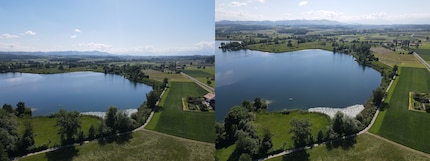
The picture on the left was taken from a height of 63 metres, the one on the right from 100 metres. Funnily enough, the lake looks bigger from a height of 100 metres because the camera angle is different. The higher I climb, the more I point the camera downwards.
Around midday I see almost nothing on the smartphone again, it seems to have something to do with the position of the sun. That's why I can't try out the intelligent flight modes, which would actually have been the goal for flight number 2.
Video recordings turn out best when you fly as smoothly and regularly as possible. I manage this better the second time. I deliberately turn the drone slowly. At high altitude, the flight can be faster than near the ground.
The image quality impresses me. When DJI announced the Mavic Air 2, it touted the camera's HDR capabilities, and it seems to work. The shadows are never too dark. Overexposure does occur, but much less frequently than I would expect with such a small sensor.
I'm slowly getting to grips with it
I continue to read the manual and watch YouTube videos and go practising again in the evening. I find out that the gimbal can be swivelled sideways after all. To do this, I have to touch the screen for a long time and then swipe my finger to the side without letting go. This probably only makes sense if you are looking vertically downwards, otherwise you will see the drone's supporting leg in the picture.
Now I also know how to activate the intelligent flight modes: By swiping a right angle to draw a rectangle over the target object. For example, I can select myself as the subject and let the drone fly alongside me while I walk around the neighbourhood. Or circle an object. To circle something completely, you have to get close, otherwise the drone will fly out of sight. However, it can also be effective to fly only a small part of the circle. The important thing is to create a regular tracking shot.
When I stand at the edge of the forest, I'm in the shade and can see everything perfectly on the screen. But I can't see the drone as soon as it flies behind me. A small shady spot with an all-round view would be perfect. Or, of course, a sun visor for the smartphone.
A trip to the mountains
After these flights, I feel confident enough to try out the drone in a place I don't know very well. I go to the mountains. Basically works well. I do fly around the area a bit, but I just use the quiet parts when editing.
Where there are only woods and meadows, you won't always find a suitable take-off and landing site. Landing in the grass is not recommended unless you want to mow the lawn with the propellers. There are portable landing sites for such cases. I used my jacket to help me.
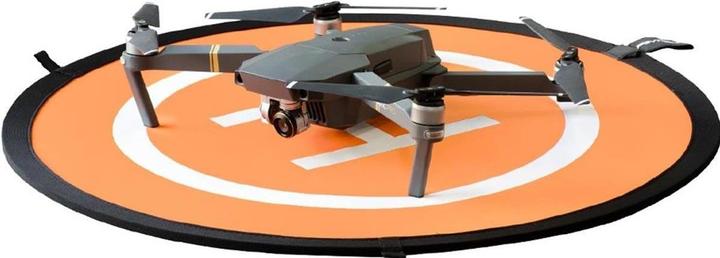
Pgytech Landing Pad Small
Drone landing site, Universal
The other problem is that the drone can't keep its distance from the ground on a slope. If I fly against the slope at a height of 10 metres, it quickly becomes 0 metres. I am warned, but the drone does not compensate for the loss of altitude by itself. I can avoid the problem by simply flying high enough from the start. However, I find taking pictures just above the ground very appealing and would also like to be able to do this on uneven terrain. Manual ascent is very bumpy.
Conclusion: fun even for beginners
I am satisfied with my shots, which I attribute not to my talent but to the drone. The automatic mode already delivers good image quality. I didn't change anything in terms of colours and exposure when editing
The drone is suitable for beginners. It flies very smoothly and is easy to control. The drone and app help me to avoid major mistakes with warnings and instructions. The only thing I find difficult is flying on a slope. Of course, you can't just try out a drone like any other gadget. You have to familiarise yourself beforehand with what you are allowed to do and what the risks are. But that's the case with every drone.
My interest in IT and writing landed me in tech journalism early on (2000). I want to know how we can use technology without being used. Outside of the office, I’m a keen musician who makes up for lacking talent with excessive enthusiasm.
Interesting facts about products, behind-the-scenes looks at manufacturers and deep-dives on interesting people.
Show all