
Background information
Keycap Kevin: The Sound of Mechanical Keyboards – Episode 4
by Kevin Hofer

I did it. On my second attempt, I managed to embellish my keyboard with a ceramic coating. I’ll tell you what I did differently and show you the end result.
I nervously look at my wobbly construction. It consists of a cost-effective cheap clothes rack, two wires and my keyboard. I want to embellish the latter with a ceramic coating called Cerakote.
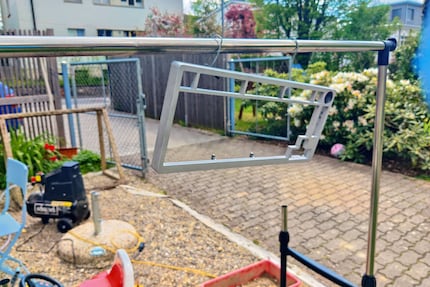
The installation is at home in my garden. On my first failed Cerakote attempt, I escaped to my dad’s garage due to the nasty April weather. The merry month of May has so far lived up to its nickname. But apart from the weather, my second attempt doesn’t differ much from my first.
I’m holding my compressed air paint spray gun. The compressor whirs and mixes with the birdsong to create a cacophony that heightens my discomfort. I’m nervous, I really want it to work this time. After my failed attempt, I had to remove the coating with an intensive sandblasting procedure. I don’t want to repeat that any time soon. I want results – good ones.
I therefore research my paint spray gun even more in advance. It was included in the Cerakote starter kit that I got from the official store. I quickly find out that it’s an extremely cheap model sold by various manufacturers under various names. The model described by Cerakote as a «Cerakote Trainer approved mid-range HVLP spray gun» turns out to be a sham. In a video, YouTuber Martin «ETOE» Grey literally and figuratively takes apart the 12-Euro pistol and makes a few adjustments. I follow his instructions and do the same. The gun still isn’t good according to Martin, but it should serve its purpose.
Before I begin, I test it on a piece of cardboard to make sure my gun settings are correct. I did so last time too, but probably not well enough. I had applied too much Cerakote at the time.
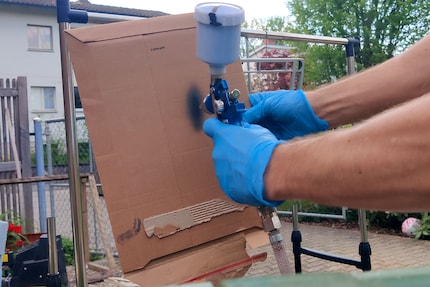
This time I seem to have found the right settings – at least in my layman’s eyes. I get to work.
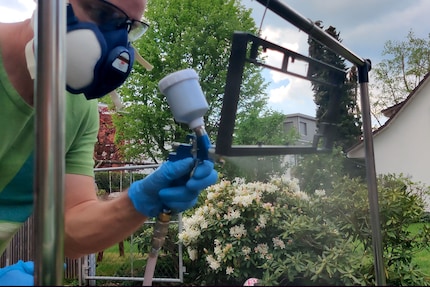
It’s amazing how much time I put into preparation compared to how long it takes to spray. After a little more than a minute, I’m done. Preparation, including set up, sandblasting and so on took about two hours. The keyboard must now be placed in the oven for the same length of time; Cerakote doesn’t harden until it’s heated.
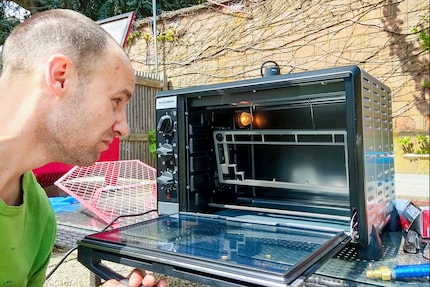
What a result! The new paint job on my keyboard looks pretty darn impressive.
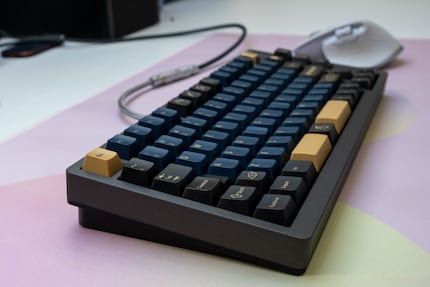
On a closer look, you’ll probably wonder why I didn’t spray the bottom of the keyboard. The answer is simple. I like a distinct colour difference between top and bottom. So it’s not laziness – at least not only.
I embarked on my Cerakote adventure wondering whether I could do this at home. Clearly, I can. However, it isn’t as easy and especially as cheap as I imagined. The effort involved in preparing the workpiece and providing all the equipment is relatively large. This is also reflected in the costs.
I listed everything I had to get below for you. I’ll add things I already had, like the compressor, to the list as well.
| Item | Cost (in Francs and 1:1 in Euros) |
|---|---|
| Cerakote Starter Kit | 285 (including delivery and customs) |
| Oven | 100 |
| Compressor | 180 |
| Sandblasting cabin | 250 |
| Casserole dish | 15 |
| Clothes rack | 20 |
| PPE (mask, goggles and gloves) | 50 |
| Acetone | 25 |
| Total | 925 |
It’s very likely I forgot something else in this listing. That’s why I reckon with about 1000 francs/euros for entry into Cerakote spraying. So, is it worth it?
If you’re as deep down the Custom Keyboard Rabbit Hole as I am, it’s an enthusiastic yes, of course! Even if you’re just interested in a coating that can withstand a lot of wear and tear, the investment should pay off. Especially since you may already have one or the other required component at home.
My Cerakote journey doesn’t end here, it’s only just beginning. I’ll definitely embellish some more keyboards with this coating – using a good paint spray gun, that is.
From big data to big brother, Cyborgs to Sci-Fi. All aspects of technology and society fascinate me.
Interesting facts about products, behind-the-scenes looks at manufacturers and deep-dives on interesting people.
Show all