
Reviewing the Keychron Q2: have it your way
The Keychron Q2 is the newest DIY keyboard brand in our range. Time to check it out and mod it to my liking.
Keychron has brought out ten DIY keyboards with the Q series. The Q1 seems like the perfect custom keyboard for beginners. Q2, the second release, possesses a 65 per cent form factor. In doing so, Keychron has built on Q1, improving it in key areas. The Q2 is already very good out of the box. Nevertheless, you should mod it. If you buy it in an ISO layout, you even have to.
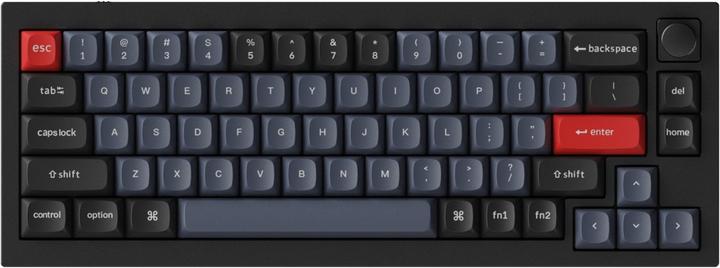
CH layout
US Layout
Versions and what’s in the box
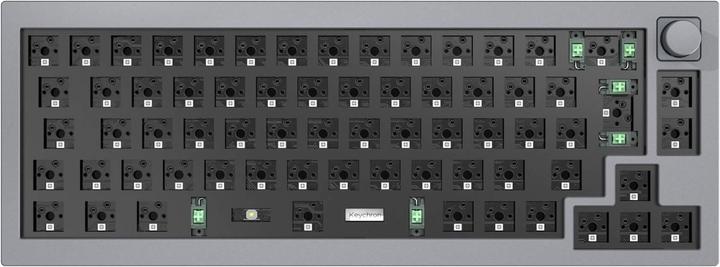
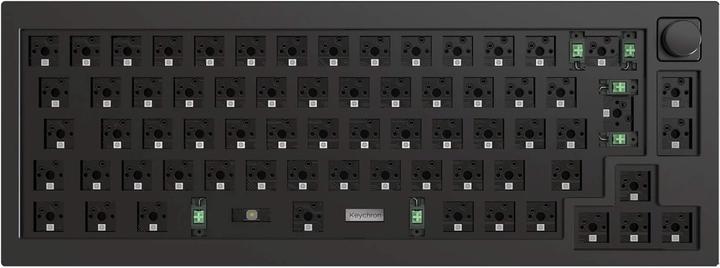
The keyboard, which consists of two aluminium parts, is available in three colour variants in the ISO version: black, grey and navy. All ISO versions come without keycaps and keys. You’ll have to get those yourself. I’m testing the ANSI version. It is a bit more expensive, but comes fully assembled with switches and keycaps in the US layout. I got the black version with blue buttons. But that’s irrelevant, since I took the keyboard apart and reassembled it anyway. All Q2s available in the store have a knob in the upper right corner, which you can programme like the rest of the keyboard with the open source programs QMK or VIA.

The keyboard is compatible with both Windows and Mac. You can switch between the two systems with a switch on the back right next to the USB-C port. The Q2’s scope of delivery includes keycaps for Mac and Windows. Besides the keyboard, a coiled cable for connecting, a keycap and button puller for removing the components, and tools for screwing on are included.
Typing out of the box
Like the Q1, the Q2 is very well made. There’s nothing to complain about regarding either the quality of the materials or their workmanship.
Typing on the Q2 is already very pleasant as it comes. Like the Q1, the Q2 is a so-called gasket-mount keyboard. Its circuit board includes the cover plate onto which the keys are mounted, all clamped between the upper and lower parts of the housing. Polyurethane foam seals at the top and bottom provide grip and that flexible typing feel.
Because of the built-in clicky switches, it’s hard to say how good the Q2 actually sounds. Nothing against clickies, but those things are so loud that the character of a keyboard is lost under their sound. But here’s what stands out: the case’s pinging noise, which was very audible in the Q1, has disappeared in the Q2. So Keychron has made adjustments.
Here’s a first typing test out of the box:
What’s under the hood
To see what exactly Keychron has changed, I took the keyboard apart. The first thing I did is remove the keycaps. Its switches and the cover plate are revealed underneath. In contrast to the Q1, Keychron relies on a steel top plate instead of aluminium for the Q2 as standard. It’s larger and should prevent reverb when typing. Anyway, unlike the Q1, many of the Q2’s changes are geared towards the keyboard’s sound profile.

Eight hexagon socket screws on the back hold the two aluminium sections of the Q2 together. In order to remove the board including the cover plate, I first have to loosen the daughterboard’s two Phillips screws.
There’s insulating foam in the lower part of the case and a foil underneath. What exactly the foil is supposed to be good for, I don’t know. It may be to protect against short circuits if the board touches the bottom of the case.

However, something else is much more important than the insulation: the lower part of the Q2’s case is much more massive than that of the Q1. The cavity between the board and the bottom of the case is smaller too. As a result, sound can spread less easily and the keyboard sounds less hollow.
There’s another difference: On the Q1, I added what is called the Force Brake Mod by YouTuber Keybored. I applied painter’s tape to the screw connections so that the vibrations of the lower section of the housing are not passed on to the upper part. Keychron now does this by default.

It’s nice to see that a manufacturer responds to criticism and already makes appropriate adjustments to their next product.
Further, it has four holes in the bottom section of the housing. These probably serve to optimise sound as well.
So much for the inner workings of the Q2. I removed the switches and started modding.
Keyboard conversion
I like a flexible typing feel. The steel cover plate is too hard for me. I replaced it with one made of polycarbonate, which I ordered directly from Keychron. But before I installed it, I had something special in mind: I added this PE Foam Foil Mod, but not with said foil. Instead, I used a beeswax cloth. Simply because I wanted to try it out. This should affect the sound profile of the keyboard. Let’s see how the cloth turns out. Who knows, maybe in a few years I’ll be known as the guy who first installed a beeswax cloth in his keyboard – or it’s already been done somewhere, by someone, and the mod is bad.

I cut the cloth to the size of the board and made cutouts for the stabilisers – which I, of course, re-lubricated to make them rattle less when typing. Now I just needed to put the switches back into the hot-swap sockets, which allowed me to easily swap the switches.
Instead of the blue buttons, I used popcorn switches. They’re tactile and suit my switch tastes.
Once all switches are on, I added the Tape Mod. I applied two layers of blue painter’s tape to the back of the board. This mod is also intended to affect the sound profile of the keyboard.

Before I screwed the keyboard back together, I put filler cotton in the lower part of the case instead of the enclosed insulation materials. I like the acoustics of filler cotton in keyboards better than those of the damping material. In addition, the cover plate and PCB thus have more room to yield under my typing.
Instead of the standard keycaps from Keychron, I used the Mykonos keycap set from Tai-Hao. By the way, this manufacturer now also offers sets in the CH layout in our store. A review will follow soon.
This is what my Q2 looks and sounds like now:
The typing feel is fantastic, just like with the Q1. Thanks to the gasket-mount construction and the polycarbonate top plate, typing on the keyboard is very smooth. I also like the sound. Thankfully, the Q2 is more on the high-frequency side sonically. It’s always difficult to say something about sound, as your setup has a big influence on it. The only thing I’d change now are the stabilisers. They rattle too much for me – even after lubrication.
The Q1 made better
The Q2 takes the excellent typing feel of the Q1 and significantly improves the acoustics. Plus, it comes in a 65 per cent form factor – my favourite keyboard size. The only thing to criticise are the stabilisers, which rattle even with lubrication.
At 189 francs for the CH version without switches and keycaps, the Q2 seems fairly priced to me. Of course, it’s not cheap, but you get a superbly crafted keyboard that you can make your own by customising it with switches and keycaps. Compared to other keyboards, it’s even cheap, at least for a keyboard with an aluminium case.
If you want to build your first custom keyboard, like the 65 per cent form factor, and are looking for something available soon, I can only recommend the Q2.
From big data to big brother, Cyborgs to Sci-Fi. All aspects of technology and society fascinate me.


