Guide
ZBrush on iPad: your introduction to 3D modelling
by Michelle Brändle
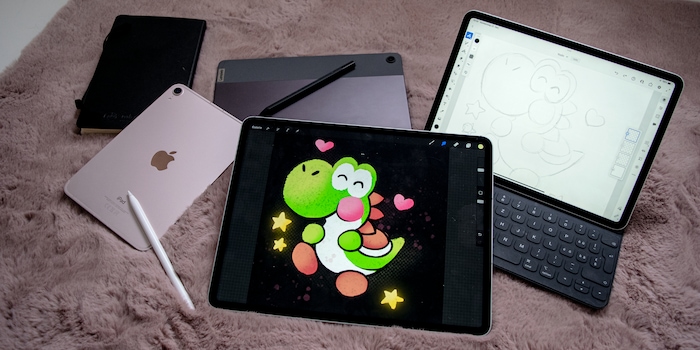
When getting started with digital art creation, you’ll be faced with the question of which program and device to use. Here’s an overview of the most popular art apps to help you decide.
A few years ago, I decided to give digital art a go. Having no prior experience, the hurdle was big. Which tablet do I need? And how in the world am I supposed to know which of the countless apps to go for?
Many apps and tutorials later, I’ve found the answers. Below, I’ll introduce you to some popular apps I find quite handy. Personally, I opted for an iPad along with the Procreate app. For the Android options, I used the Lenovo Tab M10, as it has the performance needed for the apps I mention. The Lenovo Precision Pen 2 is also available. It allows me to work in the apps with no problems.
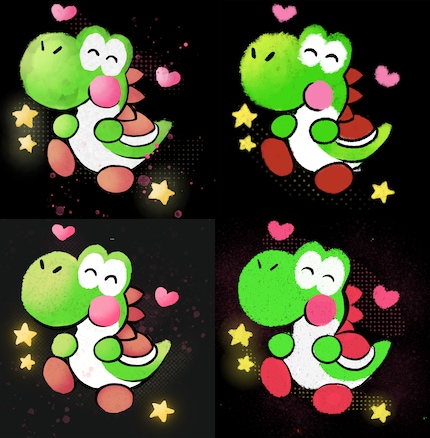
In this overview, I’ll cover all points as briefly as possible. I’ve divided the apps into individual criteria to help compare them. I also painted the same picture in each program.
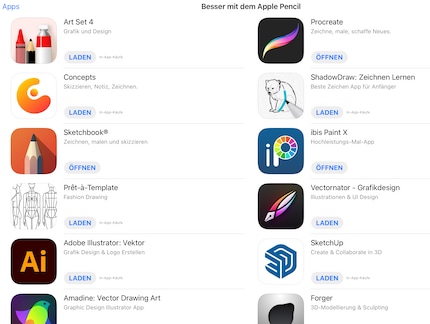
These are the apps we’ll be looking at:
What’s important for good usability is a structured user interface. Tools and various functions must be clearly recognisable and accessible in as few clicks as possible. Brushes, colours and settings are also key.
In addition, there should be customisation options: custom brushes and colour palettes, the option to move individual tools around, and maybe even individualised gesture controls.
The price should also be in good proportion to the performance. Subscriptions don’t make sense in every case, but if you get a good program with constant improvements, you might not mind paying a franc or two more.
With the Procreate app, you have an all-rounder that’s constantly being added to and improved. In addition to two-dimensional sketches and images, you can also make 3D sculptures as well as use the Animation Wizard to create moving paintings. The layout is clear. You can also customise it and download additional brushes from countless artists. Procreate enjoys a large number of users, which makes it easier to find tutorials and written explanations on individual topics.
The user interface is clearly designed and everything is accessible in just a few clicks.
Brush size and opacity can be changed using sliders or tap gestures.
In fact, there are a lot of things you can do with tap gestures in Procreate. For example, if you tap the canvas with two fingers, you undo one step. For more gestures, check out this tutorial.
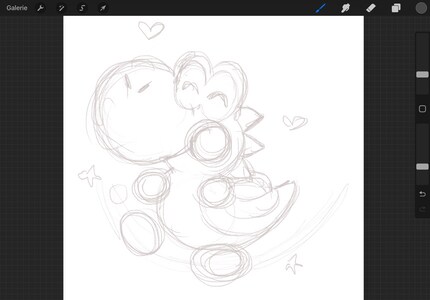
The interface design is so simple, in fact, that some functions aren’t immediately recognisable. But there are well-made tutorials for this, too, like the one below:
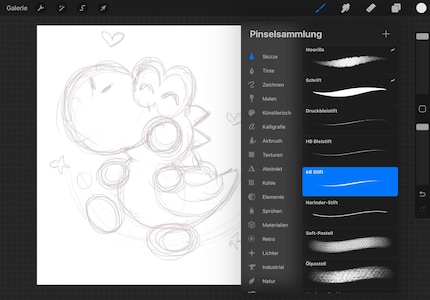
The basic tools already offer everything you need. Each brush can be customised to your liking, and you can also create a folder to sort your favourites.
Some artists offer brush sets for download for a small additional price. You can also find tools that are free of charge on various websites.
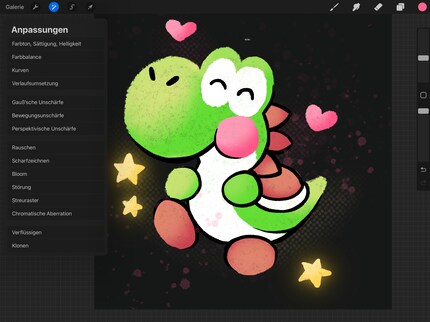
In the menu bar, you’ll find various settings. Under «Anpassungen» (adjustments) you can set the colour balance and apply filters. Layer modes can also be set, from post-exposure to overlay. Clipping masks can also be used if you want to link two layers together.
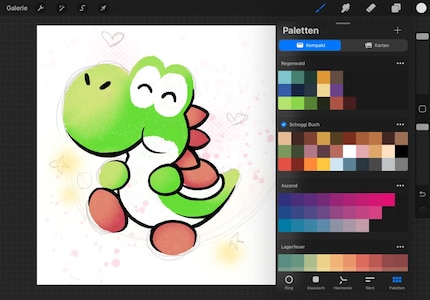
In addition to brushes, you can also create custom colour palettes, move the brush slider menu to your preferred side and save custom canvas sizes. For example, I created a canvas for sketches, one for Instagram and another with a modified colour profile for prints.
The program is available for a one-off price of 13 francs or 12 euros. It’s only available for iOS, so you’ll need an iPad.
As the most downloaded art app on Google Play, Sketchbook had to have a place on this list. The app is free, also available on iOS and offers a large range of features. However, I don’t find it particularly user-friendly. Getting to most settings takes too many steps, and the brushes don’t behave like real paint or pencils.
The user interface confused me a bit with its menu bar at the top. I had to work my way through it all to understand exactly what was what. I find the brush icons confusing in general, and I have to click on each tool to see the brush style. Selecting individual colours is also extremely tedious if I haven’t yet downloaded or defined a suitable colour palette. And you can only group layers in the premium version.
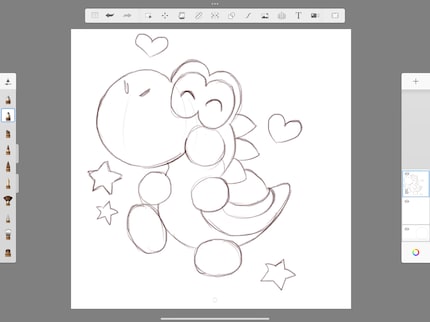
In the Android version, you can only undo a step by either clicking the undo button at the top of the screen or by double-tapping the bottom left corner. In the iOS version, you can double-tap anywhere on the canvas. Having to use the button wastes a lot of time when drawing.
Sketchbook does offer the most important tools. But the pencil, watercolour and other brushes don’t look realistic. The colour palettes are also very limited. The premade pallets are sorted into individual folders by shade and are therefore not very intuitive. Furthermore, there’s no history feature allowing me to switch back to colours used shortly before. At least I can get them back using the pipette.
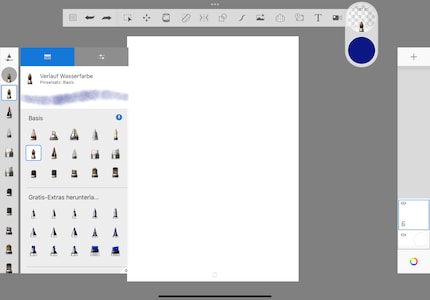
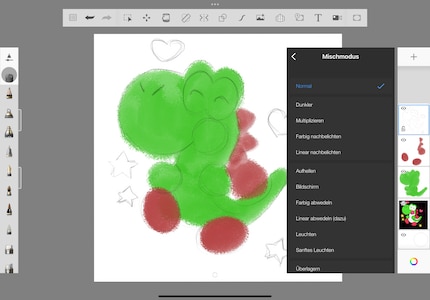
A nice feature is that you can automatically hide the user interface when drawing, which allows you to focus on your canvas. Blending modes are also available. You’ll find everything from multiply to glow to colour and saturation. With the pro version, you get some additional options, such as gradient creation.
In the top menu bar, you’ll find a smooth stroke setting – «Vorausschauende Striche» (predictive strokes). However, the line is only smoothed after I complete each stroke, meaning I can’t tell if the line looks the way I want it to as I draw.
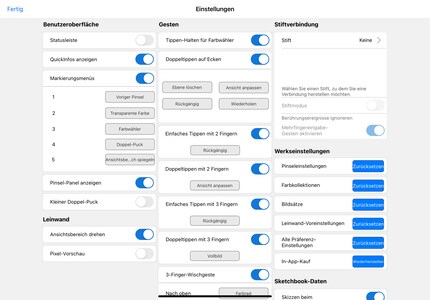
The user interface and certain tapping gestures can be customised in the settings. The brushes can also be customised. In the pro version, you can download additional palettes and brushes or create your own colour palettes.
Sketchbook is available for Android and iOS tablets, smartphones and the desktop free of charge – a big plus if you’re not keen to take risks. The only thing you need to do to use the app is to create a user account. The premium version costs only two francs. Among other things, it allows you to import brushes and create brushes yourself, group layers and it offers additional colour palettes.
Infinite Painter’s interface shines from the second you lay eyes on it. It’s very clearly organised, so you can concentrate on your art. The user interface is pleasant and offers a ton of handy options and settings, from authentic-looking brushes to recording a time-lapse video in 4K quality.
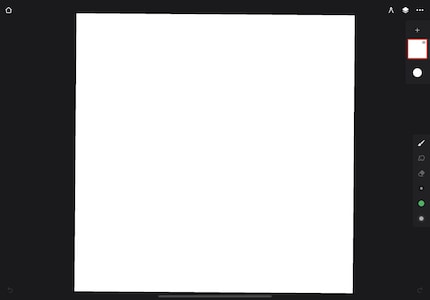
The user interface is pleasantly minimalistic. All you can see and switch between are the brush, blending brush, eraser and colour. You can also choose to display the layers. All other functions are located under the tools button.
In addition, there are useful tutorials on using Infinite Painter for beginners. Here are two examples:
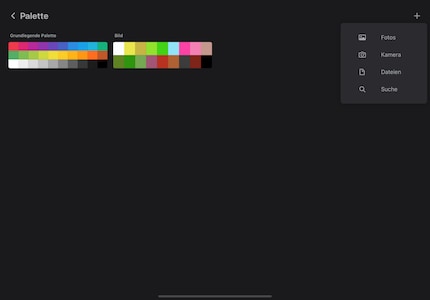
The brush button opens up a nicely sorted selection of tools, including pencil, marker, watercolour and even a glow effect. The brush size, flow and opacity can easily be adjusted. In addition, you can choose from interesting patterns and textures. The predefined colour palette offers a handy selection of tones.
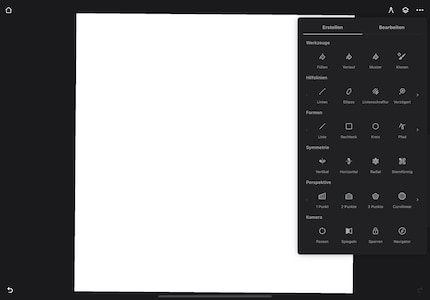
In the tools menu, the settings are sorted into two sections: create (e.g. perspective, shapes and drawing guide) and edit (select, transform, canvas). This is where you’ll find all customisable settings.
The toolbar can be moved by dragging and dropping. You can create time-lapse videos in quality ranging from 720p to 4K, and you can also select grainy backgrounds.
In addition, you can configure or create entirely new brushes. Tapping gestures can also be customised. You can create new colour palettes, add to existing ones, or even have them automatically generated from images and photos on your tablet.
The free version limits you to three layers. In addition, functions such as certain filters, perspectives or the transformation option are missing. The pro version, which includes all these features, costs ten francs or 13 euros and is available on Android and iOS.
Clip Studio Paint is probably the most comprehensive art program available for tablets. In a monthly subscription, you get an app with almost endless possibilities. But you’ll need some perseverance to get the hang of things. In return, you can then customise all areas of the program to suit your wishes and needs. I recommend using a desktop PC with this app so that you can easily navigate all the functions; it’s quite handy with a mouse. If you prefer drawing on a tablet, I recommend getting a larger one to use with this app – at least 12.9 inches. Otherwise, your screen will quickly become cluttered, and you’ll lose track of your artwork.
The user interface is very complex and reminds me of Adobe Photoshop. Because I’m familiar with Photoshop, it’s not a problem for me. As a newbie, you’ll have to be prepared to click through everything systematically to get an overview. But everything you need to get started is easy enough to find.
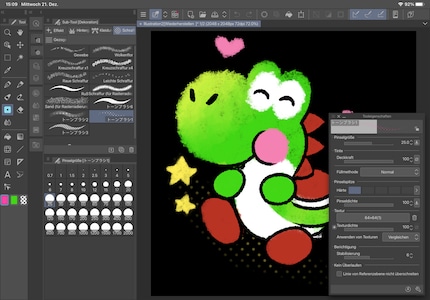
If you ask me, this is an app better suited to large screens. You have to expand menu bars to get to many functions, for example, to switch between layers and tool sizes. Only then can you adjust the latter using a slider or predefined brush sizes.
What’s annoying is that when you select something from the submenus, it covers the canvas; you have to close all the menus manually. It would be more practical if the menu bars closed by themselves when you continue painting.
A solid selection of basic brushes is available out of the box, and you can add more from an extensive online portal called «Assets». However, the brushes you’ll find there are from all sorts of sources, which makes the website a bit confusing. The extra speech bubble tool is great if you’re into creating comics.
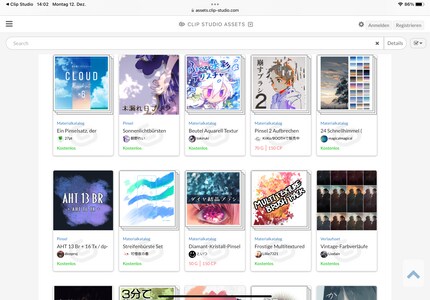
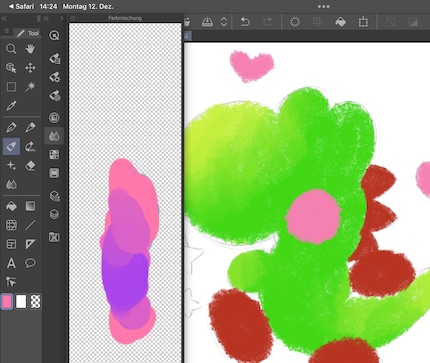
I find the transparent colours that are available unique and practical; they work like an eraser, but I only have to switch colours instead of tools.
Another unique and very handy tool is the colour mixing palette. It allows you to mix colours together and use the resulting hue.
Despite the huge selection online, I couldn’t find a dot grid that was suitable for my painting. So, I took one that was too small and enlarged it using the deformation tool. Credit where credit is due, this worked flawlessly.
The settings and filters are almost as extensive as in Adobe Photoshop.
There’s one addition that’s interesting for comics: you can create a story folder for multi-page works and set the story pages to a web comic or book format.
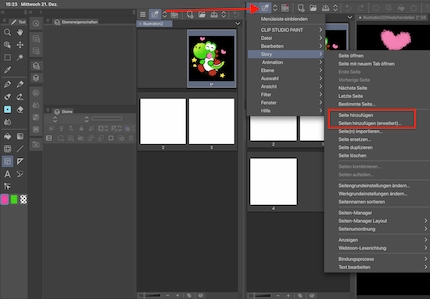
The ability to create vector layers is also very useful. This allows you to create graphics whose resolution adjusts automatically. Sliding anchor points are also included.
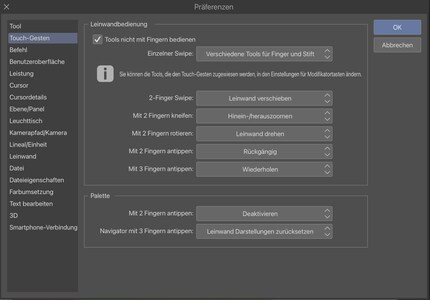
There’s almost no limit to the settings you can customise. Under «Präferenzen» (preferences), you can set everything from touch gestures to the cursor and from the ruler to colour conversions. You can rearrange individual toolbars by dragging and dropping. For example, to be able to change the brush size more quickly, I put the corresponding icon on the right side of my screen. In the case of certain brushes, you can set their size using the buttons on the tablet’s pen.
On my small, 11-inch tablet, the many tool menus are a bit bulky and unwieldy. However, if you work on a desktop or large tablet, you can set everything up just how you like it.
Clip Studio is available as a monthly or annual subscription for all major platforms. The price will vary depending on the number of devices you want to use the program on. It ranges from 5 francs or 4 euros a month for a single-device plan to 16 francs or 13 euros a month for a four-device plan.
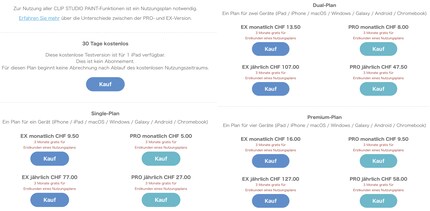
You can also try the program on a tablet for a month without starting a subscription once the month is up.
While I find Adobe Photoshop rather impractical for drawing, Adobe Fresco is specialised in it and is therefore more suitable. There are some handy features, such as auto colour palette creation when you load an image into the open file, or so-called interactive brushes. With interactive brushes, oils and watercolours behave extremely realistically in terms of texture, colour mixing, and colour bleeding.
The program responds to pen input only, which is an advantage; your can rest your hand on the tablet without accidentally leaving strokes. This makes Adobe Fresco a versatile and user-friendly drawing app that doesn’t require you to spend hours learning the ropes to get good results.
The user interface is somewhat reminiscent of Adobe Photoshop due to the tools, but is more clearly structured and offers a clear palette of options. In addition, images from Fresco are automatically displayed in the Photoshop app and can be easily processed there.
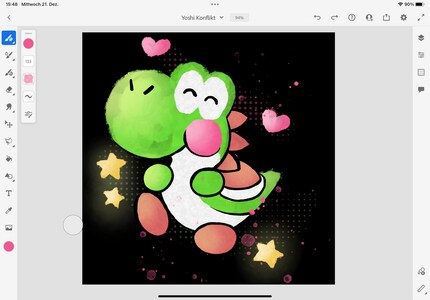
The brush selection menu is divided into three types of brushes:
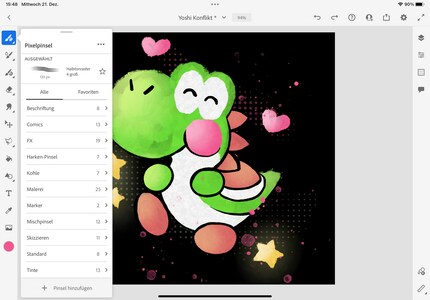
More brushes are introduced in seasonal intervals and you can always add them for free.
When you insert an image, Adobe Fresco automatically creates a colour palette for you based on it.
The perfect, automatic setting in Adobe Fresco is that the canvas responds exclusively to the pen. When you place your hand on it, nothing happens. This prevents unwanted strokes from appearing in the image, as is usually the case.
Layer settings and filters are available to the same extent as in Photoshop, and you can also work with layer masks.
The brushes can be customised and the toolbar moved. There are also a lot of touch gestures, but these can’t be personalised.
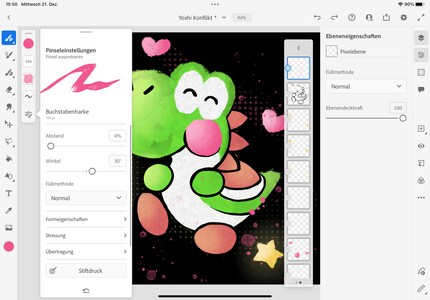
In the future, it’ll also be possible to create your own brushes, and a time-lapse video function will also be added. In addition, Adobe promises to soon store brushes and swatches in a library. However, it’s not yet known when this update will be released. In the window with the future functions, you can even express any other wishes you have.
Adobe Fresco is available for iPhone and iPad free of charge. If you have a Creative Cloud subscription, you can also use it on Windows devices.
Tayasui Sketches does well with its minimalist interface, user-friendly tools and ease of use. For simple sketches, you can use the program for free on Android and iOS devices, as well as on Windows and macOS. But operation is sometimes a bit tedious despite the simple interface. Namely, because of unnecessary steps required to make any adjustments. The selection of tools and settings is also severely limited.
Using Tayasui Sketches seems simple at first, but various settings are somewhat hidden. Switching between tools is also tedious. You have to double-click each of the main choices (i.e. brush, pencil, etc.) and then click again to choose from the subcategories. Since the tools are displayed in a very abstract way, I had to click through every single one of them at the beginning – but I did get the hang of them eventually.
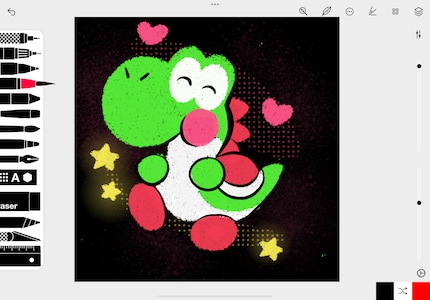
The selection of brushes includes quite a bit, but is unfortunately not expandable. Even the pro version doesn’t offer more options.
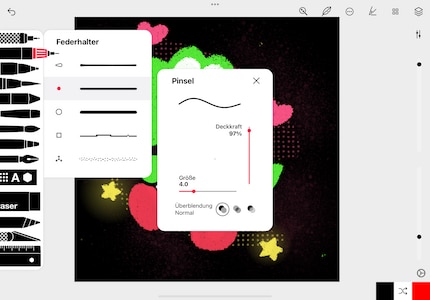
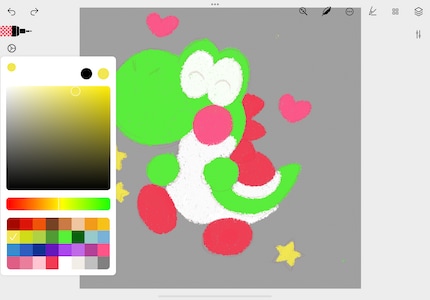
When it comes to settings, you have little room for adjustment. You can only change the brightness and transparency of the individual layers. That means that you can’t create clipping masks that would allow you to change colours or add shading on each layer, for example, without drawing over the painted areas.
In the Android version, you can move the toolbar to the left, right or bottom. The iOS version doesn’t offer this option. Disappointingly, the existing brushes can’t be modified either. At least you can create your own colour palettes.
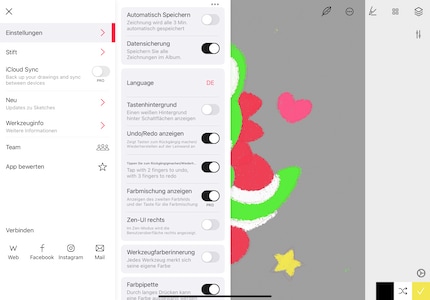
The app is available free of charge for both iOS and Android. It can also be used on the desktop, but with slightly fewer functions.
To get started and for smaller doodles, you’ll find suitable apps that are free of charge. Sketchbook or Tayasui will already give you many options across devices, i.e. Android, iOS, Windows tablets, PC and Mac. However, what I’m lacking in these two programs is efficient use and realistic drawing tools. Because of this, I find Adobe Fresco is the best option for beginners. However, Fresco isn’t free; it’s available in «Adobe Creative Cloud».
If you like somewhat more customisability when it comes to your own brushes, value working with layers and want to create your own personal colour palettes, you can get all that for a low price. On the iPad, you’ll get everything you need and more with Procreate for 13 francs or 12 euros.
For Android users, I view Infinite Painter as an equivalent alternative that’s easy to use and offers endless possibilities. The great thing is that you can test the program with the free version to see if it suits your needs. The pro version costs 10 francs or 13 euros, which is not much at all.
But maybe you’re certain you want to get going on a professional level. If you want a high-quality and extremely versatile program and don’t mind investing the time to get the hang of it, Clip Studio Paint might be the one for you. The monthly subscription can be quite expensive, but you can select one that suits your needs. The one thing that could be improved is the interface on smaller screens.
In any case, it’s worth starting with a program that appeals most to you. That way, you won’t get sick of digital art before even really getting into it. In addition, you save time and money by choosing well from the get-go. After all, it’s the fun of doodling that should come first.
In my world, Super Mario chases Stormtroopers with a unicorn and Harley Quinn mixes cocktails for Eddie and Peter at the beach bar. Wherever I can live out my creativity, my fingers tingle. Or maybe it's because nothing flows through my veins but chocolate, glitter and coffee.