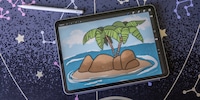
Guide
Michelle's iPad creative course: Layers and brush diversity with Procreate
by Michelle Brändle

The illustration app Procreate is available exclusively for the iPad. The affordable software is clear and comprehensive. Nevertheless, getting started can be overwhelming. In this series, I will guide you through the programme with application examples.
With Procreate, you can create great sketches, illustrations or animations in no time at all - if you know how. In this series, I'll show you how to learn the programme without frustration, but hopefully with a lot of fun.
In this part, you'll learn how to create your first project and illustrate the cute Stegosaurus in the Header image. No previous knowledge is required. I will go through the most important functions and tools as I go along. If you already use Procreate, you may still find some helpful tricks.
In addition to the explanations and images, you will find the video recording of the Stegosaurus creation process here. By the way, Procreate records everything you do by default. Quite practical.
When you open Procreate, you will first see the gallery. You will find all your artworks here later. To avoid a yawning void, the developers have already put some projects on this page. You can also use them to see what is possible.
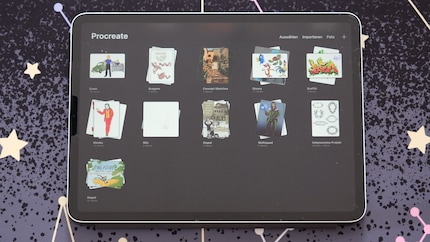
You need a canvas for your artwork. You can create this by clicking on the plus sign in the top right-hand corner. There are already predefined sizes. However, you can also create your own templates.
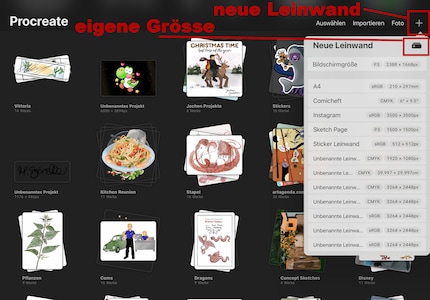
This is what you do first. Click on the black rectangle with the plus sign. A window for the settings of your personalised canvas will then open. Enter 3264 × 2448 pixels for width and height. Set the resolution to 300 DPI. This gives you a 4:3 format in good print quality for an image of around 30 cm × 20 cm. The maximum number of layers is calculated by the device and can vary depending on the performance of your iPad. Mine is around 60, but the newer Pro models can handle 100 layers or more with this canvas size.
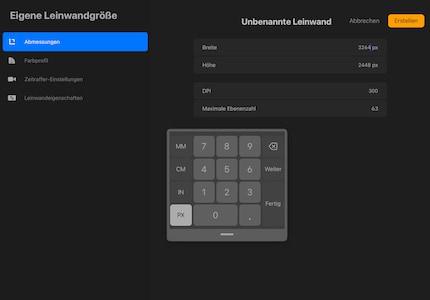
You can also adjust the colour profile here. For a rough classification: sRGB is well suited for purely digital works. You need CMYK if you want to print your work later
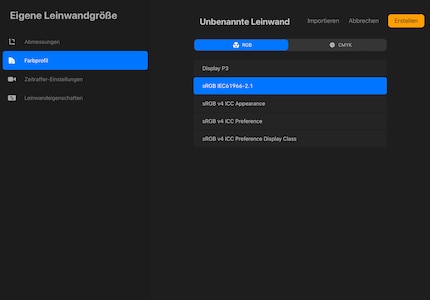
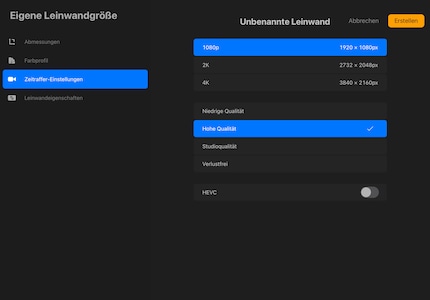
You need the time lapse settings for the video that the software automatically creates of your workflow. This is great if you want to show it later on Instagram or Tiktok, for example.
With canvas properties you only set the background colour for your project. This can also be adjusted later as required.
After you have made the desired settings, click on the yellow "Create" button in the top right-hand corner. Congratulations, you have created your first canvas. Now let's rain some colour on it.
Your painting tools are at the top right of your workspace. In the brushes section, you will find everything you need to get colour onto the canvas, from pencil to charcoal to watercolour. It's best to let off steam first and see what's available.
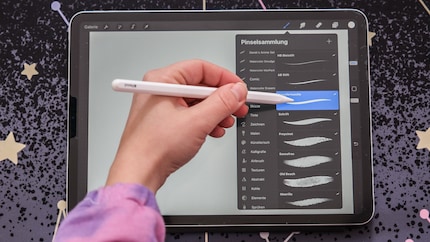
Next to it is the so-called wiping finger. You can use this to smudge painted brushstrokes. There is also an eraser. Next to it are the layers on which you will later create your work and last but not least: the colour selection.
First, draw the rough shape of the stegosaurus. It's best to use a brush from the ink folder for this. My favourite is the artist's ink. I've customised it so that the lines look as fluid as possible. To open the settings for this, tap on the desired brush. On the left under Stabilisation, set the slider for the streamline strength to the maximum.
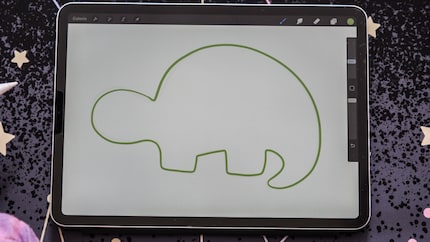
Use this brush to draw the shape of the dinosaur as in my example. If you want to change the brush size, you will find sliders for size and opacity on the left-hand side (as a left-hander, I have moved this to the right). You can also save individual brush sizes by clicking on the slider button and then on the plus button. A blue line should then appear next to the slider. For this example, set the colour to green at the top right of the circle.
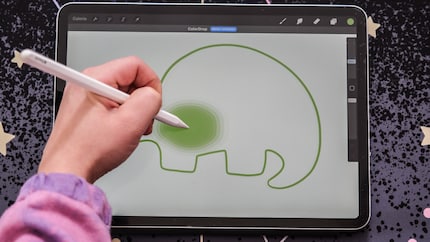
To avoid the tedious task of colouring in the shape by hand, drag the colour circle directly into the dino shape in the top right-hand corner. This fills in the shape automatically.
Next, the eyes: create a new layer using the plus button. Then select white as the colour and create a circle. Procreate has a little trick to make sure it is really round.
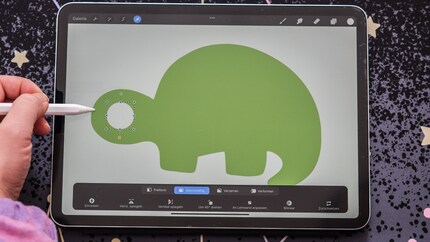
If you don't put the pen down after drawing a circle, the programme will automatically create a closed, round shape. To make sure it really is a circle, you can also tap the canvas with your finger before setting it down. Incidentally, the trick also works for squares or triangles: simply draw a rectangle, follow the same procedure and it's already a square.
Fill in the painted eye with white again - then add a pupil in black and you're done.
Now it's time for the bone plates. I think a misshapen oval is appropriate for this. Create one and then copy it for the remaining bone plates. To do this, drag the layer to the left and select the "Duplicate" command. By clicking on the cursor at the top left, you can now make the shape evenly smaller and distribute the plate on the dinosaur's back as you wish.
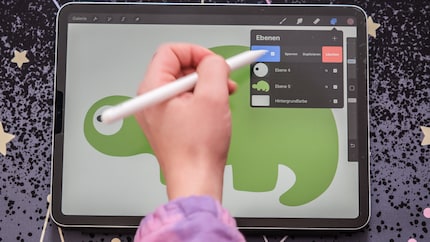
So that the bone plates are not all floating around as individual layers, group them together. To do this, go to the layers and select all the plates. Do this by tapping on a bar and dragging all other bar levels briefly to the right. They should now all be highlighted in blue. Then tap on "Group" at the top. All the tiles are now grouped together, but not yet on a single level. To achieve this, click on the group you have created and then on "Collapse". That's it.
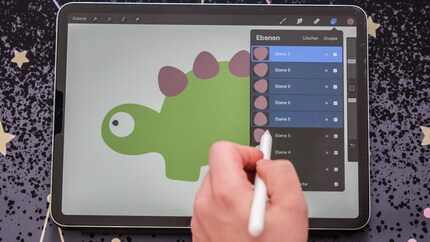
You've almost done it. Now add a bit of structure and patterning to the little guy. To make sure you don't paint over the shapes, use the alpha lock. You can activate it by dragging the dinosaur shape to the right with two fingers. Alternatively, click on the layer and select Alpha lock. Now only the dinosaur can be painted.
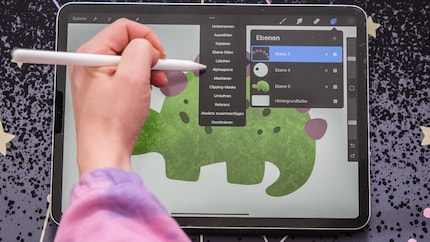
Choose a slightly darker green for the texture in the colours. To use the colour you have already used as the starting point, tap and hold your finger on the desired colour in the image until the program displays it as a circle around your finger. Now tap on the colour palette at the top right and move the slider to the darker area.
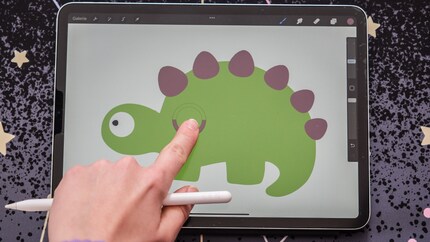
Use the "Dove Lake" brush from the textures for the pattern. Set the brush size to around 20 per cent and the opacity to 50 per cent. Now you can colour the dinosaur from below as you like. Once that's done, we'll follow the same procedure for the dinosaur plates. Use a darker colour there too, in this case dark purple. Add stripes to the bone plates. You can find the "Mercury" ink brush for this purpose. Use this to draw three vertical lines over each individual plate.
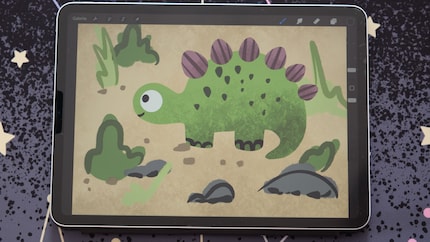
Using the same brush, you can also give the dinosaur a few green scales, a smiling mouth and a few toenails. You can go wild with the background. To do this, create a layer below all the others and colour it in ochre, for example. Finally, paint a few stones, bushes and grasses on a layer above as desired.
Your first Procreate illustration is ready. Congratulations!
In the next part, I will go into more detail about the many possibilities of layers and introduce more brushes. Do you have any questions or requests for future parts of the course? Put them in the comments column.
Ever since I learned how to hold a pen, I've been doodling away in bright colours. Thanks to my iPad, digital art has also become part of my life. That's why I love testing tablets – from the graphic design range to the regular kind. When I feel the urge to express my creativity without lugging lots of equipment, I go for the latest smartphones and start snapping away.
Practical solutions for everyday problems with technology, household hacks and much more.
Show all