Monitors for Macs: do you need Apple’s pixel density?
Apple likes to show off its Retina Displays. Read on to find out what this means, why it’s important in theory – and whether there are serious drawbacks if you use other monitors with macOS.
Macs and monitors, a complicated relationship. Apple itself only offers two devices, and they don’t cover many needs. But macOS doesn’t seem to harmonise well with conventional monitors and resolutions at first glance. In this article you’ll learn what the problems are and what options are available.
A little heads-up: this article dives deep into the subject matter. If you only want some practical recommendations, you’ll find an easy-to-digest conclusion at the very bottom.
Mac vs. Windows – once more
The biggest source of confusion comes from the fact that macOS scales its user interface differently than Windows. That and Apple relies on a very high pixel density for its own displays. This leads to complications.
For most screens, manufacturers focus on resolution in absolute terms. The most common ones are:
- 1920 × 1080 (Full HD, 16:9)
- 2560 × 1440 (QHD or WQHD, 16:9)
- 3840 × 2160 (UHD or colloquially 4K, 16:9)
- 3440 × 1440 (UWQHD, 21:9)
- 5120 × 1440 (Dual QHD, 32:9)
Windows computers cope with all these wonderfully. Fonts and menus can be scaled in 25 per cent steps in the settings. This content is then calculated to the desired size by the computer for the monitor’s native resolution, avoiding any losses in image quality.
MacOS is optimised for Retina Displays
Macs are different. Apple cares very little about standard resolutions. Instead, the Californians want to achieve a certain pixel density in their own displays. This should be so high that you no longer recognise individual pixels at the typical viewing distance. Apple’s marketing calls this a Retina Display. The pixel density required for this varies depending on the device. On a smartphone it has to be higher than on a computer, as those are held closer to your face.

Source: Samuel Buchmann
Apple’s pixel density is higher than that of typical screens. A 27-inch device with 4K resolution, for example, has 163 ppi. Apple, on the other hand, uses panels with completely different resolutions in its own screens. Here are some examples:
- 2560 × 1664 (13" MacBook Air), 224 ppi
- 3456 × 2234 (16" MacBook Pro), 254 ppi
- 4480 × 2520 (24" iMac), 218 ppi
- 5120 × 2880 (Studio Display), 218 ppi
- 6016 × 3384 (Pro Display XDR), 218 ppi
MacOS is optimised for such Retina displays with high pixel densities. The user interface is laid out in such a way that it can be multiplied exactly by a factor of two – and then has a reasonable size with a pixel density of 218 ppi.
Here’s an example: the 27-inch Studio Display has a resolution of 5120 × 2880. The font and menus are calculated for exactly this pixel count. In native size, however, they’re tiny. To fix this, macOS doubles the pixels of the user interface horizontally and vertically by default. This then corresponds to a size around 2650 × 1440. An easy fix, just halve the resolution.
The issue of macOS with «normal» resolutions
So far, so good. The problems start when you connect a monitor with a lower pixel density. Let’s take the example mentioned above: a 27-incher with a resolution of 3840 × 2160 and thus a pixel density of 163 ppi. In native scaling, you’ll need a magnifying glass to use macOS. And if you enlarge the surface by a factor of two, as with a Retina display, you get the opposite problem: macOS is massive. As if it were on a 1920 × 1080 screen. You won’t be able to fit much content on your monitor.
Apple knows this and to this end offers further scaling in the display settings. For example, the following increments are available on a 4K monitor (there’s even more if you alt-click on a scale):
- Like 1920 × 1080 (factor 2)
- Like 2560 × 1440 (factor 1.5)
- Like 3008 × 1692 (factor 1.28)
- Like 3360 × 1890 (factor 1.14)
- Like 3840 × 2160 (factor 1)
The options marked in bold are the native scaling of macOS mentioned above – either not enlarged at all, or enlarged by a factor of two. In both cases, the GPU only has to calculate a 4K image, which corresponds to 8.3 megapixels.
If you choose a scale in between instead, the conversion becomes problematic: pixels can’t be halved. So Apple uses a trick. When scaling «like 2650 × 1440», macOS calculates the image in 5120 × 2880 and then enlarges the surface by a factor of two again. This way, the GPU has to calculate a 14.7 megapixel image.
Source: Samuel Buchmann
But that’s not all. As your monitor has a different resolution, the operating system now has to fit 5120 × 2880 pixels into the 3840 × 2160 grid. This isn’t mathematically possible and leads to two drawbacks, in theory:
- Poorer image quality and sharpness due to artefacts, moiré patterns, and the loss of dithering.
- Greater GPU load because of the higher resolution at which macOS calculates the image and because of the effort required to accommodate the monitor’s native resolution.
This second point is why macOS warns you when using odd scaling factors: «Using a scaled resolution may affect performance.» Read on to see how bad the problem really is.
Limited scaling at low resolutions
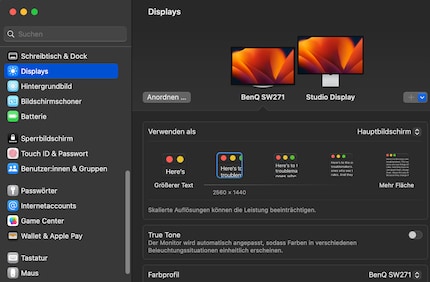
If your Mac has an M-chip, macOS only gives you these scaling options for screens with a resolution that Apple considers «Retina-ready». This only applies to 4K and above. For monitors with 1440p resolutions, the operating system can only be scaled in the native size or to 200 per cent. This happened to me:
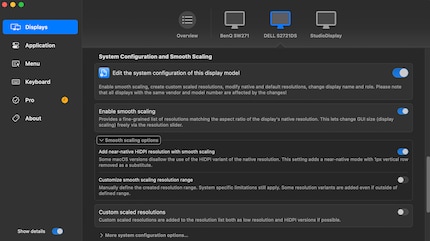
If you want something in between, you could reduce the resolution. But then your image quality will suffer massively. I don’t recommend this in any circumstances. Instead, use a tool called BetterDisplay, which you can find here.
Source: Samuel Buchmann
BetterDisplay offers all the scaling options, even for low-resolution monitors. And the app can do much more, such as controlling the brightness of compatible screens. The basic functions are free, the full version costs $18. There is one catch: you have to trust the developers to update the tool for new macOS versions.
More little caveats: soft- and firmware
Monitor manufacturers also often have their own apps. Sometimes it’s only those that offer every feature. However, most of these apps only work on Windows. MacOS versions either don’t exist or don’t work properly, especially with M-chips. My boss Martin Jungfer faced such difficulties when testing a large HP screen:
A screen’s firmware can also cause problems. This is particularly difficult to figure out or fix, as many manufacturers simply don’t care. That or they don’t say which models are struggling with errors.
On 32:9 monitors, I’ve been faced with blank black screens several times during tests – sometimes only certain connections work. Even then, macOS sometimes didn’t recognise the correct resolution. It wasn’t until I went to «Show all resolutions» in the settings that I was able to select the native 5120 × 1440.
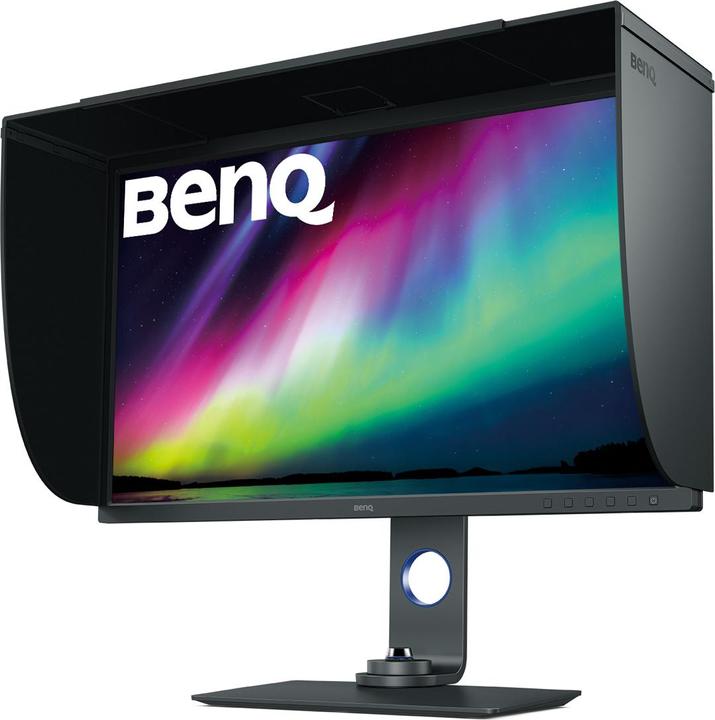
The portal Macwelt has compiled a list with information about various manufacturers. You can find it here (page in German). Some brands like BenQ or Eizo very kindly provide information about compatibility issues. Others like Samsung or HP can’t be bothered.
Option 1: monitors from Apple
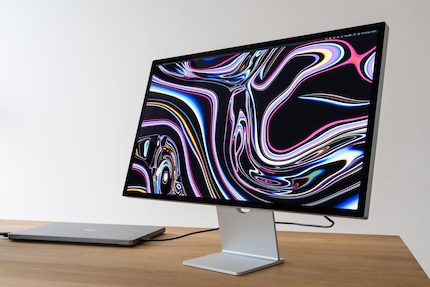
The simplest solution to all these problems: buy a screen emblazoned with a bitten apple. This way, everything works as Cupertino intended. Another big advantage is that you can control brightness directly via macOS, by using the corresponding keys on the keyboard, for example. With other monitors, you have to press buttons on the device to do this, or at least need additional software like BetterDisplay.
Source: Samuel Buchmann
At the moment, Apple offers two displays: the Studio Display at 27 inches and 5K resolution, and the Pro Display XDR at 32 inches and 6K resolution.
Both devices are good, but expensive. Things like a matt coating or a height-adjustable stand even cost extra. Besides the price, they have other weaknesses. The maximum frame rate for both is 60 hertz. The Studio Display also has to do without local dimming, resulting in a middling contrast ratio.
The Pro Display XDR in particular is aimed exclusively at professionals with its price. For normal users, only the Studio Display is even an option – even then, it’s relatively small at 27 inches.
Option 2: other monitors with Retina pixel density
There are other manufacturers who also offer screens with a similar pixel density. This being 5K resolution at 27 inches and 6K at 32 inches. This way, at least the scaling works just like on a native display.
The Samsung ViewFinity S9 comes into question here, a brand-new release. It’s cheaper than the Studio Display and probably the best 5K alternative at the moment. Initial tests attest to the monitor’s slightly higher peak brightness. The colour accuracy should be comparable. Cons include the clearly inferior production quality and materials used. The ViewFinity S9 comes with a matte coating as standard. Whether you like it or not is a matter of taste. I personally prefer a glossy finish because of the higher perceived contrast.
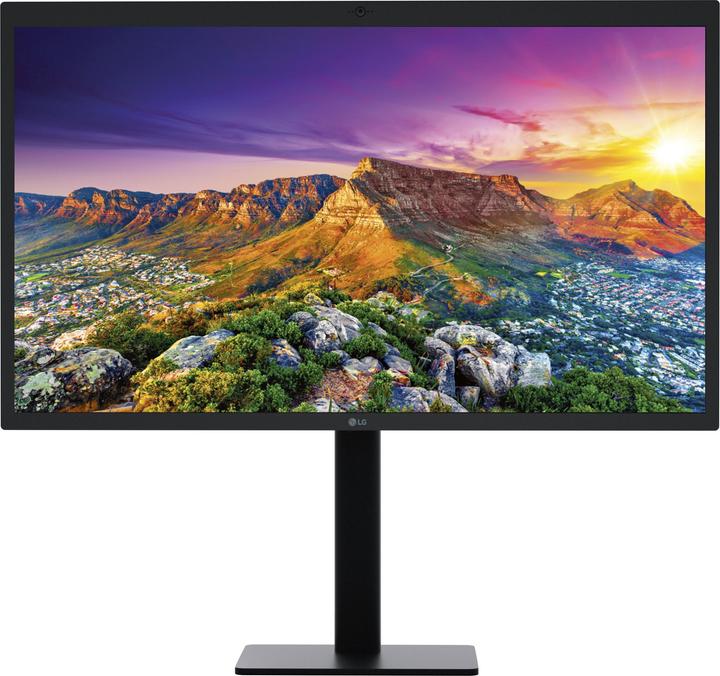
The LG UltraFine 27MD5KLP is nothing more than the 5K display of the old 27-inch iMac. It’s virtually identical to the Studio Display. The only differences can be found in the casing, a slightly lower brightness (500 instead of 600 nits), and worse speakers and webcam. The LG monitor is cheaper than the Studio Display, but I still wouldn’t call it a bargain.
Dell offers a competitor to the Pro Display XDR: the UltraSharp U3224KB has a 6K resolution just like Apple’s 32-incher. The 218 ppi pixel density scales perfectly with macOS. But in my test, I was still disappointed by the Dell screen. In particular, I found its susceptibility to reflections and blooming unacceptable for this price. The latter is probably due to the fact that it has to manage without local dimming in contrast to the Pro Display XDR. If you don’t care about the price, the Dell can still be a good office monitor in the right workplace.
Option 3: use ordinary resolutions
Even with third-party options, the range of Retina-ready displays is a joke. What if you’re just looking for a cheap office monitor? Or a higher frame rate than 60 hertz for gaming? Or good AdobeRGB colour space coverage without having to take out a second mortgage? Or something larger than 32 inches?
In such cases, you’ll have to go for screens with standard resolutions and pixel densities below 200 ppi. The all-important question: how bad is this?
Pixel density around 100 ppi
A monitor with around 109 ppi pixel density works well with native scaling. Menus and fonts are the same as on an Apple monitor. Makes sense, 109 ppi is half as much as 218 ppi. MacOS simply omits the small x2 calculation and the user interface fits like a glove. Such a pixel density is present in the following resolutions, for example:
- 27 inches (16:9), 2560 × 1440, 108 ppi
- 40 inches (16:9), 3840 × 2160, 110 ppi
- 34 inches (21:9), 3440 × 1440, 110 ppi
- 49 inches (32:9), 5120 × 1440, 110 ppi
The first drawback here is that 109 ppi doesn’t look particularly sharp by today’s standards. This is less noticeable in movies and games, but many would prefer better pixel density for things like text. The second disadvantage I’ve already mentioned: if you don’t like the default scaling, you need extra software and depend on its further development.
Pixel density between 130 and 170 ppi
If you want a sharper image, you need a better resolution. However, most of those screens offer a pixel density between 130 and 170 – exactly in the macOS red zone. Here, neither the standard scaling (too small), nor 2x magnification (too big) will fit most tastes. Monitors offering these pixel densities include:
- 27 inches (16:9), 3840 × 2160, 163 ppi
- 32 inches (16:9), 3840 × 2160, 137 ppi
- 40 inches (21:9), 5120 × 2160, 137 ppi
- 57 inches (32:9), 7680 × 2160, 139 ppi
With these displays, you’ll pretty much be forced to scale macOS using an odd factor. Oh dear. We all remember Apple’s words of caution: something, something, «affect performance».
Source: Samuel Buchmann
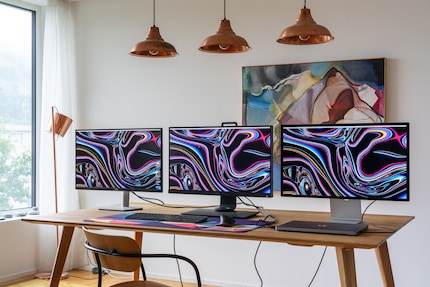
I want to find out how big the drawback actually is in terms of image quality and power requirements. For this, I test three 27-inch monitors: one with 1440p, one with 4K and one with 5K. I note five things:
- I can’t tell apart native and non-native scaling (i.e. «like 2560 × 1440» on the 4K display, for example) in blind tests, no matter how hard I try.
- I can’t make out any uneven gradients or other artefacts with non-native scaling.
- GPU performance barely suffers from non-native scaling: running all three monitors at the same time at the worst setting, Lightroom takes five per cent longer for a big export. RAM usage increases minimally – by about 200 megabytes per monitor.
- The difference in sharpness between 5K (218 ppi) and 4K (163 ppi) is noticeable, but small. I see it most clearly when I open a high-resolution image with fine textures. Text looks practically identical from a normal distance.
- 1440p (108 ppi) looks noticeably blurrier. Text here is also less clear than at 4K or 5K. The finer the details, the more I notice the lower pixel density.

Source: Samuel Buchmann
I didn’t expect such small differences between native and non-native scaling. Especially since there are countless dramatic outbursts across forums and YouTube, decrying non-native scaling in macOS as pure evil. Instead, Apple’s operating system seems to perform the necessary computing steps very efficiently. At most, it only makes a difference if you rely on the very last per cent of your GPU performance.
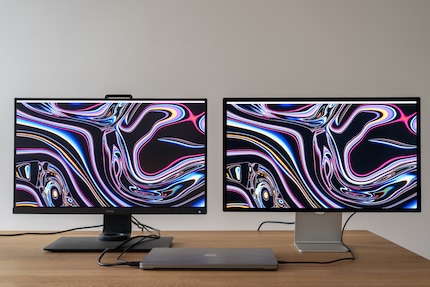
Less surprising is the absolute superiority of high pixel density: the Studio Display with 5K resolution is visibly the sharpest, even though the distance to 4K is subjectively small.

Source: Samuel Buchmann
Verdict: don’t worry about it
In summary, just buy the monitor whose image quality and features suit you best. Regardless of whether it has exactly the pixel density that Apple demands. You can scale macOS as you please with a clear conscience – even if you don’t end up at a native level. This will bring disadvantages in theory, to be sure. But in practice they’re negligible.
It just doesn’t make sense to buy a screen with 1440p resolution just because macOS has the right size here at default settings. A non-native scaled image on a 4K screen will still be sharper. The fact that Apple’s own screens look even a tad clearer has nothing to do with the scaling of macOS. It’s simply down to the higher pixel density. If you still have 1440p and want to resize the user interface, get BetterDisplay.
It’s up to you to find your personal sweet spot between price, pixel density, and other features of a monitor. Apple’s 27-inch Studio Display or one of the 5K alternatives manage 218 ppi, just at a high price. Personally, I think 27 or 32 inches with 4K resolution is fine. I’d only recommend lower pixel densities for gaming monitors.
Source: Samuel Buchmann
My fingerprint often changes so drastically that my MacBook doesn't recognise it anymore. The reason? If I'm not clinging to a monitor or camera, I'm probably clinging to a rockface by the tips of my fingers.

