Guide
Beginner's photo tip: reserve a budget for lenses too
by David Lee

The maximum distance when focussing is "infinity". You think you can't go further away than infinity. Nevertheless, many lenses can be turned beyond this point. This results in blurred images.
Suppose you want to take a photo of the starry sky. The autofocus does not focus in the dark. So you focus manually to infinity. This is the greatest distance at which you can set the focus.
The problem with this is that infinity is not where you would expect it to be. You would expect the maximum distance to be at the stop of the focus ring. However, this is not the case with most lenses, as the infinity setting is just before it.
The result: If you take photos with the aperture open - which is highly recommended in the dark - your photos will be blurred. With some lenses, the deviation is so large that even with the aperture closed, the sky will be blurred.
It's not a problem during the day. The autofocus works and you would also recognise blurred areas in the viewfinder if you used manual focus. Night shots are more difficult. The solution depends on the lens.
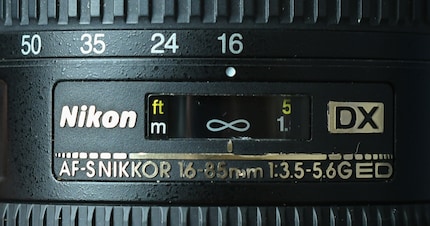
Example Nikon DX 16-85mm: This lens has a distance indicator. So it's simple: you set the focus so that the mark is in the centre of the infinity symbol.

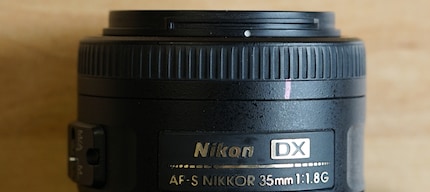
Example Nikon DX 35/1.8: This lens has no distance scale and the focus point is quite far behind the stop. I have marked the infinity point with a pencil.

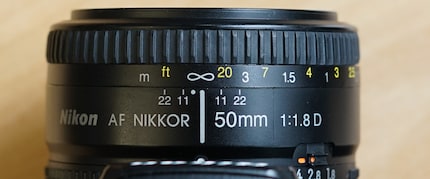
Example Nikon AF 50mm 1.8: Lucky you: With this old lens, the infinity point is actually where you would expect it to be. Just turn it as far as it will go and it'll fit.

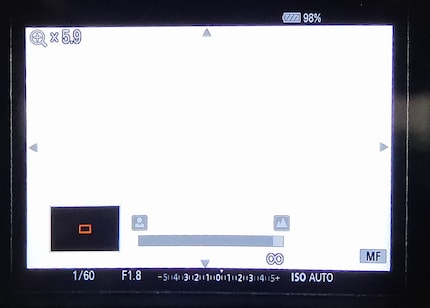
Example Sony FE 1.8/50: This lens has no stop, it spins. However, a scale is displayed in the viewfinder. The scale ends at infinity, but the actual maximum distance is - as with the two lenses above - just before infinity. In such a case, you need to memorise how far the scale is from the end for correct focusing.

My interest in IT and writing landed me in tech journalism early on (2000). I want to know how we can use technology without being used. Outside of the office, I’m a keen musician who makes up for lacking talent with excessive enthusiasm.
Practical solutions for everyday problems with technology, household hacks and much more.
Show all