
Quick photo tip: Cleverly convert to black and white
Today, black and white photos are usually created from colour photos. Instead of simply omitting the colour information, you can use it to create the monochrome image exactly the way you like it best.
Colour images can be converted to black and white in various ways. Let's assume that I want to decolourise this photo.
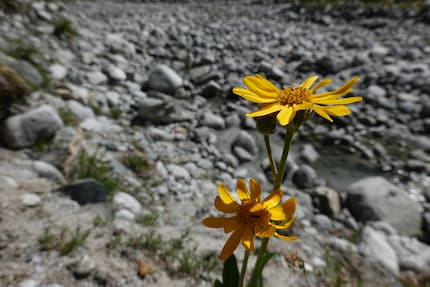
The simplest way, which almost every image editor can do, is to convert to greyscale. This simply discards the colour information. If I do this with the photo above, the following happens
.
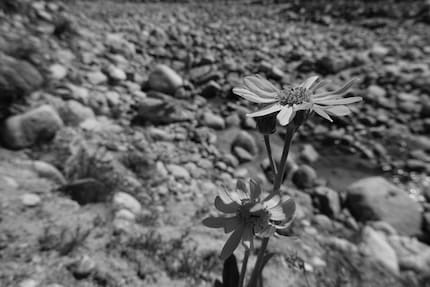
The problem with this image is obvious: the flower no longer stands out from the background. But that doesn't have to be the case, because I can weight the different colours differently when converting to black and white. In this black and white image, all yellow and orange tones are set lighter than the other colours.
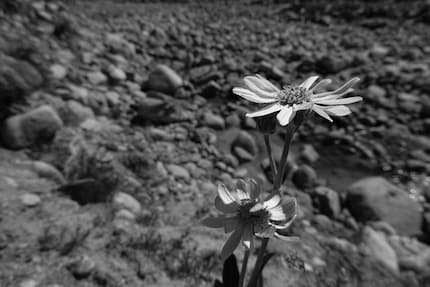
How does it work?
I edited the above image in Lightroom. In Develop mode, there is the section "HSL / Colour / B/W on "B/W". If you click on "B/W" there, the photo becomes monochrome. However, the colour information is still present in the background. You can therefore use the sliders to adjust the brightness of different colours.
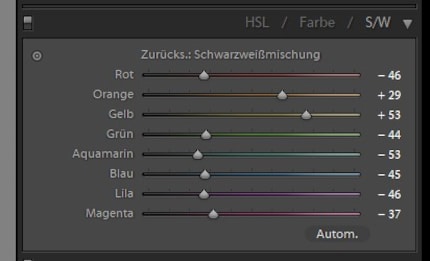
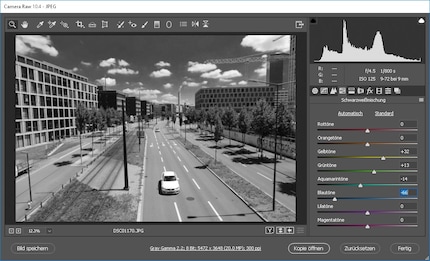
In Photoshop, you have similar options when you open a file in Camera Raw: "File -> Open as" menu, select "Camera Raw" as the file type and then open a RAW or JPEG image. Then change the basic settings to black and white, switch to the icon with the three bars and set the black and white mix.
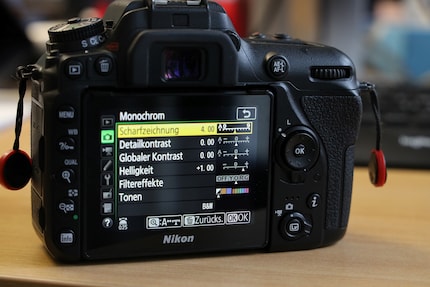
Practically all cameras can also produce black and white images directly, and you can often also weight the colour information. This is less flexible, but faster.
My interest in IT and writing landed me in tech journalism early on (2000). I want to know how we can use technology without being used. Outside of the office, I’m a keen musician who makes up for lacking talent with excessive enthusiasm.
Practical solutions for everyday problems with technology, household hacks and much more.
Show all