
This is how "simply" you can de-yellow your old console
Old consoles tend to acquire a nasty yellowish tinge over time. Fortunately, a few clever nerds discovered an antidote years ago. I tried it out on my Super Nintendo.
Does your old console look like it's been standing around in a smoky railway station pub for the last 30 years? Then it's time for a spring clean. Like many consoles and electronic devices from the 80s, my Super Nintendo has that typical grey plastic casing - except that the grey on my device has turned an ugly yellow. As this eyesore on my console shelf has been bothering me for some time, it's time for a little DIY with the supposed miracle cure: hydrogen peroxide. I'm going to try two methods: The so-called Retr0bright mixture and a ready-made version using a remedy from the hairdresser.
Ordering supplies with pitfalls
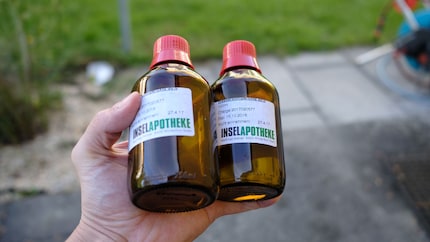
The first question arises with hydrogen peroxide, which is available in different strengths. Generally, 15% or 30% solutions are considered the most promising. According to the German retro forums, however, the stuff is apparently not easy to obtain if you don't want to end up on a terrorist list. However, I was lucky with the third pharmacy. Before that, I got a few weird looks and only a 3% version. But that won't get the yellow off your teeth, let alone turn an SNES grey again. "How much would you like?", the nice young lady in pharmacy number three asks me. "About half a litre," I reply. "Wow, I'll have to see if we still have that much," she says and disappears, presumably to report me to the authorities. A few minutes later, she returns with two bottles and no police. I buy another bag of baby food as a cover and say thank you.
The theory
The yellowing is due to the ABS (acrylonitrile butadiene styrene copolymer) plastic with an integrated flame retardant, which was popular at the time. If the plastic is exposed to UV rays, a chemical reaction occurs. The bromine molecules contained in the flame retardant become unstable and penetrate through the housing to the surface. This causes the plastic to turn yellow or even brown.
Luckily for us, the CBM Museum in Wuppertal, Germany, discovered in 2008 that there is a cure in the form of hydrogen peroxide. This news spread like wildfire, first via German forums and then via English Amiga forums. In the end, the Retr0bright community was born. Until the website was closed at the beginning of the year, it was dedicated to tips and tricks for restoring old electronic hardware.
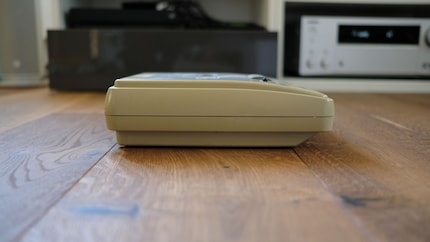
Over the years, a wide variety of formulations have been developed to reverse yellowing. There is no 100% solution. As not all plastic is exactly the same, it can happen that, for example, the underside of the console has remained grey, but the lid has a yellow tint. The varying material quality in combination with numerous mixtures make it difficult to find the perfect solution. However, the basic substance in all cases is hydrogen peroxide, which removes the protruding bromine molecules. In principle, the application is very simple. Apply hydrogen peroxide, place in the sun and wait. After a few hours, the yellow colour should have disappeared.
A hairy affair
Since the Retr0bright method is a bit cumbersome, a few amateur chemists (or real ones, who knows) have come up with a simple alternative. "40 Volume Creme Developer" is the name of the product used for hair colouring. I could order it online, but as hairdressing salons are a dime a dozen, I'm trying my luck offline.
When asked if I would like to cut my hair, I show the hairdresser round the corner the picture from the internet: "I'd need some chemical stuff like this". I get even more weird looks than in the pharmacy, but the lady knows immediately what I'm looking for: "You want Oxy." As we start discussing different strengths, I feel like I'm in a weed shop. "This product will make your hair two shades lighter." I try to apply this to my blonde SNES, but fail to realise what I'm looking for. "Just give me the strongest one you have," I tell her and now I really feel like I'm at the dealer. She disappears into the parlour and returns a moment later empty-handed: "What do you actually need this for?" she wants to know. I explain my nerdy request to her, although she doesn't look like she's ever seen an SNES in the wild. Despite her understanding, she doesn't want to hand me the product. They don't sell these things and I should order it online instead.
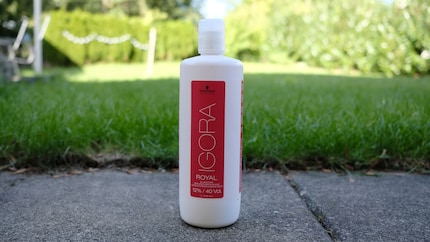
I'm not giving up that easily. 200 metres down the road is another hairdresser. The lady there doesn't speak perfect German, but she immediately understands what I mean. She also has the product I'm looking for in stock. Before she hands it to me, she briefly consults her boss, who is sitting outside the salon smoking and sipping coffee. For some reason, he is even more suspicious than the pharmacist and the first hairdresser. In broken German, he wants to know what the bottle is worth to me. I show him the internet prices, which start at CHF 10. "25 francs," he says. Yes, have I landed in a bazaar here? All right, I finally want to start bleaching and agree. He's already changed his mind again. He obviously thinks I want to start a rival business. Has he ever seen my hairstyle? I haven't. When he learns that I want to write an article, he offers to give me a bottle for free if I help him write one. He's giving up his salon and needs some kind of written confirmation. But because German is not his mother tongue, he needs help. What the hell, I think to myself, the main thing is that I get my stuff.
I only half understand what exactly he wants, but at a tariffs of one bottle per half hour, he can't expect much. However, he seems happy with the result and hands me a bottle of the hydrogen stuff at the end - it's practically empty. "Enough for two applications," says the boss. Either he secretly belongs to the Retro0bright community or he still thinks I want to get into the hair business. I shrug my shoulders and shake my mane goodbye.
Warning
Caution is advised when using this method. Both for the hardware and for the user. Hydrogen peroxide can make plastic brittle or wash out any imprints. It is also an acid that should never get into the eyes or on the skin.
In addition, a yellowish tinge may reappear in a few years. It is not a guarantee for eternity.
The test begins
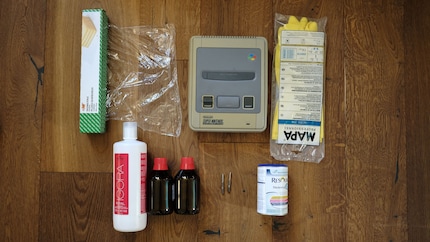
Now that I've finally got all the ingredients together, I'm ready to get started. The following equipment is needed:
- Hydrogen peroxide or hair product from the hairdresser
- Gloves
- Protective goggles
- Brush
- Clear film or container
- Cleaning alcohol or soap
- Screwdriver
- Thickening agent, xanthan gum
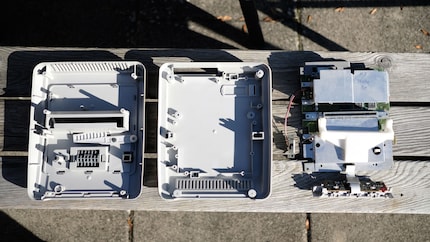
The very first thing you need to do is unscrew the console. Unfortunately, many devices like my SNES have special screws that also require special screwdrivers. You can get these online for around CHF 15. Alternatively, you can notch a slotted screwdriver. But that's too unreliable for me. Make a note of where which screws go, otherwise you may end up watching YouTube videos like me to find the exact position. We only need the plastic parts of the console - the electronics or screws would break during the process. Clean the parts thoroughly before the next step. Either with alcohol, in the washing machine or simply with soap.
I'll start with the Retr0Bright method. Depending on the amount of hydrogen peroxide, you could simply pour the liquid into a large container and place the housing parts in it. However, I only have just under half a litre and because I don't know exactly whether and how much I should dilute the acid, I choose the soaping method. To do this, you first have to thicken the hydrogen peroxide so that it can be applied with a brush. I got Resource from the pharmacy for this. I mix this with some soap (e.g. Vanish), it should foam up nicely. If you mix the things in a bottle, you have to be extremely careful when opening it that nothing splashes in your face - so wear protective goggles and gloves when mixing and applying
My mixture looks like this:
- 200 ml hydrogen peroxide 30 %
- two measuring cups of Vanish
- at least two tablespoons of Resource
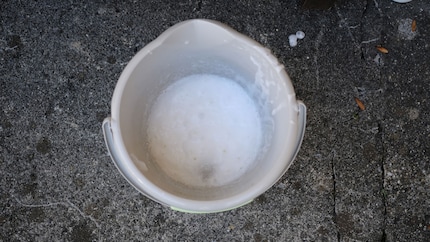
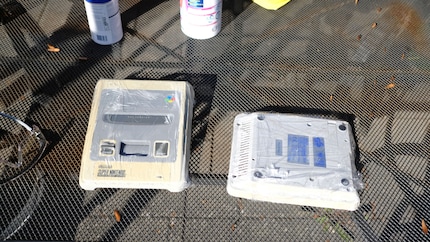
The mixture should then be left to rest for about half an hour until it is really frothy. You can then apply it generously to the plastic parts with a brush. Then wrap everything in cling film. This prevents the hydrogen peroxide from evaporating, which can cause stains.
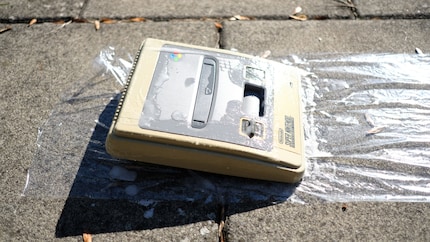
I treat the lower part of my SNES with the hairdresser's mixture. It's the finished version of the Retr0bright mixture, so to speak. I also applied a thick layer of this and then wrapped it in cling film. Then it's time to wait. Some say a few hours, others say a day. As I carried out the project in September, the sun doesn't shine as much. For comparison: when the sun is at its highest on 21 June, the global radiation reaches over 1000 W/m2. In autumn, it is only around 600 W/m2.
And did it work?
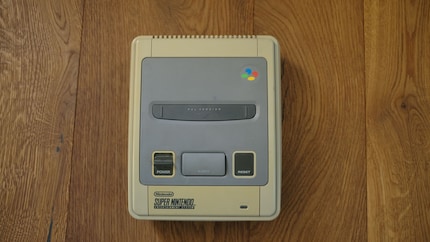
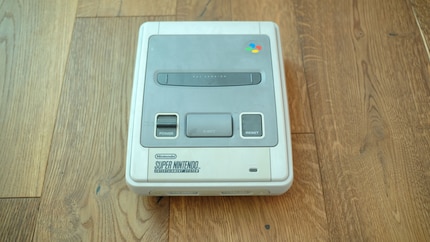
After around four hours in the sun, I removed the transparent film and carefully washed off the SNES cases. You can see the result immediately: instead of the ugly nicotine yellow, I can once again see the light SNES grey. The rectangular area where it says Super Nintendo is still a little yellowish, but much prettier than before the treatment. Both methods worked. However, the Retr0bright variant was a little more thorough. However, the plastic suffered more. You can see quite clearly how unevenly I applied the mixture. As I didn't wait until it was foamy, it probably spread less evenly. Despite this small blemish, I'm happy with the result. My SNES looks really healthy again. Too bad I also forgot to remove the front panel - next time.
As a child, I wasn't allowed to have any consoles. It was only with the arrival of the family's 486 PC that the magical world of gaming opened up to me. Today, I'm overcompensating accordingly. Only a lack of time and money prevents me from trying out every game there is and decorating my shelf with rare retro consoles.
Practical solutions for everyday problems with technology, household hacks and much more.
Show all