
Background information
OLED vs. QLED: battle of the TV technologies
by Luca Fontana
To explain how the background lighting of a TV works, I will not accept half measures. If need be, I’ll open up the thing up. And that’s exactly what happened during our teardown focus week.
It’s focus week and we’re tearing stuff down! Or rather, I'm taking stuff apart and trying to put the goings-on to paper. A tricky task that doesn’t quite do the real-life experience justice. But when do you ever get the chance to look at the insides of expensive electronic devices and learn something about it?
In my case, the electronic device is a television set.

How does a TV work? To put it in a nutshell: it’s a black box with a glass front – the panel. The innards consist of millions of small cells, or pixels. The TV processor supplies these pixels with information about what they’re supposed to represent. The pixels are illuminated by LEDs – the backlight. The whole thing then produces the picture.
In this teardown article, I explain why the most important part of the interaction between pixels, processor and backlight is, surprisingly, the latter. At least that’s the case with LCD televisions.
Let’s do this!
I’m excited. TVs are extremely fascinating but complex. I've never opened up one myself. That’s why I don’t know where exactly the LEDs for the backlight are located. I guess I’ll just have to find out. Here’s my plan: first, I’ll remove the back cover of the TV. Then I’ll decide on my next step. Someway or another, I’m bound to make my way to the backlight LEDs.

What I'm dismantling is a Sony XG9005 – a full array local dimming TV. That's the backlight technology that delivers the best picture you can get. But I'll get to that later. First, I remove the cover screw by screw.

Two large and two small circuit boards appear. The orange circuit board supplies the TV with electricity.
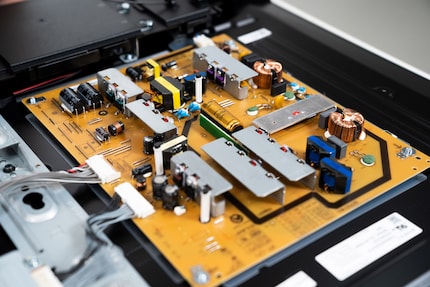
The large green board is the mainboard. The brains, so to speak. And it’s where two TV processors are located. They’re the ones in charge of suppressing unwanted image noise, smoothing edges and intensifying colours. In addition, they upscale HD content by adding missing pixels to reach UHD resolution.
The processors are equally important for the operating system – the Smart TV. They make sure it runs smoothly and reacts promptly to commands.

From the mainboard, ribbon cables lead to the two small boards. My workmate Kevin, a computing expert extraordinaire, helps me find out what their job is.
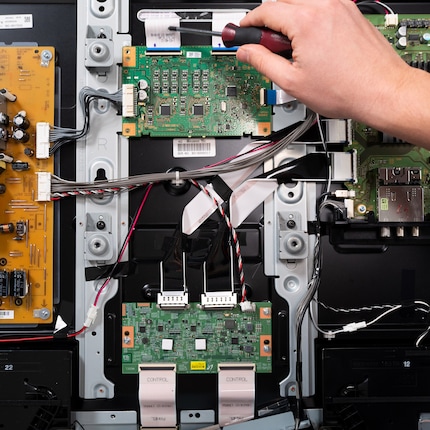
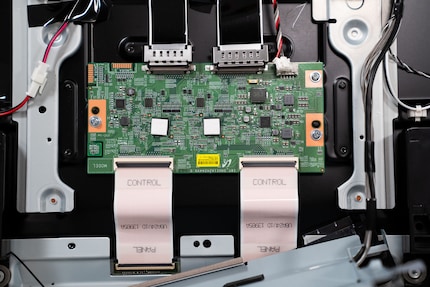
The lower circuit board works similarly to a graphics card: it receives processed image information from the mainboard, processes it and then forwards the new information to the pixels in the LCD panel. The wide, black ribbon cables ensure that the large data packets are quickly sent from the mainboard to the LCD panel via the «graphics card».
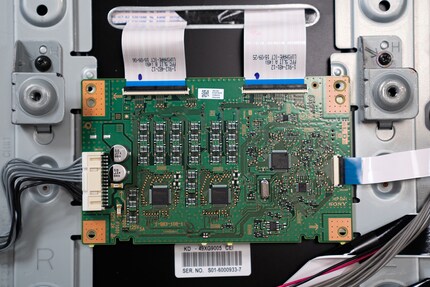
The upper board is also connected to the mainboard by a ribbon cable. The ribbon cables there are narrower. Narrower means less data bandwidth. This doesn’t come as a surprise. After all, the image information flowing through these cables isn’t complex. It’s for the backlight LEDs, which, in turn, light up the TV picture. In other words: this is where the backlight LEDs are told when they should light up.
And those are the LEDs I'm trying to get to in this teardown.
My only problem: the cover’s gone. In the meantime, I’ve also unscrewed all the circuit boards. But I can't find any other screws or access that would allow me to remove the rear panel.
Dammit.

I’m not giving up. I’ve got to give it a go from the other side of the panel.
First, I try to remove the aluminium frame. This might allow me to remove the glass from the panel. How hard can it be?
Very.
The thing must be glued on. Or interlocked with the LCD panel in some other way.

I keep on trying. In the end, I at least manage to remove the upper side of the aluminium frame. It’s enough to rip out the glass. This requires more brute force than I’m comfortable with. But time is running out. The shoot has to be today. And it's already late afternoon.
There’s no turning back now. I’ll have to see it through to the end.

Progress! The glass has gone. Now it's time to have a go at the diffuser sheets. The sheets enhance the backlight und evenly distribute it over the whole TV surface.
The LEDs can’t be far now...
Finally! There they are, those background LEDs.

A white protective foil covers the LEDs. Away with it!
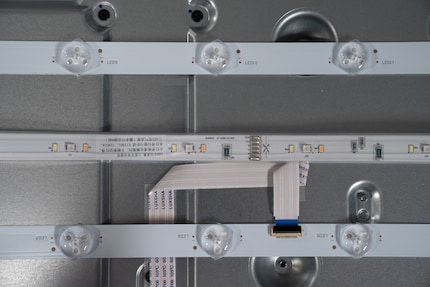
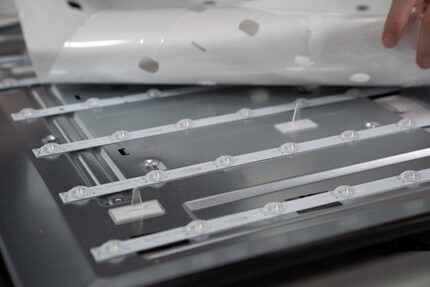
Ta-dah! LED strips! At first glance, they look very much like the ones you’d find in a regular shop. Like the Hue Lightstrips by Philips.
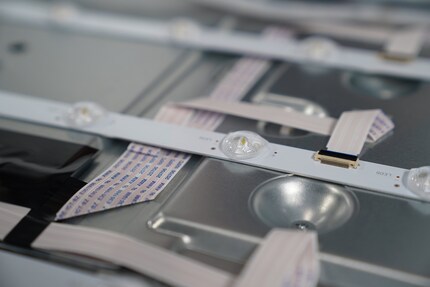
Then I discover the ribbon cables. They’re coming in from the other side of the panel; from the small green circuit board at the top. Let me recap: the green panel processes the information coming from the mainboard. That information tells each LED when to light up.

I count 90 «LED domes» in total. Each dome features three LEDs. In total, the Sony TV has 270 LED lights.
And they do an important job.
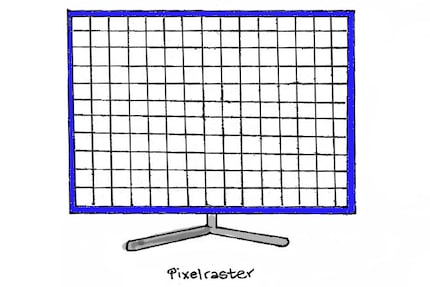
An LCD consists of pixels arranged like squares on a chessboard or, in this case, a pixel grid. The number of pixels on the grid determines the resolution. Ultra HD televisions have just over eight million pixels. Mostly in 16:9 format. So 3840×2160 pixels in total.
Contrast is the maximum difference between the brightest and darkest pixel on the screen. So you could roughly say that the brighter the pixel can shine, the better. Because this results in the widest possible span between light and dark.
How bright a pixel can shine depends on the backlight. Ironically, it also depends on how dark the darkest black is. Because of their technology, LCD televisions are incapable of producing black.
Not «true» black that is.
Picture the following: bright spotlights against a dark background. Ideally, only those LCD pixels representing the spotlights would shine with perfect accuracy; the remaining pixels would be switched off. Like a lamp. Everything around the spotlights would be black.
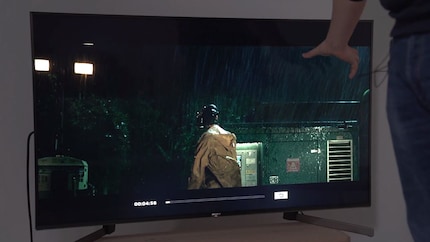
If there were a separate LED for each of the eight million pixels, it would be easy to switch them on and off with perfect accuracy. However, those eight million pixels are represented by a maximum of a couple of hundred LEDs. In the case of the Sony XG9005 we unscrewed, we’re talking about 270 lamps. This leads to grouping, in which one LED shines for several pixels.
In the case of the spotlight scene, this means: there are pixels that should be displaying black but are illuminated by the LED behind them. To ensure that these pixels stay black, light crystals and polarisation filters seal off the pixel from the LED’s light.
And there you have it: black.
This sounds good in theory. But there’s a catch. In practice, this doesn’t work one hundred per cent. This is due to physical factors. A tiny bit of light always penetrates the LCD pixel. So what you see in the end is not black, but a very dark grey.
And that’s what I mean when I talk about LCD black that isn’t «true» black.
This is not ideal in terms of contrast. That's why LCD TV manufacturers try to reach maximum brightness and deepest black in two ways:
Let’s take a closer look at that.
Backlight architecture influences the maximum brightness and determines how well said brightness can be controlled for each pixel. There are usually three different architectures for LCD televisions.
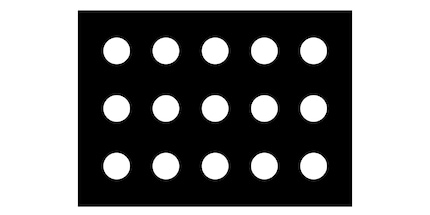
Cheap LCD TVs are equipped with direct LED lighting, or what we call «Basic LED» in our digitec stores. The production of these TVs is cheaper because they use just a few LED strips with a handful of LEDs roughly arranged behind the panel. It’s just about enough to provide all pixels with enough light. This type of LCD television is not particularly bright.
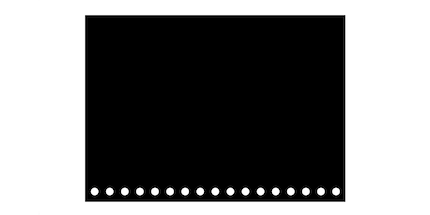
The production of Edge LED TVs is somewhat more expensive. Edge televisions cram their LEDs into a frame – hence the name «Edge». At the same time, the number of LEDs increases, resulting in brighter displays.
The best backlight is delivered by full array LED. Just like direct LED technology, the light-emitting diodes are located directly behind the LCD. The difference is that there are more than just a few LEDs. More like one to five hundred, depending on the manufacturer and model.
In fact, at this year's IFA in Berlin I saw full array panels with up to a thousand LEDs.
To sum up: The fuller the LED coverage, the better the maximum brightness and the ability to determine the brightness per pixel as well as the connected contrast values. Full array offers the largest LED coverage. Despite the lateral LED arrangement, Edge LED comes second in terms of coverage. Direct LED comes in last.
The dimming technology affects the maximum darkness. Let me recap: LCD pixels that are supposed to display black block out the backlight. However, they never manage to do this perfectly. This leaves us with a dark grey. But what we want is black. Three dimming technologies of varying quality help out.
Dimming means that the LEDs dim the backlight for dark images. And that allows LCD pixels to better block out the light. This means dark grey is closer to black, but it also means that parts of the image that are supposed to shine brightly suffer. Like in the example I gave with the spotlights against a dark background. That's why you'll only find dimming in cheap LCD televisions.
Local dimming is much better. The technology is mainly found in televisions with Edge LED. Essentially, LEDs emit light near bright areas of the image, while they dim or switch off completely in dark areas of the image – «local dimming» in other words. But with Edge LEDs, the light-emitting diodes shine into the picture sideways. This can lead to visible columns of light against a dark background.
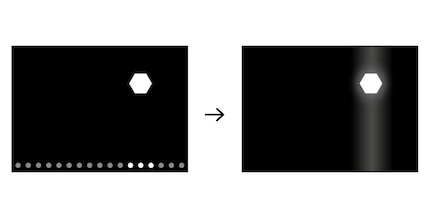
The best combination is the backlight architecture full array with local dimming. This is what you call full array local dimming (FALD). The technology controls LEDs with great precision and locally dims them or switches them off: whilst the spotlight pixels in the spotlight example shine brightly, the areas around them remain dark.
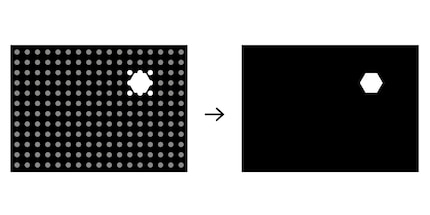
The following applies: the more LEDs there are in the full array architecture, the more dimming zones are theoretically available. The more dimming zones there are, the more precise the spot-on illumination of each individual pixel. Depending on the full array TV, you’re looking at several dozen dimming zones.
Or even hundreds.
I write about technology as if it were cinema, and about films as if they were real life. Between bits and blockbusters, I’m after stories that move people, not just generate clicks. And yes – sometimes I listen to film scores louder than I probably should.
Interesting facts about products, behind-the-scenes looks at manufacturers and deep-dives on interesting people.
Show all