
Guide
Seven Lightroom tips you need to know
by David Lee

Sometimes it is necessary to correct certain parts of the image separately. If you work in Lightroom, you can do this directly there. The most difficult thing is to select the desired area correctly.
In Lightroom, image optimisations are usually applied to the entire photo. Many users switch to Photoshop (or something similar like Affinity Photo) to edit individual areas. However, it is also possible in Lightroom to select certain settings for only part of the image - i.e. to make a local correction. There are several tools available for this. This article is about the correction brush.
Local corrections are not a panacea. I rarely use them, and not just because I'm lazy. It quickly looks unnatural if a certain part of the image is edited completely differently to the rest. But sometimes it's worth the effort. Here's a simple example.
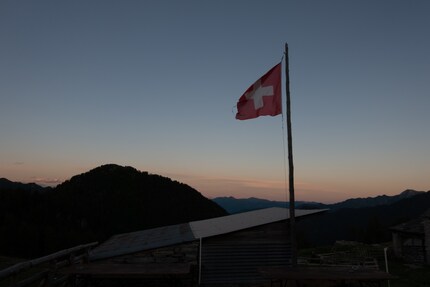
This image seems too dark and too dull for me. First step: I brighten it up by increasing the exposure.
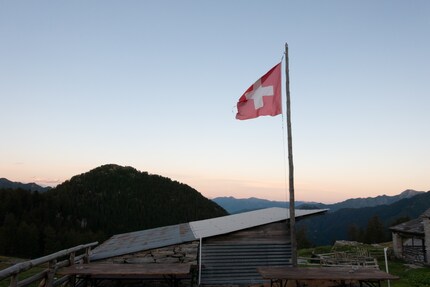
Now I have the problem that the ugly foreground is much more noticeable. So I lower the depths. But the roof of the shed remains bright.
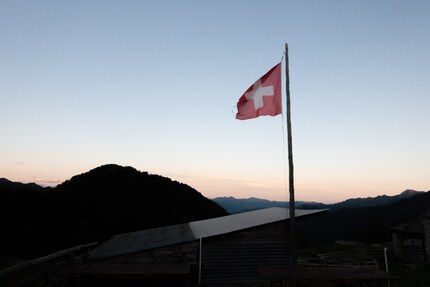
I can darken the entire foreground by turning the black slider and the "Dark midtones" all the way down. But then the flag is also far too dark. And it stays that way even if I lighten the red tones in the corresponding colour channel.

To lighten just the flag, I have to edit it separately. A typical case for the correction brush.
For a local correction, you must first select the area you want to edit. To do this, select the tool on the far right, the correction brush (framed in red). An area with various settings will open underneath, which only apply to the area that is masked with the brush.
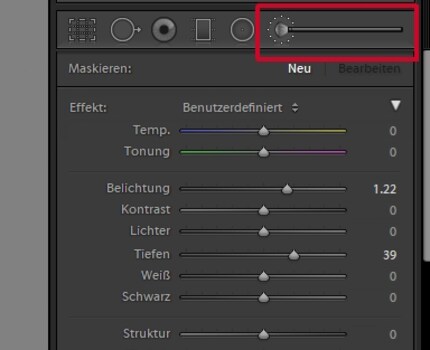
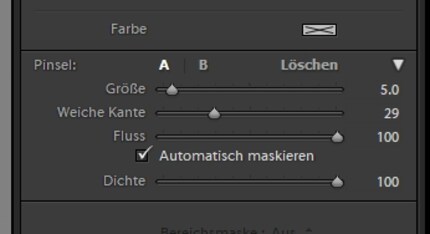
Scroll all the way down in this area and select a suitable size and soft edge. You can also do this directly in the image using the mouse scroll wheel. For the edge, press the Shift key at the same time.
I would initially set the flow and density to 100 per cent. This ensures that the area is fully masked and not just a little bit.
"Automatic masking" is particularly important. If this box is ticked, you don't have to hit the edges exactly. This is because Lightroom recognises where the edges are based on the colour and brightness values.
To see what you are masking, tick the box under the image "Show overlay for selected mask" or press the letter O.
Despite the help provided by automatic masking, you will only be able to mask an area cleanly if you zoom into the image. Normally, the easiest thing in the world is to zoom into Lightroom and move the image section. Just click into the image to zoom and drag and drop to move. But if a tool such as the correction brush is active, this is not possible. The solution: Hold down the space bar. This will temporarily activate the zoom and move tool.
Pressing the Alt key changes the mouse pointer from a plus to a minus. In this case, the brush does not add further areas, but deletes parts of the existing masking. This is necessary if you have overshot the mark somewhere. You can set the size of the eraser brush separately - in the same way as the normal correction brush.
If you need to draw an exactly horizontal or vertical line with the brush, you can do this by holding down the Shift key.
Once the area is correctly selected, you can adjust the settings as you wish. I have only increased the exposure here. Then press the "Done" button at the bottom. If you click on the correction brush tool again, a grey dot appears in the flag. If I press this, I can edit both the selection and the settings.
For the final result, I lowered the highlights for the whole image and increased the dynamic range. Now I can finally sing the national anthem with my hand on my puffy chest.

My interest in IT and writing landed me in tech journalism early on (2000). I want to know how we can use technology without being used. Outside of the office, I’m a keen musician who makes up for lacking talent with excessive enthusiasm.
Practical solutions for everyday problems with technology, household hacks and much more.
Show all