
Guide
Lightroom: Local adjustments with the correction brush
by David Lee

If you want to use Adobe Photoshop Lightroom efficiently, you need to know at least the following seven things.
Have you imported your images into Lightroom and started working with them? But you're still not getting anywhere? Then you've come to the right place. The following tricks will help you get started.
If you have adjusted a slider and want to set it back to zero, you don't need to move it exactly to the zero point in the centre. You can simply double-click on it. Double-clicking on the label (e.g. "Exposure") works.
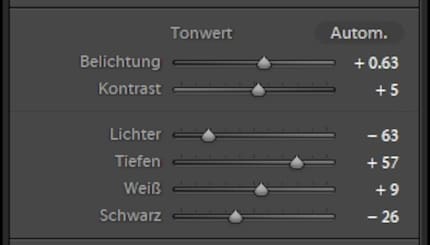
The double-click can also be applied to the entire area: Clicking on "Tonal value" in the screen above resets all the values shown.
The default setting of a slider does not necessarily have to be zero. For example, the Lightroom factory settings for sharpening are Amount 40, Radius 1.0, Details 25 and Mask 0. Because you can activate these values by double-clicking, you don't need to know them by heart.
When viewing a photo in Develop mode, you will first see the entire image. Click into the image to enlarge a section. Clicking again shows the whole image again. But what if you prefer a different zoom level?
In the navigator you can see the different zoom levels of Lightroom. You can select one here.
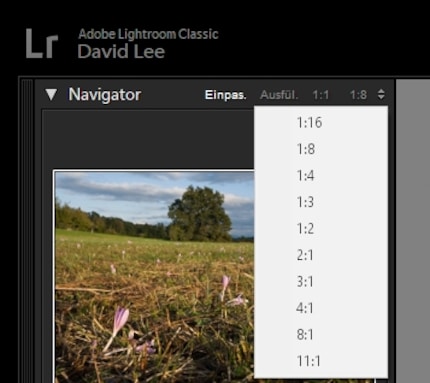
Doing this every time would be cumbersome. However, Lightroom remembers which magnification you last used and returns to it when you click on the image.
Alternatively, you can also scroll with the mouse wheel while holding down the Ctrl key. This scrolls through the various zoom levels. Here too, Lightroom remembers what you last used.
In the library, you can display the grid so that you can select multiple images. You can do this by holding down the Ctrl or Shift key. In this screenshot, images 1 to 4 are selected, recognisable by the lighter background.
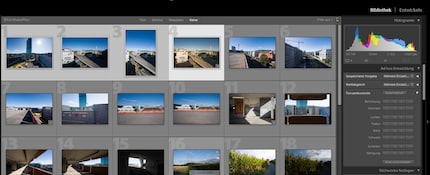
If you now switch to development mode, everything you do there will be applied to the selected images, even though you only see one image. Such multiple applications therefore often happen unintentionally. Therefore, press F6 to show the thumbnails at the bottom.
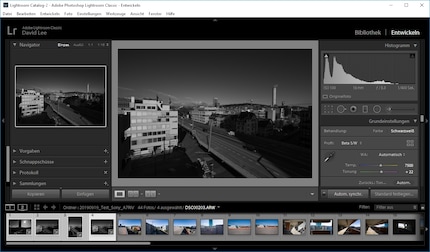
With the multiple image selection, you can also transfer the settings of an already edited photo to others. The image you select first is the image whose settings are transferred to the others. In the screenshot above, this is image number 4, whose background is slightly lighter than the other selected photos. A small plus-minus symbol indicates that this image has already been edited.
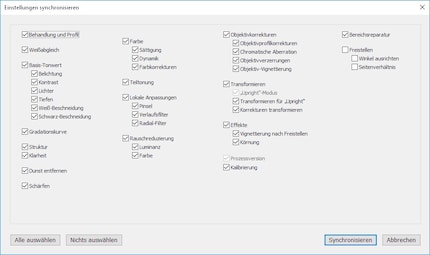
Now click on the "Synchronise settings" button, which is unfortunately only called "Sync settings" - to be found at the bottom right. In the following dialogue window, you can exclude certain settings from the transfer if required.
Colour or black and white? Square or landscape format? Bright or desaturated? I can rarely decide immediately and then create several versions of the same image. This allows me to pursue different ideas in parallel and see which one really works.
Click on the image with the right mouse button and select "Create virtual copy". The image now appears twice in the grid, labelled "1 of 2" and "2 of 2". You can delete a virtual copy again using the "Remove photo" menu command.
This is called virtual because the copies access the same RAW file. This is never changed directly. Lightroom saves the settings in an .xmp file and/or in the internal database.
If you have two screens connected to your PC, the secondary display comes in handy. Pressing the F11 key fills the second screen with an alternative view. For example, you can always view the single image and grid at the same time. Or magnification and overall image.

There may be something you need to change for virtually every image. In this case, you can change the Adobe default settings. The image will then be set to a different value when it is opened. Many users find that the standard settings are too dull and always increase the contrast and saturation a little anyway. For me, it's the lens correction that I have to activate every time.
So: Make changes to a "virgin" image, select the menu command "Develop → Set default settings" and confirm with "Update to current settings".
When you click on "Reset", Lightroom will revert to your own default settings. If you do want to reset to the Adobe settings, press the Shift key while clicking on "Reset".
The default settings only apply to the camera you are using.
My interest in IT and writing landed me in tech journalism early on (2000). I want to know how we can use technology without being used. Outside of the office, I’m a keen musician who makes up for lacking talent with excessive enthusiasm.
Practical solutions for everyday problems with technology, household hacks and much more.
Show all