
Guide
Windows tip: Folder Options from A to Z
by Florian Bodoky
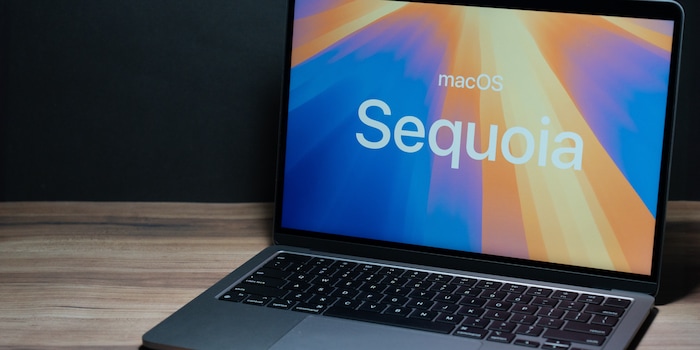
If you’ve recently switched from Windows to MacOS, you’ll have a whole host of unfamiliar things to get used to. Where do you find this? Where do you change the settings for that? What should you do if Mac randomly stops working? Here are ten common pitfalls experienced by MacOS newbies and how to avoid them.
In this article, I’ll sum up the typical difficulties faced by MacOS newbies and show you how to get around them. Some of them are really straightforward, but if you’ve only recently switched to Mac, they can drive you bananas.
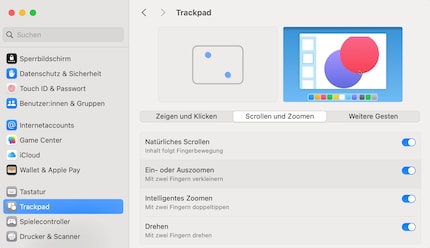
Note: this is the first part of a how-to guide aimed at people who’re new to MacOS. It contains basic tips designed to make transitioning to Mac easier. If you’re a long-time user of the operating system, some of the advice here might seem trivial to you.The trackpad on a MacBook has a few quirks specific to Apple devices. Minor things that can be seriously annoying during day-to-day use if you’ve just made the switch to Mac. These include scrolling, the secondary click and the tap-to-click option.
If you use your mouse wheel or trackpad to scroll, the content on your screen moves in the opposite direction. To avoid this, you need to activate Natural Scrolling. You can do this by clicking on the Apple icon at the top left, then selecting System Settings, then Trackpad. Once you’ve found the Scroll and Zoom tab, toggle Natural Scrolling on.
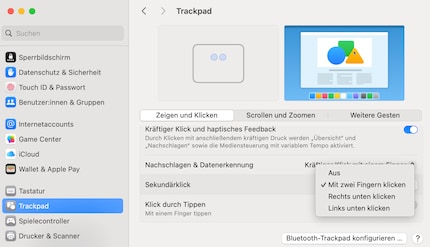
You’ll find the Secondary Click menu item in the same menu, under the Point & Click tab. If you’re still used to a trackpad or a mouse with several buttons, you might be missing a good, old-fashioned right-click function. To return to right-clicking, go to Secondary Click and change «Click with two fingers» to «Click in bottom right corner».
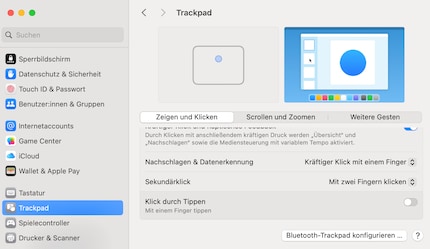
On MacOS, tapping with your finger initiates a click by default. If this bugs you, you can deactivate tap-to-click under Point & Click. Once you do that, only a physical click will be registered as such.
In Windows, if you want to move two windows next to each other, you just drag them to the side. They then snap into place automatically, with each covering half of the screen by default. One on the left, one on the right. Or one on the top, one on the bottom. On MacOS, it’s a different story. To arrange your windows, you need to move your cursor over the green circle on the top left of your screen. This reveals the Move & Resize and Fill & Arrange options, which allow you to set the windows to your preferences. If you think a Windows-style snap mechanism’s going to kick in, think again.
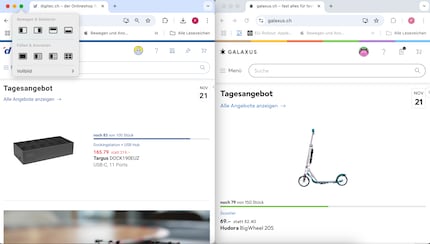
If you prefer having the Windows snap, I’d recommend getting the app Magnet. However, it’ll cost you 4.90 francs.
On MacOS, you can choose which folders, functions and app content on your Mac (if any) you want to be automatically saved to iCloud and synchronised with other Apple devices. In addition to the typical advantage of the Cloud – namely that your data would be recoverable if your SSD were to break – you can also access your folders, files and programs from any Apple device. At least if those devices are logged in with the same Apple ID. You can retrieve your data using the Files app or the web version of iCloud.
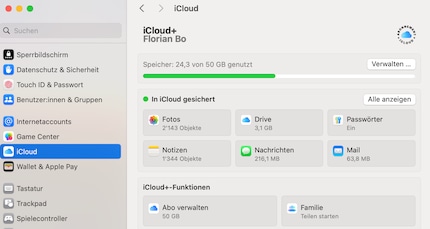
Some people, however, aren’t that keen on the Cloud. Or they have a storage issue – namely, that Apple only provides five gigabytes of storage space in the free version of iCloud. If you don’t want to use the Cloud, you can deactivate backup and synchronisation. You can either turn it off completely or disable it for individual apps and folders.
Here’s what to do if you don’t want to upload anything whatsoever to the Cloud, be it apps, folders or other data. Use the Apple icon to access your settings, then click iCloud. After that, click Drive and use the slider to deactivate «Sync this Mac». Once you do this, none of your data will go to the Cloud.
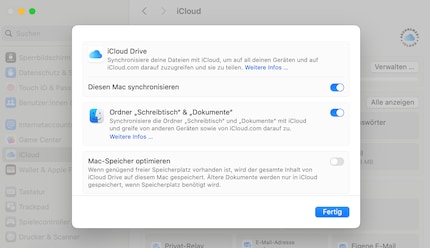
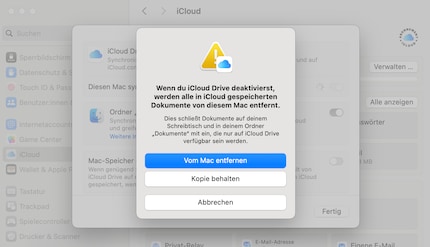
Watch out! If you turn off synchronisation, all the data already stored on your iCloud Drive will be deleted on your Mac. To prevent this, click the «Keep a copy» option in the message that pops up.
If you don’t have enough Cloud storage or simply don’t want to synchronise your folders, go back to the Drive button. Click on it and deactivate the slider in the Desktop & Documents menu.

Watch out! Content that’s already been uploaded to your iCloud Drive will only remain available there. It’ll be deleted from your Mac. New content that you save to your desktop or in your Documents folder will no longer be uploaded to your iCloud Drive.
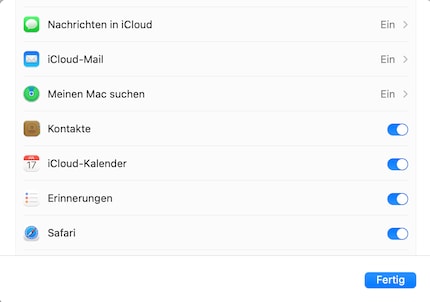
Under «Saved to iCloud» in the same menu, you’ll find all MacOS native apps being synchronised via iCloud. Simply click on «Saved to iCloud», then «See all». Here, you can decide exactly which apps should be backed up and synchronised to iCloud and which ones shouldn’t. For instance, you could decide to synchronise your calendar events but not your Safari browser history. To do that, simply toggle off the relevant switches or select the Off option.
On Windows systems, it’s undeniably convenient that each individual drive is assigned a letter and displayed in File Explorer. If you want, you can even create a desktop shortcut for them. You can do this on MacOS too, but unlike Windows, it doesn’t work via drag and drop. That’s because the Finder doesn’t display drives.
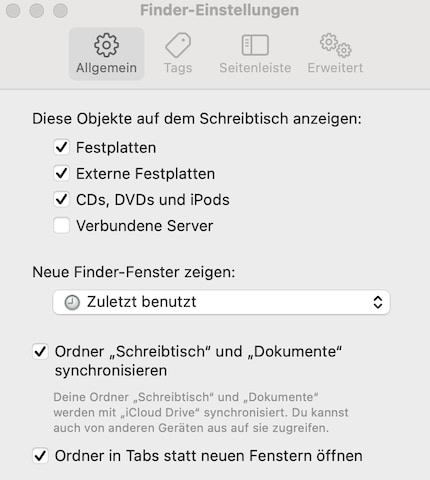
However, you can change this by opening the Finder, going to the taskbar at the top of the page and clicking Finder, then Preferences. Under the General tab at the top, you’ll see the option to «Show these items on the desktop». Tick the boxes next to the things you want to display, whether it’s your Mac’s hard disk, connected drives or even iPods and connected servers. After that, the drives you’ve selected will appear on the desktop and you’ll have a Windows-style file browser.
Generally, installing programs is super straightforward. You can either open the App Store and search for the app you want, or download it from the internet. Just click on «Download» in the App Store and you’re ready to rock.
When you download software from the internet, it’s saved in your Downloads folder by default. You just double-click there, and it’ll do its thing. Unlike on Windows, you can’t influence the installation path or closely monitor the setup details. Instead, you can check its progress on the displayed loading bar. When it comes to the installation path, you only get to decide whether your new software should appear in the Launchpad or not. This shows all your installed programs at a glance.
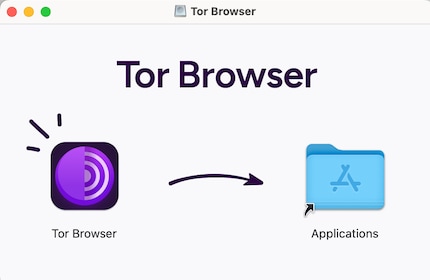
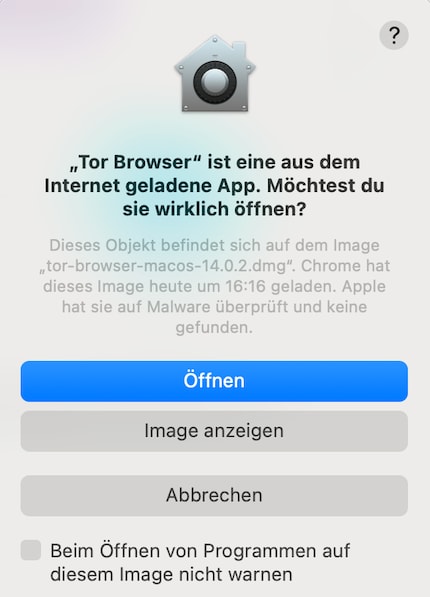
If you’ve downloaded the program from the internet, you’ll be told the source of the file and asked whether you’re sure you want to install the program. You’ll always be asked this, no matter how reputable the source is.
However, MacOS might also refuse to install the software. This usually happens when a program comes from an unverified developer. In cases like these, MacOS only offers you the opportunity to end the setup in a bid to get rid of the file immediately.
Even so, you can still install it. Just make sure the program really is legit before you do. Hold down the Control button as you’re opening the program. MacOS will then ask if you really want to launch the app. Click «Yes». After that, you’ll be able to open it with a double-click.
Apple generally makes it really easy for you to uninstall programs. You just open the Finder, click Applications, right-click (or click with two fingers) on the app you want to delete and click Move to Trash. If you right-click on the recycle bin, you can empty it. Job done.
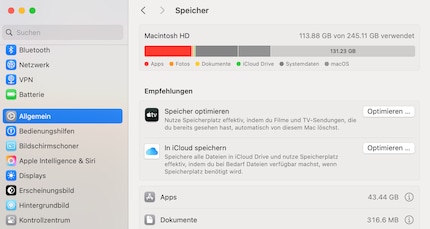
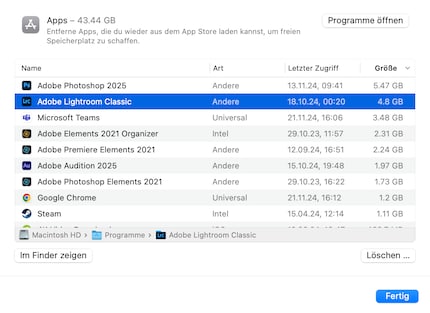
There is, however, another method. Go to Settings, select General, then Storage. There, you’ll see specific numbers and a multicoloured bar. This indicator tells you which of your programs are taking up a lot of storage space. If you click on the little «i» symbol next to the Apps menu item, you’ll see a full list of apps. Select the ones you don’t want and click Delete.
The Dock has a core task on your Mac. Unlike on Windows, there are no desktop shortcuts to your most important programs. What you can do, however, is put them in the Dock at the bottom of the screen. To do this, open the new program once. You’ll be able to see the program icon (in this case, the messaging app Signal) next to the vertical line in the Dock at the bottom of the screen. Set programs are displayed before this line.
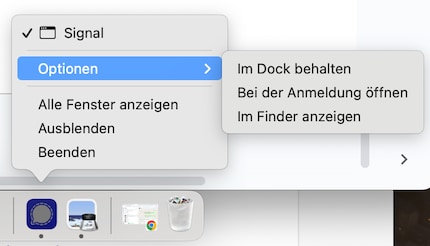
After right-clicking on the program icon, go to Options, then click «Keep in Dock». Once you’ve done that, the app will continue to be displayed there, so you won’t have to go looking for it whenever you want to use it. You can clear apps out of the Dock by using the same method, clicking «Remove from Dock». If you activate «Open at Login», the program will launch automatically each time you start up your Mac.
Side note: if the Dock or its position gets on your nerves, right-clicking on an empty space in the Dock allows you to move it to the left or right, or hide it. If you hide the Dock, it’ll only be displayed if you move the mouse pointer to its location at the bottom edge of the screen.
Looking for another program that’s not in the Dock? Simply hit the Command key and the space bar to use the Spotlight search feature.
I've been tinkering with digital networks ever since I found out how to activate both telephone channels on the ISDN card for greater bandwidth. As for the analogue variety, I've been doing that since I learned to talk. Though Winterthur is my adoptive home city, my heart still bleeds red and blue.