
Guide
Photoshop: Facing the final boss
by David Lee

Now I'm learning Photoshop. To start with, I'm tackling three things that should be very simple. But I still can't do them. Is it me or Photoshop?
I don't get on well with Photoshop. This is due to the enormous complexity of the software, but also because I've never taken the time to acquire the relevant expertise. I'm changing that now - at least that's the plan.
I'm starting with things that sound easy but that I've stumbled over several times. Despite this, I have so far resisted watching a ten-minute tutorial.
Something I often need for my work are so-called 100 per cent crops. To show and judge the image quality of a camera or lens, it is not enough to look at the photo in reduced size on the screen. The best assessment is provided by the 100 per cent section: here, one pixel on the original image corresponds exactly to one pixel on the screen. To do this, I have to crop a part of the image to a specific pixel size, for example 600×400 pixels.
It seems quite simple. Activate the cropping tool, select "B & H resolution" in the tool options at the top and enter the desired width and height in pixels in the corresponding fields.
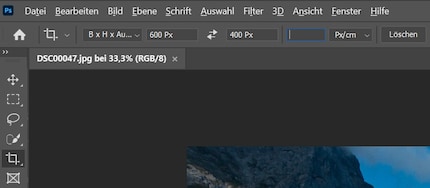
The cropped image is actually 600×400 pixels in size, but Photoshop does not ensure that this is the size of the original crop. In other words, Photoshop accepts any size as a crop and then converts it to 600x400 pixels. But I need a section that is already 600x400 pixels in the original size.
The solution: I have to change the tool. I can use the selection rectangle tool. There I can select the "Fixed size" type, enter my desired number of pixels and then I have a selection rectangle that always remains the same size, but which I can move around in the image. As soon as the selection is correct, I select the menu command "Image > Crop"

Since I used to know how to do this, I figured it out relatively quickly. Without googling and lengthy YouTube tutorials.
In Affinity Photo, it works as normal with the cropping tool: Enter the desired width and height in "Unrestricted" mode, move the section to the right place, enter. That's it.
This is probably something that everyone needs from time to time. An arrow that draws attention to a specific detail.
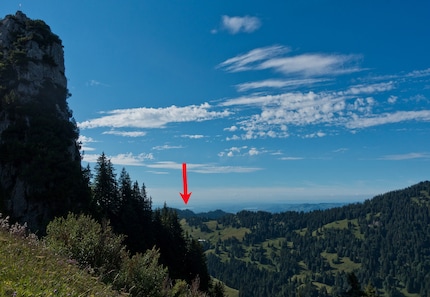
I create arrows in Photoshop with the Line Drawer tool. I turn a line into an arrow by activating the arrowheads in the tool options. As the arrow should only point in one direction, I select "End". The area is red, as is the contour. If I now draw a line with the tool, a red arrow appears.
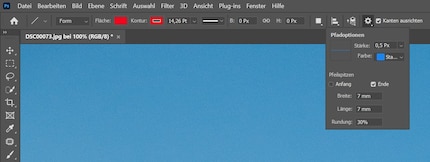
And what follows is a nice example of why I can't get along with Photoshop.
In Photoshop 2020, only the area is defined in red, the outline remains empty. The arrow size can be defined in per cent. In Photoshop 2021, which has been out since mid-October 2020, both the area and the outline must be red. Otherwise, only the triangle of the arrow is visible, the line is not. Percentage values are no longer accepted. I have to define the size in centimetres, millimetres or pixels. In addition, the width of the shape no longer indicates the thickness of the arrow, but the horizontal extent of the shape.
In cases like this, I ask myself why what always worked before suddenly no longer works.
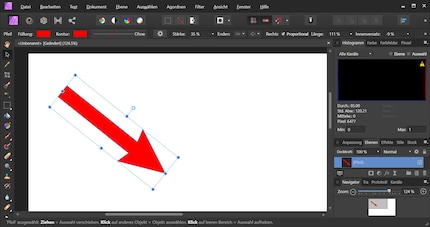
In Affinity Photo, I was able to create the arrow to my complete satisfaction within ten seconds without any prior knowledge. As I correctly surmised, there are other shapes in the "Heart" tool, including the arrow. This is initially a double arrow, but this can be changed later. Just like everything else, including the shape of the arrowhead. In Photoshop, this is only possible if I convert the arrow into a path. Then I have to painstakingly adjust everything by hand. Affinity Photo is better. Adobe InDesign too.
I want to export an image as a JPEG with certain settings: Image quality 85 per cent, full HD resolution (reduce image height to 1080 pixels). The image should be saved in the same folder as the original document, with the file suffix "-small". All this should happen fully automatically without me having to make these settings each time.
This is no problem at all in Lightroom. There are export presets. You define in advance how you want an image to be exported and give the preset a name such as "reduced size". From then on, you simply select the preset from the menu and the image is exported. In the right location, with the right name, in the right size and quality.
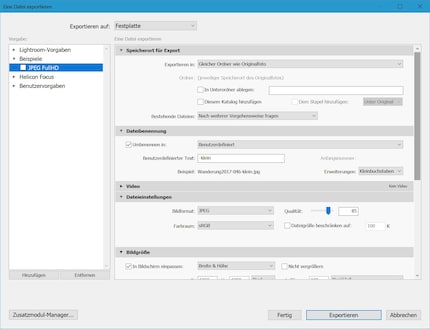
For some unknown reason, Photoshop doesn't have this. There is the "Quick Export" function, which exports the image according to the presets without further enquiry. But I can't save to the same folder in these presets. I either have to select the storage location manually each time or Photoshop creates a subfolder. At least I can say that the save dialogue should always open with the path of the current document. So I only need to press Enter.
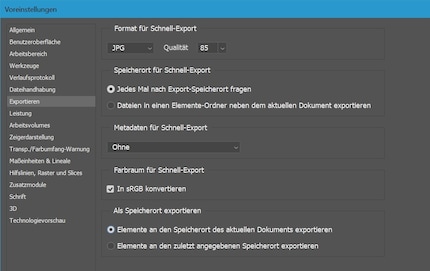
An action would be a workaround. Photoshop actions are not special offers, but sequences of commands that you can define yourself. But I can't get it to work with that either. The problem is that the file path and name cannot be defined relative to the current document. Either it is always saved in the same place with the same name - or then I have to save manually, which I don't want to do.
I couldn't manage a one-click export with Affinity Photo either. It doesn't work with the normal export, nor with batch processing.
Task number 1, the cropping thing, is easy; I just didn't know how to do it. Number 2, the thing with the arrow, is quite complicated, especially when Adobe changes everything when you switch versions. Affinity Photo shows that it could also be quite simple. And task number 3, the one-click export, doesn't work at all as far as I know. I get very close to my desired solution, but not quite there.
In the next instalment, I will set myself somewhat more difficult tasks.
My interest in IT and writing landed me in tech journalism early on (2000). I want to know how we can use technology without being used. Outside of the office, I’m a keen musician who makes up for lacking talent with excessive enthusiasm.
Practical solutions for everyday problems with technology, household hacks and much more.
Show all