Reach for the stars – astrophotography
Photographing the stars is often considered a bit of a mystery or even downright impossible without ridiculously expensive equipment. What's more, many city dwellers have probably forgotten that stars are not only found in online ratings but also beautifully illuminate the night sky by the billions every night. High time to bring some light into the darkness and give you an introduction to astrophotography!
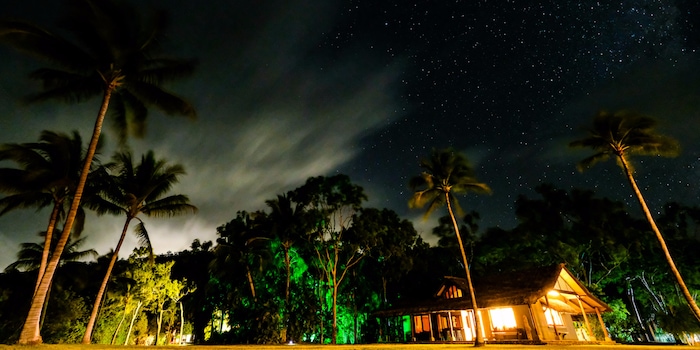
My current abode is the remote backpacker resort in Airlie Beach on the east coast of Australia. The resort is about a 40 minute drive away from any civilization and the wireless connection is juuuust about allowing me to send this article to Switzerland. So there’s plenty of time to dedicate to photography and marvel at the starry night sky.
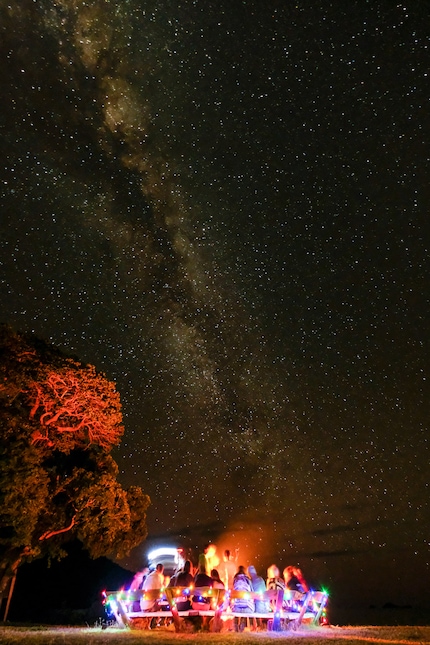
View of the milky way.
With this article, I’d like to give you an introduction to astrophotography that will allow you to get started with just a tiny bit of preparation. Astrophotography is an extremely extensive topic. From telescopic images of distant galaxies to snaps of shooting stars – there is a vast selection of visual motifs and techniques. In this article, I’ve focused on methods that are easily accessible for most people (so feel free to remove that CHF 50.000 telescope from your shopping cart). We’re looking at wide angle astrophotography that not only captures stars but also includes a bit of our pretty planet, silhouettes or people.
What goes in the camera bag?
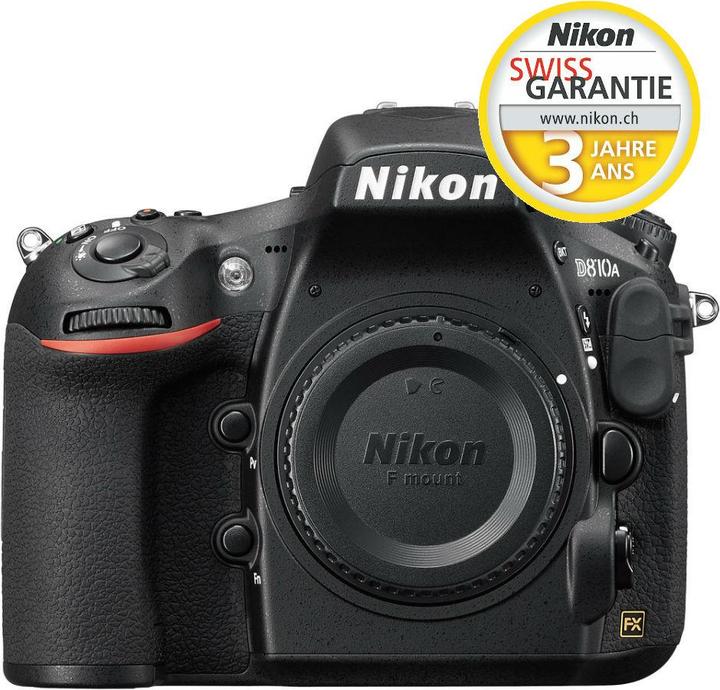
Astrophotography is one of the few fields of photography where equipment actually matters. A mobile phone or a simple point & shoot camera won’t be able to capture much more than the moon (i.e. a little white dot on the horizon). The camera should have a manual settings mode that allows you to adjust exposure time, aperture and the ISO value. These days, this is the case in the majority of SLRs, system cameras and powerful compact cameras. If you’re the owner of an SLR or a mirrorless system camera, you’re best off using a light-sensitive wide angle lens. A focal length between 12 and 24mm (full format) is particularly suitable. The more wide-angled the lens (low mm value) the better.
These cameras are specifically made for astrophotography (e.g. with astrotracer and designated sensor). We've also added suitable lenses to the list.
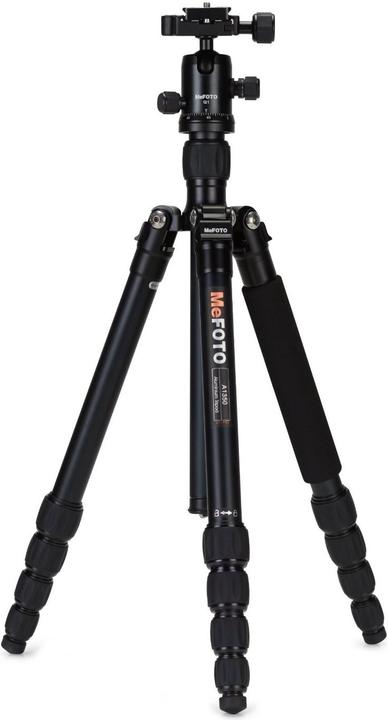
The third point regarding equipment is extremely critical for the image quality of astro pics. I’m talking about a sturdy tripod! It can make the difference between blurry white lines on a black background and a clear image of the milky way.
A camera remote control and a torch should definitely also go in your camera bag. The remote will help you take blur-free photos as you don’t have to touch the camera. The torch comes in handy to set the focus in the dark and it’s a great item to get creative with.
What buttons do I have to push?
Snapping stars is a bit like enjoying a surprise egg. Neither your naked eye nor the camera’s LCD screen will give you an idea of what the end result will look like. To keep the metaphor going – your pic will either be a really cool collectible figurine as seen on TV or an unshapely blob of plastic like the other ten before it. That’s why I always get excited about the first test shot (and start craving chocolate).
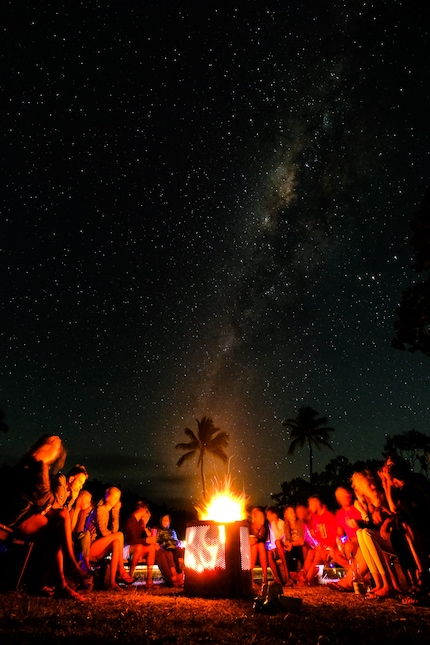
Due to various sources of light, it was hard to know how the exposure would turn out in this picture.
Before you get started, set your camera to manual mode.
Next, we’re going to take a closer look at aperture. It depends on your lens speed and is determined by the f-number. To capture as much light as possible, select the smallest f-number of your camera and lens combination. The number usually ranges between F1.2 for camera-obsessed individuals with a fat wallet and F6.3 in kit lenses or simpler models.
Let’s now turn to exposure time. To freeze the stars without movement, exposure time should be between 10 and 30 seconds. This value may vary depending on aperture, focal length and sensor sensitivity. If the 30 second mark is exceeded, stars will mostly look like star trails because of the earth’s rotation. Avoid this effect by following the 500 rule of thumb:
500 : lens focal length (full format) = maximum exposure time in seconds
Set the sensor sensitivity or ISO value between 1600 and 3200. The basic rule is to keep the value as low as possible and as high as necessary. Although a high value will help you brighten the picture and make the stars more visible, the increased sensitivity will also add annoying image noise.
If your camera is capable of taking pictures in RAW format (as opposed to .jpeg) and you plan on editing the snaps, you should definitely go for the former. Shooting in RAW means your camera collects significantly more image information. This enables you to make even more details visible in post editing.
To avoid camera shake, use the shutter release delay and disable the image stabilizer. Flip up the mirror before shutter release if you’re using an SLR.
Focusing in the dark is one of the biggest challenges for many cameras. If there’s another motif in the foreground other than the starry sky, I always use a strong torch and the camera’s autofocus to get the sharpness right. But generally, it’s easier to take matters into your hands and set your camera to manual mode. If you’re using a wide-angle lens and the foreground motif is far away enough, you can additionally set the lens to infinity.
The settings cheat sheet
- Set camera to manual mode
- Set aperture to maximum value (smallest possible f-value)
- Set exposure time between 10 and 30 seconds (fine-tune later)
- Set ISO value between 1600 and 3200
- Focus on your motif with the help of a torch
Further setting options:
- Set camera to RAW data format
- Disable image stabilizer
- Set shutter release delay to 2 seconds
- Set white balance manually to get the same colour temperature in all successive images
- Flip up mirror if using an SLR
I generally start with the following settings and gradually get closer to my desired image by modifying the values: 25 seconds exposure time, aperture set to F4 (maximum aperture on my wide-angle lens), ISO 2500, 2 second shutter release delay.
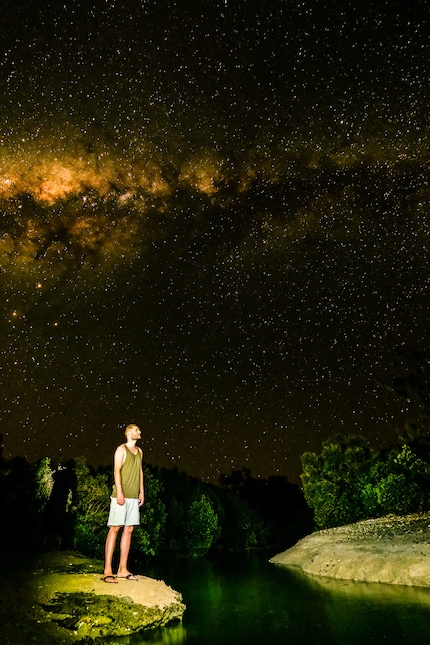
For this photo, not only the model but also the surroundings were illuminated with a torch.
Preparation
Photographing stars usually requires a bit of planning. There are four factors to keep in mind: location, position of the milky way, weather forecast and the moon.
To marvel and capture the stars in all their glory, I would recommend heading into the great wide open – as far away from artificial light sources (so-called light pollution) as possible. Apart from a clear night sky, a further criterion for selecting your location should be a point of interest in the foreground.
I think you’ll agree when I say that the milky way is the most photogenic astro motif by far. As planet earth continuously moves, you should consider the position of the milky way when selecting your motif. It would be a pity if you realised, after pitching your tent and getting the exposure right, that the milky way is hanging out on the opposite side. I use a smartphone app that helps me locate stellar constellations.
Although the weather is an uncontrollable factor, it should be considered in your planning process. Breaking news: A cloudy sky will prevent you from taking a photo of the stars.
The third planning factor is the moon. Expose your motif for 30 seconds and you’ll be surprised just how much the moonlight will affect your photo. Your best bet is to use the full moon as an excuse to check out those infamous “full moon parties” in Thailand and to wait for a new moon to photograph the stars. If you want to take pictures under a half moon, you should start taking pics when the moon is low.
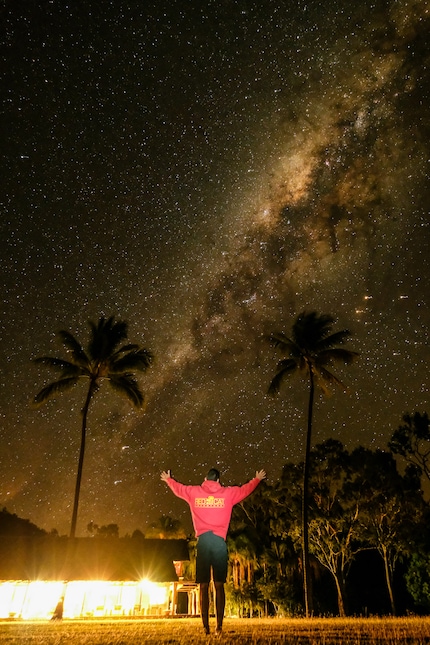
For this photo, I shone the torch on the model for a split second.
Creative suggestions
After going through the technical basics, let’s get to the juicy bits.
The milky way is impressive in its own right. However, it does take a little more to make people gasp. What I’m talking about is a point of interest or an eye-catcher. Something to put the stars in context and direct the gaze of the viewer. I’d like to give you some ideas that I’ve been trying out myself in the last weeks.
If you’ve got a friend with you, the obvious thing to do is integrate that person in your picture. In view of the fact that you’re working with long exposure time, you should make sure your model’s patient. Ideally, he or she shouldn’t budge during the entire exposure period. Work with the model’s silhouette or put him or her in full view by shining a torch on them. If you’re going for the latter, pointing the light beam at the model for a few seconds before switching it off will be enough.
Not only will a torch help you focus but will potentially give your photos a special twist.
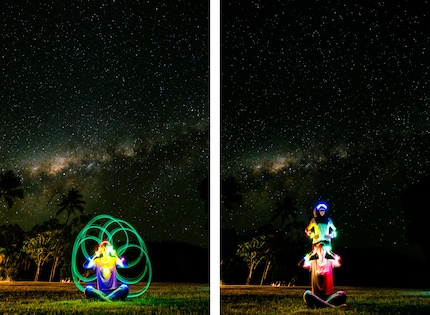
Light painting with glowsticks.
One way of putting it to use is for so-called light painting. Use your torch like a pen and draw shapes and words in the air that become visible through the long exposure. Apart from torches, you can use any kind of light source to create shapes. Glowsticks and sparklers are also highly recommended.
To achieve a light beam effect, use a powerful torch with a focusable beam. An important precondition for this effect is that the air is “polluted” with fog, dust or smoke in order to make the light “visible”.
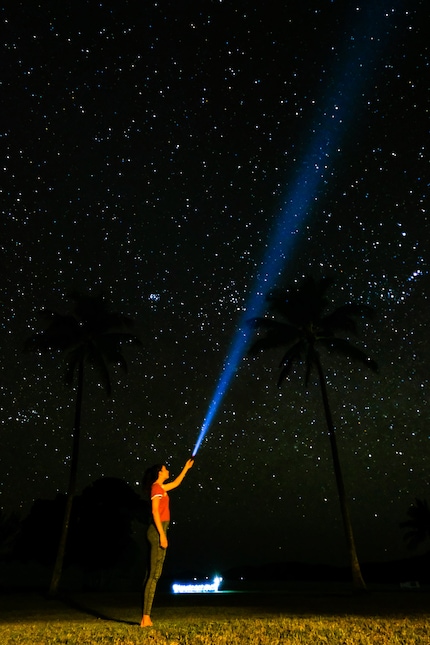
Generating a beam of light with a torch.
The lowdown
As mentioned previously, this is merely a little introduction to the immense topic of astrophotography. Although the stars are millions of light years away – with a bit of patience, a camera and a bit of preparation, you’ll make them a lot more reachable. Unlike the stars that will be there for many years to come, our time on earth is limited. So don’t hesitate and set off to find the milky way!
As a next step, try creating star time-lapses. Watch this space to find out more!
You might also like
A camera in one hand, an airline ticket in the other. That's what I call a perfect situation.
Find out more about me and my photography on <a href="https://www.instagram.com/35waves/" target="_blank">Instagram</a> or on my <a href="https://www.35waves.com/" target="_blank">website</a>
From the latest iPhone to the return of 80s fashion. The editorial team will help you make sense of it all.
Show all


