
What a grey filter is good for and how to choose the right one
Normally, you want as much light as possible when taking photos. With a grey filter, you achieve exactly the opposite: it darkens and extends the exposure time. You can find out why you need it and which of the countless filters you need to choose here.
Movements become blurred in long exposure shots and create beautiful effects.
For example, three of our employees burnt steel wool in the mountains last year to test the long-exposure capability of smartphones.

Sometimes it would also be appealing to take long exposures during the day. For example, to capture the movement of water. Or for architectural shots when people should not be recognisable.

However, if you expose for a very long time during the day, too much light will reach the sensor. The image is overexposed. That's why you need a filter that absorbs light in these cases. Such a filter is called a grey filter or ND filter (abbreviation for neutral density).
Sometimes a grey filter is also necessary for relatively short exposure times. Because if you have the aperture wide open, you will get overexposed images in bright sunlight even with a short exposure time. "Then just close the aperture, problem solved!" you might object. But a photo with the aperture closed looks different, has more depth of field and no blurred background. By using a grey filter, you are not forced to adjust the aperture according to the light, but can use it much more freely as a creative tool.
Grey filters are also used quite frequently in videos. Video producers also want to film with an open aperture from time to time. They also don't like to expose with very short exposure times, even if this is technically possible. The reason: if the individual images are slightly blurred, the movement in the video appears more fluid and natural than if every frame is frozen.
If you are considering buying a grey filter, there are several things to consider when choosing the right filter.
- Which filter suits my lens?
- What strength do I need?
- Do I need a round or square filter?
Which filter fits? The filter diameter
Most lenses have a filter thread at the front. This is where the filter is screwed in. Of course, the size must fit. The filter diameter is usually written on the front of the lens, sometimes also on the underside of the lens (Nikon).
It is likely that not all your lenses have the same diameter. So you would have to buy several grey filters. In many cases, you can get round this with a filter adapter. You buy the filter for the largest diameter of your lenses. You screw the filter directly onto this. With a smaller lens, you use the adapter.
Direct link to the filter adapters
The right strength of filter
Depending on how bright it is, how long you want to expose and which aperture you want to use, a stronger or weaker darkening is required. However, classic ND filters swallow a fixed amount of light, because they are basically just dark glass.

For videos, only weak filters (up to factor 32) are useful, as you never expose longer than 1/50 second. For photography, on the other hand, the stronger filters are interesting.
An extension factor of 1000 (logarithmic ND 3.0) reduces the amount of light by 10 f-stops. Conversely, this means that the shutter speed can be doubled ten times with the same aperture, i.e. 2^10 = 1024 times as long. So if you need to expose for 1/125th of a second without a filter, the correct shutter speed with a 1000 filter is 8 seconds. With a 64 filter it is 6 f-stops, which results in only half a second. A 1000 filter is therefore by no means too strong in many cases.
For water movements or fast movements such as passing cars, the 64 filter is certainly good. But if I had to choose a filter, I would go for the 1000 filter. Only with this filter can you expose for 20 seconds or even longer in sunshine. In strong winds, you can even make clouds melt away.
There are also ND filters with variable strength. They are movable and change their degree of darkening when you turn the ring. That sounds very tempting - you don't have to choose, you spend less money and you carry less with you.
Sounds too good to be true? Well, it is. Because these filters have two major disadvantages.
- They are variable, but not necessarily in the range you need for photography. For many purposes, they simply don't darken enough.
- The quality does not come close to that of a filter with fixed darkening. There can be problems with wide-angle lenses in particular.
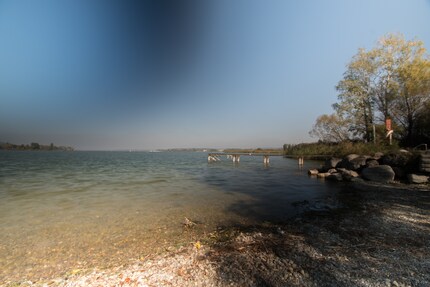
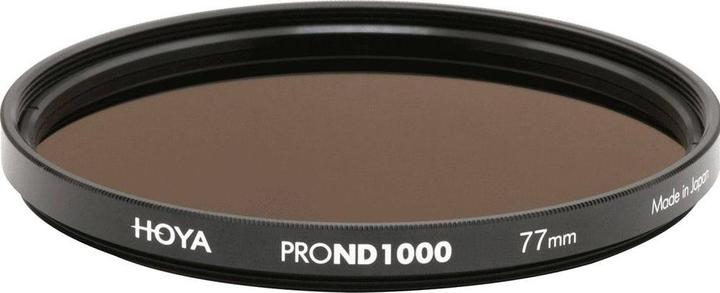
I tried out the variable filter from Hoya shown above on a wide-angle lens for this article. It's not a cheap product and it doesn't look cheap either. Nevertheless, I was underwhelmed by the result. There are large and massively darkened areas. At least this only happens at the extreme wide angle (10 mm, equivalent to 15 mm in full format) and only when the filter is set relatively high.


So: Stay away from these filters if you're working with a wide angle! Instead, you can screw several filters in series. Because the filter itself also has a filter thread. Then, of course, weaker filters than ND64 are also useful.

This is the wide-angle lens I used. [[productlist:6337393]]
Round or square? Insertion filters as an alternative
Not all filters are screwed directly onto the lens. Slide-in filters are square and are inserted into a holder. You screw these onto the lens, which means that you need an adapter with a suitable filter thread. But at least it's only the adapter that depends on the lens size. All the rest, the system and the filters themselves, always fit, so you only have to buy them once.

Nisi starter kit
Neutral density filter, Graduated neutral density filter, 100 mm
Assembling and dismantling the entire system takes longer than with the screw-on filter system; changing between individual filters, on the other hand, is very quick. If you want to work with many different filters, such a system makes sense. Only then will the higher purchase costs be worthwhile. Slide-in filters have a real advantage when it comes to grey gradients. A grey gradient filter (also known as a gradation filter) is not the same as a grey filter. It darkens more at the top than at the bottom to compensate for the bright light in the sky. In a slide-in system, the gradient can be moved so that it fits the horizon in the image section.
Filters for drones
Drones have their own filters, as the cameras are particularly small. The filters are relatively inexpensive and, according to user reviews, very useful. The case seems clear to me: if you're spending a four-figure sum on a drone, then a filter set is a must.
Avoid mistakes for beginners
I'm a beginner when it comes to ND filters. As such, I have made a number of mistakes especially for you that I can now warn you about.
Firstly: blurred images. With a really strong ND filter, the autofocus no longer works because too little light gets through. You must therefore focus without the filter, then switch off the autofocus, put the filter on and press the shutter release. Important: Refocus every time you move the camera or even just the angle.
Secondly: even more blurred images. After I had consistently focussed manually, some photos were still out of focus. Either I accidentally adjusted the focus on the ring, or the tripod was not stable enough. Sometimes camera shake also occurs when you take photos with a tripod and don't switch off the image stabiliser. I can rule this out in my case because the lens doesn't have an image stabiliser at all.
Thirdly: underexposed images. The Live View of modern digicams is tempting. The camera gives the impression that it can calculate the correct exposure time through the filter. But this is very imprecise, you actually always have to make corrections and therefore take a few test shots first. For me, the correct exposure time was usually around one full stop of exposure compensation (+1 EV), but this can vary depending on the situation. It might be faster and, above all, more accurate if you take the trouble to calculate and set the exposure time manually.
Fourthly: Wrong colours. The neutral density filter is so called because it displays the colours neutrally, i.e. the same as without a filter. Nevertheless, the colours look different with the filter than without it.


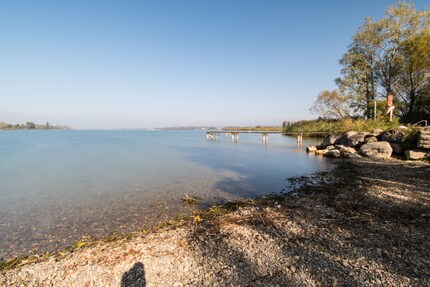
Is the filter no good? The problem is that the camera's automatic system is fooled by the filter. Without the filter, the camera has set the white balance in the example above to 4700 Kelvin, with the filter in exactly the same situation to 7100 Kelvin. This leads to much warmer colours. (In this case, this was actually a good thing because the camera tends to have a colder setting without a filter)
In RAW format, you can change the white balance afterwards without any losses. The different colours are therefore only a problem if you are shooting with JPEG. Then you just have to set the white balance manually. However, I recommend that you always work with RAW when employing ND filters anyway.
Header image: Adobe Stock / Marc BranerMy interest in IT and writing landed me in tech journalism early on (2000). I want to know how we can use technology without being used. Outside of the office, I’m a keen musician who makes up for lacking talent with excessive enthusiasm.


