Background information
SSD parts: the semiconductor crisis is leading to some creative solutions
by Kevin Hofer

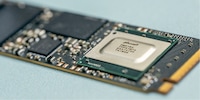
The hard drive on my iMac has gone. However, I don't want to give up on the computer just yet and am trying to revitalise it with a new SSD.
I admit, given the other hardware on my 2011 iMac, it's a bit like throwing pearls before swine to install an SSD. But if it works, I'll not only be one experience richer, I'll also have got an all-in-one computer back for the price of the SSD. The design is timeless despite the somewhat thick bezel on the display - and the sound is still impressive. The performance hopefully benefits from the fast storage medium and is sufficient for a few office applications, surfing the internet and some streaming.
I considered the Dell Optiplex 7070 Ultra as an alternative to my iMac in my test. But a comment confirmed a thought that had also occurred to me.

So, what could possibly go wrong if I rely on anonymous comments on the internet. If it doesn't work out, I already have an alternative use for the SSD. The money for the Samsung 860 Evo with one terabyte is therefore not wasted.
Before I get down to business, I borrow the right tools. A suction cup for removing the glass pane and a Torx screwdriver for the star-shaped screws are not part of my toolbox. It's been a few years since I've done any work on a PC myself.
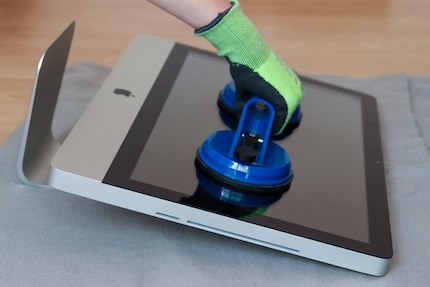
The glass pane is quickly removed with the suction cup. The magnets resist, but ultimately have no chance against my arm muscles. The disc goes to a safe storage place until I have finished replacing the hard drive.
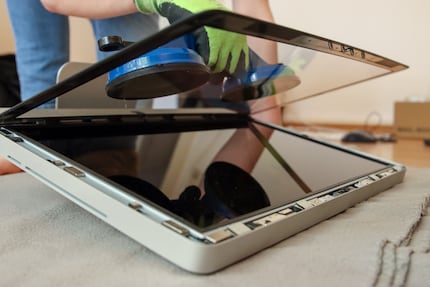
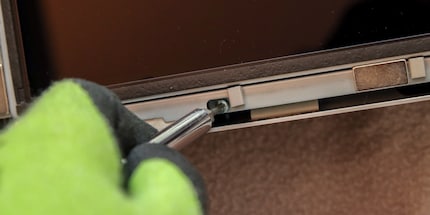
The LCD panel is attached with four screws on the right and left. To avoid leaving fingerprints or other marks on the panel, I wear gloves at work. I can't create a dust-free clean room at home, but I still vacuumed the room beforehand to minimise the amount of dust flying around. Even after about nine years, the screws can still be loosened without any problems. Only when I pull them out do the magnets sometimes give me a hard time.
Now I have to lift the LCD panel. The two upper corners are easy to grip. I'm careful as I've previously trained at YouTube University and know that there are four cable connections waiting to be disconnected. The first plug is a bit tricky, but I manage to get it out. The next two are no problem at all and I also get the fourth one out after checking which way I need to release it to be on the safe side. I don't want to tear off any cables. The LCD panel also needs a clean and safe place to be stored.
Now I have free access to the hard drive. Unscrew two screws, pull out three plugs and the old hard drive is out.
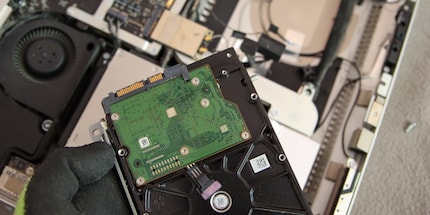
Ideally, you have a mounting frame to mount the 2.5-inch SSD instead of the 3.5-inch hard drive. However, there are also DIY enthusiasts who make do with double-sided adhesive tape. If necessary, you can let the SSD float freely on the cables. It is light enough for this, but the solution is not really elegant. One cable remains unused. Only two of the three plugs that were on the HDD are connected to the SSD. That will be important.
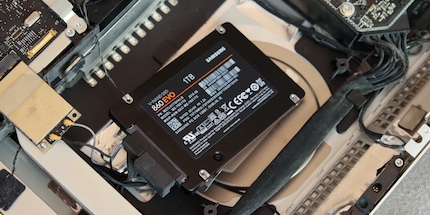
After the SSD has been installed, the LCD panel must be carefully inserted. However, you can't just put it in, you have to hold it halfway up. Finally, the four cables have to be reconnected. Only one connector caused me problems. But it quickly disappeared into thin air when I realised that I was trying to plug it in the wrong way round. Tighten the eight screws on the left and right, paying attention to the magnets that tend to pull the screws. Last step: insert the glass disc.
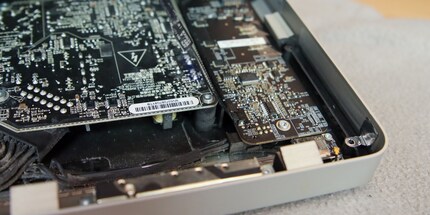
This has worked well up to this point and took me about an hour. But now comes the exciting moment: does the iMac start up, does it recognise the SSD as storage and will I manage to install macOS?
The iMac starts up and has an image. A sense of achievement: I haven't broken anything and have reconnected all the cables correctly. Now I insert the bootable USB stick with macOS High Sierra - the latest version of macOS that runs on the 2011 iMac - that I created earlier (instructions at Apple). After the restart, I hold down the cmd key to access the boot menu. Here I select the USB stick and can start the new installation of the operating system.
This also looks good until I have to select the storage medium for the installation. Here I only see the USB stick. The SSD does not appear. Since all the cables are plugged in and I assume that the freshly unpacked SSD is intact, I assume that the 860 Evo is too new for the iMac controller and is therefore not recognised. I was too naive here beforehand and assumed that it would be enough if the connection fitted.
Trying to get an SSD that is old enough doesn't make sense to me. Especially not because I now know what the third cable on the hard drive is for. It tells the iMac the temperature of the hard drive and adjusts its ventilation. Without this data, the fans turn at full speed - and that is too loud to use the computer sensibly. I hadn't reckoned with that. If I hadn't relied solely on YouTube University, I could have realised this. But as it was, I only watched videos of the disassembly, but didn't read any detailed instructions.
A classic hard drive would of course solve both problems, but does not promise such a speed gain in use as an SSD. And without it, the iMac from 2011 is already pretty lame.
When I was but a young student, I'd sit in my friend's living room with all my classmates and play on his SuperNES. Since then I've had the opportunity to test out all the newest technology for you. I've done reviews at Curved, Computer Bild and Netzwelt, and have now arrived at Galaxus.de.
Interesting facts about products, behind-the-scenes looks at manufacturers and deep-dives on interesting people.
Show all